57 Ways to Improve Your Dive Gear

Gear Tips for Scuba Diving
Regulators (Tips 1-11)
It breathes easily at depth, it won't freeze up in the extremely remote event that you go ice diving, it's great. You just wish it didn't make your jaws ache and your gums bleed. So try:
1) Change the mouthpiece. There's probably nothing special about the one that came with your reg. The mouthpiece is a standard, replaceable item, but they come in various shapes and sizes. One specifically designed for comfort is Aqua Lung's "Comfo-Bite" mouthpiece. Another option is the "SeaCure" mouthpiece that is custom molded to fit your jaw.
2) Trim the mouthpiece. Hey! Make your own! Get out scissors, or a razor knife, and trim away the parts that seem to bother you. The flange that's meant to go between your teeth and your lips is pretty much expendable and often uncomfortable, especially for divers with dental braces.
BUT WHATEVER YOU DO...
3) Don't open your regulator. Internal maintenance requires special tools and skills. Even if you do get it back together correctly, you'll probably void the warranty. Removing the second stage cover to clean out sand should be the outside limit of doing it yourself.
4) Add a multidirectional swivel to the second stage. All second stages swivel around the axis of the hose, but this may not be enough movement. If the hose still tugs your reg up or down, add a multidirectional swivel like those made by Aqua Lung, Scubapro and International Divers, among others.
5) Change to a longer or shorter hose. If the hose between the first and second stage is too long, it pushes the mouthpiece to your left. If too short, it pulls it to the right.
6) Change to a more flexible hose. Atomic Aquatics and Scubapro sell hoses that are thinner and more flexible, though with the same internal diameter as hoses with greater external diameters.
7) Reroute the hose. No law says it has to come over your right shoulder. With a swivel and a longer hose, it may be more comfortable to run the hose under your arm.
8) Change ports. Connect to a different low-pressure port on the first stage for a more direct hose routing. Caution: Some regulators have only one low-pressure port for the primary second stage hose. It often is labeled, but may not be. Check with your dive store.
BUT WHATEVER YOU DO...
9) Don't add adapters, T's or swivels to the first stage. They restrict air flow and will degrade your regulator's performance.
10) Don't mix brands. Even if a Brand A second stage can be mounted on a Brand B first stage (if the threads are compatible), they are likely to be designed for different intermediate pressures. The result is that the mismatched system will either breathe hard or free flow.
11) Use a first stage with a swivel. Some models have a built-in swivel, sometimes called a "turret," allowing the hoses to find their most relaxed position.
Instruments (Tips 12-17)
Control and protect your console so you, it, and the reef are all safe. A few ideas:
12) Retract it. Attach the console to your BC with a retractor. Pull the console out to read it, let go and it snugs up against your body.
13) Leash it. Sometimes a short lanyard to your BC lets you swing it up enough to see it. Let go and it still dangles, but doesn't go far.
14) Tuck it in. Often the console can be wedged under your cummerbund, put through the left armhole, behind the left lapel of your BC or into the vent between a pocket and the body of your BC.
15) Cover the face. Various gauge protectors will prevent scratching and even cracking of the instrument's glass or plastic face. A metal cage is one type. Another is a peel-off-and-discard sheet of clear plastic, meant to absorb scratches.
16) Reband it. The watch, compass or computer that's strapped to your wrist may not be as secure as you think. The common watchband that terminates at each pin will drop your expensive instrument if either pin fails. Better is the type of band that makes a full loop around your wrist, passing under the instrument. Both pins would have to fail for it to come loose. And get a depth-compensating longer band, or one with an adjustment to fit around your wetsuit sleeve.
BUT WHATEVER YOU DO...
17) Don't use abrasives or chemical solvents to clean your instruments. Solvents are likely to attack the plastics used to house most instruments.
BCs (Tips 18-27)
Your single most complex piece of equipment, the BC needs to grasp your body and your tank securely and to mount all kinds of accessories conveniently, besides adjusting buoyancy. There are many ways it can fall short of perfection, and many ways it can be improved. For example:
18) Find the adjustments. There's more to fiddle with than shoulder straps. Many BCs can be adjusted to reposition the lumbar pad, the tank band or the cummerbund. The adjustment points may not be obvious — they may be hidden under padding or other fabric. You may need to ask your dealer for help or read the instructions.
19) Adjust the waist first. On any BC that has adjustments at both the waist and at the shoulders, adjust the waist first and it will fit better.
20) Organize your toys. The BC is the inevitable attachment point for accessories. But there's more to it than hanging stuff randomly. Think how well accessories will be accessible when your gear is on and the BC is inflated. Arrange things to minimize drag and entanglement hazards too. Lower on the "skirt" of the BC may be a better home for many gadgets than high on the shoulders.
21) Standardize attachment hardware. If you use quick-release clips, for example, always put the male end on the BC and the female end on the accessory (or vice versa). That way, one BC clip will work for several alternative accessories, and you don't need as many clips. You can change positions more easily too.
22) Mount a knife. Or paramedic shears. Your BC is a better mounting place for cutting tools than your leg because they will be easier to reach and less likely to snag things. Smaller knives can be mounted on shoulder straps, pocket flaps and even hoses.
23) Upgrade the inflator. An alternate inflation regulator combines the octopus second stage with the power inflation device, making for a simpler and cleaner package.
24) Free the inflator. Don't use the Velcro tab or the plastic clip that attaches the BC inflator to the shoulder strap. Either one can interfere with deflation of the BC. Instead, let it float free (most are negatively buoyant), or trap it with your left arm: the corrugated hose goes over your arm, the low-pressure hose goes under.
25) Bonus BC Tip: Dress in all your gear, including wet or dry suit. Then have your buddy look you over, from the back as well as the front. Are hoses and straps taking the most direct path? Should they be longer or shorter? Are there better attachment points for accessories that you've overlooked? It's hard to see your equipment when you're wearing it, and hard to tell how well it fits together when you're not.
BUT WHATEVER YOU DO...
26) Don't mix manufacturers. When upgrading to an alternate inflation regulator, don't assume compatibility. A Brand X inflator may seem to fit a Brand Y BC, but there are differences in the diameter of the corrugated hoses. Pull it to dump your BC, and it may pull off instead. If you can, stay within the same manufacturer's family of products.
27) Don't puncture the bladder. Sewing, pinning or through-bolting makes a firm, permanent mounting for retractors and other things, but think twice and do not puncture the air cell.
Mask, Fins and Snorkel (Tips 28-37)
28) Replace the mask strap. If your hair often gets tangled in the mask strap, swap it for one of the wide neoprene types. The neoprene may be more durable than the standard silicone strap, too. But be sure it fits the mask buckle properly: these are not standardized and come in many sizes. An alternative is a slip-on neoprene strap cover.
29) Use a mask box. A hard-shell case for the mask will keep it cleaner, and will prevent deforming the skirt, causing it to leak. The case is also a good place to store defog goo.
30) Re-prep your mask. You know the drill for a new mask: scrub it with your fingers and a mask prep solution, or "Soft Scrub" or toothpaste. Repeat that procedure every few dives or so and you'll have less fogging.
31) Seal mask leaks. One solution for a leaky mask is to smear a bit of silicone grease on the skirt. This is especially helpful with facial hair. Don't use Vaseline: it's a petroleum product and will attack the silicone of the mask.
32) Hide your snorkel. About the worst place to carry your snorkel when you're not using it is to hang it on your mask strap. It's prone to getting entangled, and it can dislodge your mask or make it leak. Instead, strap it to your leg or shoulder strap, holster it in the special pouch made by Zeagle or leave it on the boat. Another option is to use a snorkel that bends or telescopes so it will fit inside a BC pocket.
BUT WHATEVER YOU DO...
33) Don't clean your mask with anything more abrasive than "Soft Scrub" or toothpaste. And don't use any solvents or petroleum products; they will degrade the silicone.
34) Don't modify your fins. Nope, garden clippers won't turn your flippers into those new propeller-style fins. The design of fins is more sophisticated than you might think, and you're likely to do more harm than good by modifying. A drain hole at the toe of the foot pocket, if you don't already have one, should be the limit of your creativity.
35) Have a spare snorkel keeper. Quick-release keepers are more fragile than the old-fashioned figure-8 type, so buy a spare. (In a pinch, a rubber band will work.)
36) To put fins on: Flip the strap under the heel plate, put your foot in, then flip the strap up.
37) To take fins off: On deck, step on the blade and pull out your foot. In the water, keep your reg in your mouth so you can use both hands.
Exposure Suits (Tips 38-49)
Tailoring for a precise fit is especially important with a wetsuit, but other modifications can improve the function and convenience of both wetsuits and dry suits:
38) Puncture your hood. Make a small hole in the top of your hood. (A hot nail works well.) This lets out the air that enters your hood from your exhaled breath. Otherwise, a "Conehead" air bubble can form that's large enough to affect your buoyancy, and can cause your mask to leak.
39) Puncture your booties. A small hole made the same way near the toes of your booties helps them drain when you leave the water.
40) Trim the face opening. Most hoods are made with an opening that is intentionally small, so you can trim it to your preference. A wider opening gives more freedom of movement, less claustrophobia.
41) Dip your fingers. Coat the ends of your glove fingers with "Tool Dip." The rubbery coating reduces wear and tear and gives good grip.
42) Add a thigh pocket. A large pocket can be added to the thigh of either a wetsuit or a dry suit. This is a low-drag, easy-access location for things like a slate, shears or knife.
43) Tuck booties inside. You'll put on your booties after your wetsuit, of course, but tuck them inside the legs of your wetsuit. Otherwise, they'll scoop water as you swim.
44) Wear socks. Thin nylon socks make booties easier to slide on, so they are less likely to tear. The socks also protect your feet from chafing on seams in the booties.
45) Make "Suit Snot." A lubricant makes pulling on a wetsuit easier. Shampoo works but may irritate your skin and requires lots of rinsing later. Try a mixture of one part hair conditioner to one part water. Put it in a squeeze bottle.
46) Reinforce seams. Repair any tears or gouges immediately with wetsuit cement. If a seam shows signs of stress, you can reinforce it by gluing a strip of nylon or tape over it.
47) Consider a custom wetsuit. For a wetsuit to be warm, a close fit is of equal importance to the thickness of the neoprene. That's why a custom-made wetsuit is almost always warmer than one off the rack. Next best: many wetsuit manufacturers offer custom tailoring of their standard sizes.
BUT WHATEVER YOU DO...
48) Don't trim too much. When trimming dry suit seals, be patient. Trim less than you think you need to and try it before trimming more.
49) Don't try major alterations. Wetsuit alterations requiring darts and curved seams are best left to experts.
Weights and Weight Belts (Tips 50-57)
50) Shift some weight. If your weight belt is carrying a significant amount of weight, shift some of it elsewhere. Various gadgets can mount as much as six pounds on your tank. Moving weight takes pressure off your hips and can improve your trim. (Don't go too far: this is non-ditchable weight.)
51) Use a weight harness. If your weight belt is painfully heavy, a harness (with shoulder straps) shifts the weight from your hips to your shoulders. The best available weight harness is the DUI Weight and Trim System.
52) Use a depth-compensating weight belt. Or a depth-compensating buckle. Both allow the belt to contract as your wetsuit compresses at depth, so it doesn't become loose.
53) Position weights for trim. There's more to proper weighting than finding the right total amount of weight to use. Position weights side to side and front to back so you're evenly balanced. Some weight can be moved to your ankles, BC pockets, the tank boot or the tank neck to alter your trim.
54) Use weight keepers. These are clips that prevent weights from sliding on the belt. Or put a twist in the belt before passing it through the second slot in the weight.
55) Cut extra weight belt. You only need about 6 inches of belt sticking out of the buckle. Trim the excess and melt the edge with a hot knife or a match.
BUT WHATEVER YOU DO...
56) Don't thread your weight belt through the buckle so it makes a bulge that prevents the buckle from closing all the way. There's no need to thread the belt through every slot in the buckle.
57) Don't cast your own weights. Many divers used to make their own weights, but lead fumes are a significant health risk.
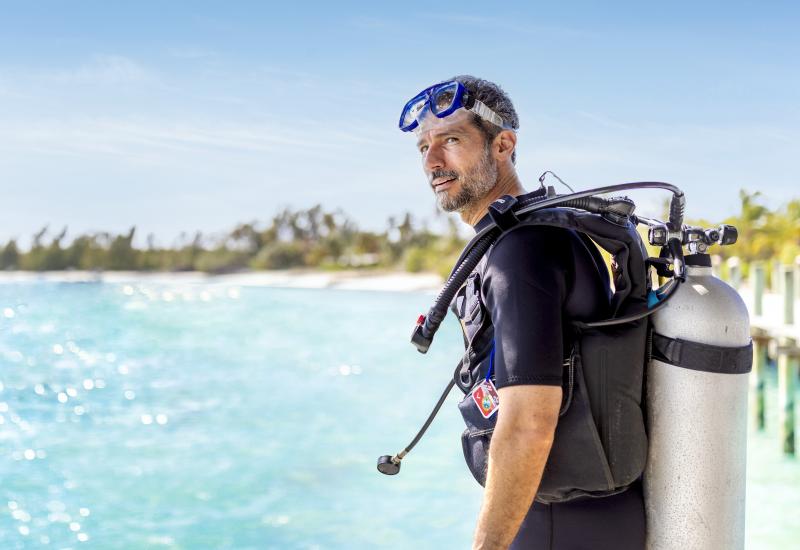
Diver photo by Shutterstock.com

Regulators (Tips 1-11)
It breathes easily at depth, it won't freeze up in the extremely remote event that you go ice diving, it's great. You just wish it didn't make your jaws ache and your gums bleed. So try:
1) Change the mouthpiece. There's probably nothing special about the one that came with your reg. The mouthpiece is a standard, replaceable item, but they come in various shapes and sizes. One specifically designed for comfort is Aqua Lung's "Comfo-Bite" mouthpiece. Another option is the "SeaCure" mouthpiece that is custom molded to fit your jaw.
2) Trim the mouthpiece. Hey! Make your own! Get out scissors, or a razor knife, and trim away the parts that seem to bother you. The flange that's meant to go between your teeth and your lips is pretty much expendable and often uncomfortable, especially for divers with dental braces.
BUT WHATEVER YOU DO...
3) Don't open your regulator. Internal maintenance requires special tools and skills. Even if you do get it back together correctly, you'll probably void the warranty. Removing the second stage cover to clean out sand should be the outside limit of doing it yourself.
4) Add a multidirectional swivel to the second stage. All second stages swivel around the axis of the hose, but this may not be enough movement. If the hose still tugs your reg up or down, add a multidirectional swivel like those made by Aqua Lung, Scubapro and International Divers, among others.
5) Change to a longer or shorter hose. If the hose between the first and second stage is too long, it pushes the mouthpiece to your left. If too short, it pulls it to the right.
6) Change to a more flexible hose. Atomic Aquatics and Scubapro sell hoses that are thinner and more flexible, though with the same internal diameter as hoses with greater external diameters.
7) Reroute the hose. No law says it has to come over your right shoulder. With a swivel and a longer hose, it may be more comfortable to run the hose under your arm.
8) Change ports. Connect to a different low-pressure port on the first stage for a more direct hose routing. Caution: Some regulators have only one low-pressure port for the primary second stage hose. It often is labeled, but may not be. Check with your dive store.
BUT WHATEVER YOU DO...
9) Don't add adapters, T's or swivels to the first stage. They restrict air flow and will degrade your regulator's performance.
10) Don't mix brands. Even if a Brand A second stage can be mounted on a Brand B first stage (if the threads are compatible), they are likely to be designed for different intermediate pressures. The result is that the mismatched system will either breathe hard or free flow.
11) Use a first stage with a swivel. Some models have a built-in swivel, sometimes called a "turret," allowing the hoses to find their most relaxed position.
Instruments (Tips 12-17)
Control and protect your console so you, it, and the reef are all safe. A few ideas:
12) Retract it. Attach the console to your BC with a retractor. Pull the console out to read it, let go and it snugs up against your body.
13) Leash it. Sometimes a short lanyard to your BC lets you swing it up enough to see it. Let go and it still dangles, but doesn't go far.
14) Tuck it in. Often the console can be wedged under your cummerbund, put through the left armhole, behind the left lapel of your BC or into the vent between a pocket and the body of your BC.
15) Cover the face. Various gauge protectors will prevent scratching and even cracking of the instrument's glass or plastic face. A metal cage is one type. Another is a peel-off-and-discard sheet of clear plastic, meant to absorb scratches.
16) Reband it. The watch, compass or computer that's strapped to your wrist may not be as secure as you think. The common watchband that terminates at each pin will drop your expensive instrument if either pin fails. Better is the type of band that makes a full loop around your wrist, passing under the instrument. Both pins would have to fail for it to come loose. And get a depth-compensating longer band, or one with an adjustment to fit around your wetsuit sleeve.
BUT WHATEVER YOU DO...
17) Don't use abrasives or chemical solvents to clean your instruments. Solvents are likely to attack the plastics used to house most instruments.
BCs (Tips 18-27)
Your single most complex piece of equipment, the BC needs to grasp your body and your tank securely and to mount all kinds of accessories conveniently, besides adjusting buoyancy. There are many ways it can fall short of perfection, and many ways it can be improved. For example:
18) Find the adjustments. There's more to fiddle with than shoulder straps. Many BCs can be adjusted to reposition the lumbar pad, the tank band or the cummerbund. The adjustment points may not be obvious — they may be hidden under padding or other fabric. You may need to ask your dealer for help or read the instructions.
19) Adjust the waist first. On any BC that has adjustments at both the waist and at the shoulders, adjust the waist first and it will fit better.
20) Organize your toys. The BC is the inevitable attachment point for accessories. But there's more to it than hanging stuff randomly. Think how well accessories will be accessible when your gear is on and the BC is inflated. Arrange things to minimize drag and entanglement hazards too. Lower on the "skirt" of the BC may be a better home for many gadgets than high on the shoulders.
21) Standardize attachment hardware. If you use quick-release clips, for example, always put the male end on the BC and the female end on the accessory (or vice versa). That way, one BC clip will work for several alternative accessories, and you don't need as many clips. You can change positions more easily too.
22) Mount a knife. Or paramedic shears. Your BC is a better mounting place for cutting tools than your leg because they will be easier to reach and less likely to snag things. Smaller knives can be mounted on shoulder straps, pocket flaps and even hoses.
23) Upgrade the inflator. An alternate inflation regulator combines the octopus second stage with the power inflation device, making for a simpler and cleaner package.
24) Free the inflator. Don't use the Velcro tab or the plastic clip that attaches the BC inflator to the shoulder strap. Either one can interfere with deflation of the BC. Instead, let it float free (most are negatively buoyant), or trap it with your left arm: the corrugated hose goes over your arm, the low-pressure hose goes under.
25) Bonus BC Tip: Dress in all your gear, including wet or dry suit. Then have your buddy look you over, from the back as well as the front. Are hoses and straps taking the most direct path? Should they be longer or shorter? Are there better attachment points for accessories that you've overlooked? It's hard to see your equipment when you're wearing it, and hard to tell how well it fits together when you're not.
BUT WHATEVER YOU DO...
26) Don't mix manufacturers. When upgrading to an alternate inflation regulator, don't assume compatibility. A Brand X inflator may seem to fit a Brand Y BC, but there are differences in the diameter of the corrugated hoses. Pull it to dump your BC, and it may pull off instead. If you can, stay within the same manufacturer's family of products.
27) Don't puncture the bladder. Sewing, pinning or through-bolting makes a firm, permanent mounting for retractors and other things, but think twice and do not puncture the air cell.
Mask, Fins and Snorkel (Tips 28-37)
28) Replace the mask strap. If your hair often gets tangled in the mask strap, swap it for one of the wide neoprene types. The neoprene may be more durable than the standard silicone strap, too. But be sure it fits the mask buckle properly: these are not standardized and come in many sizes. An alternative is a slip-on neoprene strap cover.
29) Use a mask box. A hard-shell case for the mask will keep it cleaner, and will prevent deforming the skirt, causing it to leak. The case is also a good place to store defog goo.
30) Re-prep your mask. You know the drill for a new mask: scrub it with your fingers and a mask prep solution, or "Soft Scrub" or toothpaste. Repeat that procedure every few dives or so and you'll have less fogging.
31) Seal mask leaks. One solution for a leaky mask is to smear a bit of silicone grease on the skirt. This is especially helpful with facial hair. Don't use Vaseline: it's a petroleum product and will attack the silicone of the mask.
32) Hide your snorkel. About the worst place to carry your snorkel when you're not using it is to hang it on your mask strap. It's prone to getting entangled, and it can dislodge your mask or make it leak. Instead, strap it to your leg or shoulder strap, holster it in the special pouch made by Zeagle or leave it on the boat. Another option is to use a snorkel that bends or telescopes so it will fit inside a BC pocket.
BUT WHATEVER YOU DO...
33) Don't clean your mask with anything more abrasive than "Soft Scrub" or toothpaste. And don't use any solvents or petroleum products; they will degrade the silicone.
34) Don't modify your fins. Nope, garden clippers won't turn your flippers into those new propeller-style fins. The design of fins is more sophisticated than you might think, and you're likely to do more harm than good by modifying. A drain hole at the toe of the foot pocket, if you don't already have one, should be the limit of your creativity.
35) Have a spare snorkel keeper. Quick-release keepers are more fragile than the old-fashioned figure-8 type, so buy a spare. (In a pinch, a rubber band will work.)
36) To put fins on: Flip the strap under the heel plate, put your foot in, then flip the strap up.
37) To take fins off: On deck, step on the blade and pull out your foot. In the water, keep your reg in your mouth so you can use both hands.
Exposure Suits (Tips 38-49)
Tailoring for a precise fit is especially important with a wetsuit, but other modifications can improve the function and convenience of both wetsuits and dry suits:
38) Puncture your hood. Make a small hole in the top of your hood. (A hot nail works well.) This lets out the air that enters your hood from your exhaled breath. Otherwise, a "Conehead" air bubble can form that's large enough to affect your buoyancy, and can cause your mask to leak.
39) Puncture your booties. A small hole made the same way near the toes of your booties helps them drain when you leave the water.
40) Trim the face opening. Most hoods are made with an opening that is intentionally small, so you can trim it to your preference. A wider opening gives more freedom of movement, less claustrophobia.
41) Dip your fingers. Coat the ends of your glove fingers with "Tool Dip." The rubbery coating reduces wear and tear and gives good grip.
42) Add a thigh pocket. A large pocket can be added to the thigh of either a wetsuit or a dry suit. This is a low-drag, easy-access location for things like a slate, shears or knife.
43) Tuck booties inside. You'll put on your booties after your wetsuit, of course, but tuck them inside the legs of your wetsuit. Otherwise, they'll scoop water as you swim.
44) Wear socks. Thin nylon socks make booties easier to slide on, so they are less likely to tear. The socks also protect your feet from chafing on seams in the booties.
45) Make "Suit Snot." A lubricant makes pulling on a wetsuit easier. Shampoo works but may irritate your skin and requires lots of rinsing later. Try a mixture of one part hair conditioner to one part water. Put it in a squeeze bottle.
46) Reinforce seams. Repair any tears or gouges immediately with wetsuit cement. If a seam shows signs of stress, you can reinforce it by gluing a strip of nylon or tape over it.
47) Consider a custom wetsuit. For a wetsuit to be warm, a close fit is of equal importance to the thickness of the neoprene. That's why a custom-made wetsuit is almost always warmer than one off the rack. Next best: many wetsuit manufacturers offer custom tailoring of their standard sizes.
BUT WHATEVER YOU DO...
48) Don't trim too much. When trimming dry suit seals, be patient. Trim less than you think you need to and try it before trimming more.
49) Don't try major alterations. Wetsuit alterations requiring darts and curved seams are best left to experts.
Weights and Weight Belts (Tips 50-57)
50) Shift some weight. If your weight belt is carrying a significant amount of weight, shift some of it elsewhere. Various gadgets can mount as much as six pounds on your tank. Moving weight takes pressure off your hips and can improve your trim. (Don't go too far: this is non-ditchable weight.)
51) Use a weight harness. If your weight belt is painfully heavy, a harness (with shoulder straps) shifts the weight from your hips to your shoulders. The best available weight harness is the DUI Weight and Trim System.
52) Use a depth-compensating weight belt. Or a depth-compensating buckle. Both allow the belt to contract as your wetsuit compresses at depth, so it doesn't become loose.
53) Position weights for trim. There's more to proper weighting than finding the right total amount of weight to use. Position weights side to side and front to back so you're evenly balanced. Some weight can be moved to your ankles, BC pockets, the tank boot or the tank neck to alter your trim.
54) Use weight keepers. These are clips that prevent weights from sliding on the belt. Or put a twist in the belt before passing it through the second slot in the weight.
55) Cut extra weight belt. You only need about 6 inches of belt sticking out of the buckle. Trim the excess and melt the edge with a hot knife or a match.
BUT WHATEVER YOU DO...
56) Don't thread your weight belt through the buckle so it makes a bulge that prevents the buckle from closing all the way. There's no need to thread the belt through every slot in the buckle.
57) Don't cast your own weights. Many divers used to make their own weights, but lead fumes are a significant health risk.
Diver photo by Shutterstock.com