How To Get Your Images Out Of Lightroom
Lightroom is a near-magical piece of software. It’s both librarian and technician for your digital images and, unlike Photoshop, it leaves your original photo untouched throughout the entire editing process.
How do you create a version of your image that is suitable for social media, email or printing? In Lightroom, you don’t save photos in the traditional sense. Instead, you export photos. When you export photos, you create new versions of your files that include Lightroom adjustments.
If you find yourself using the same export settings frequently, you can save them as presets to reuse again and again.
1) Get started by selecting the image or images you want to export. To select multiple contiguous images, click on the first desired photo, and Shift-click on the last one in the series. To select multiple noncontiguous images, click on the first photo, then Command (Mac)/Control (PC)-click on other images to add them to the selected group.
Erin QuigleyTo select multiple noncontiguous images, click on the first photo, then Command (Mac)/Control (PC)-click on other images to add them to the selected group.
Next, click the export button at the bottom left of the Library Module, or go to File>Export.
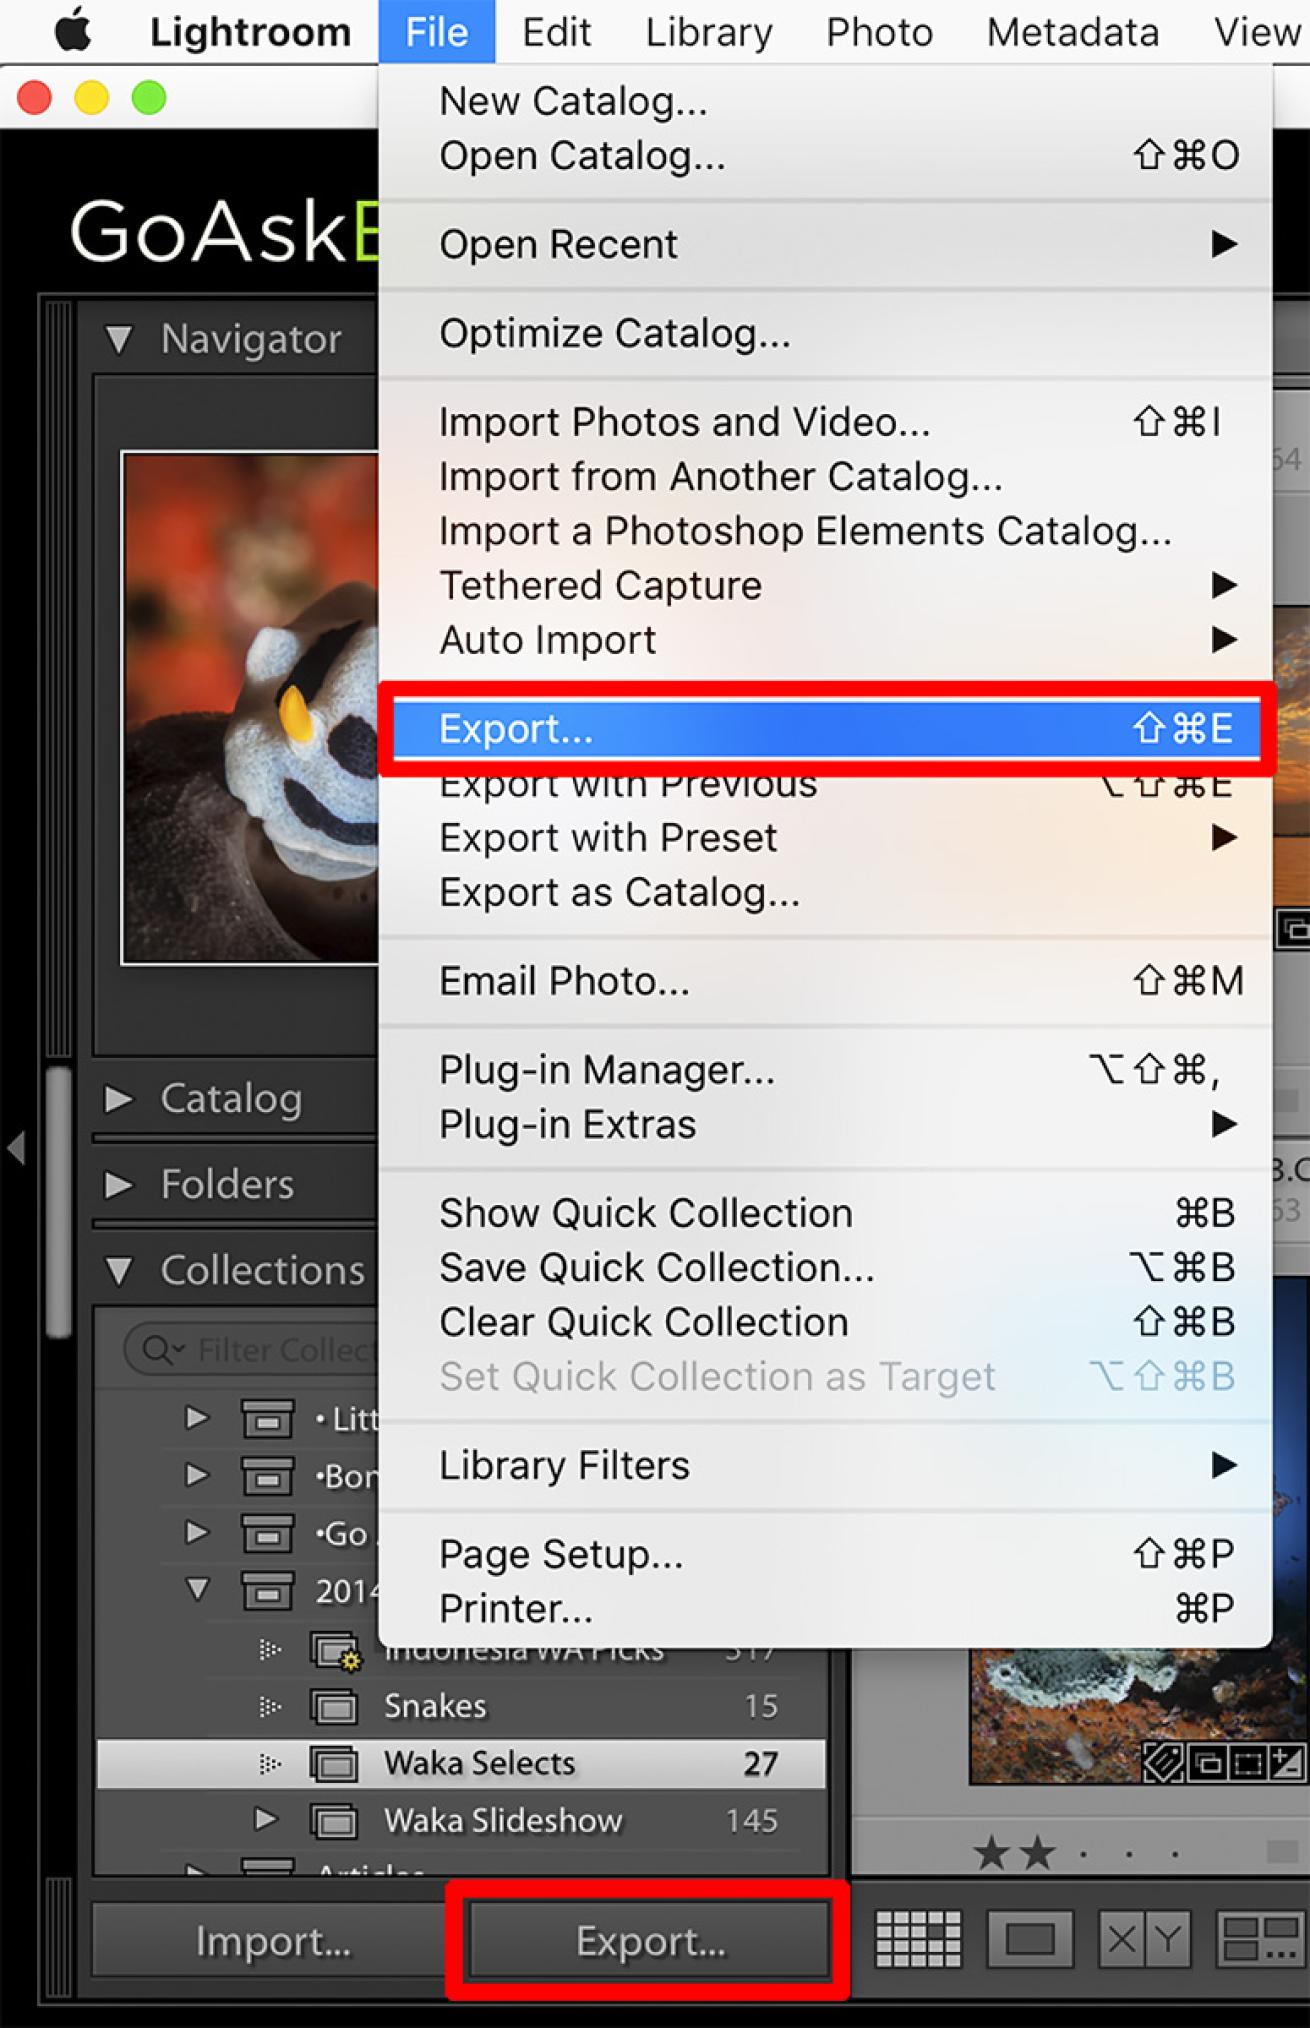
Erin QuigleyFile export.
The Export dialogue box has expandable panels to rename, select a file format, resize, sharpen, add metadata, and even add a watermark.
2) Check the header at the top of the window and make sure that the correct number of images will be exported.
3) In the top “Export To:” pop-up menu, select Hard Drive.
4) In the Export Location panel, choose a destination for your files. The two choices I use most often are “Specific Folder” and “Choose Folder Later.”
“Specific Folder” lets you set the destination for your exported files by clicking the “Choose” button and navigating to the desired location for your images in the ensuing browser.
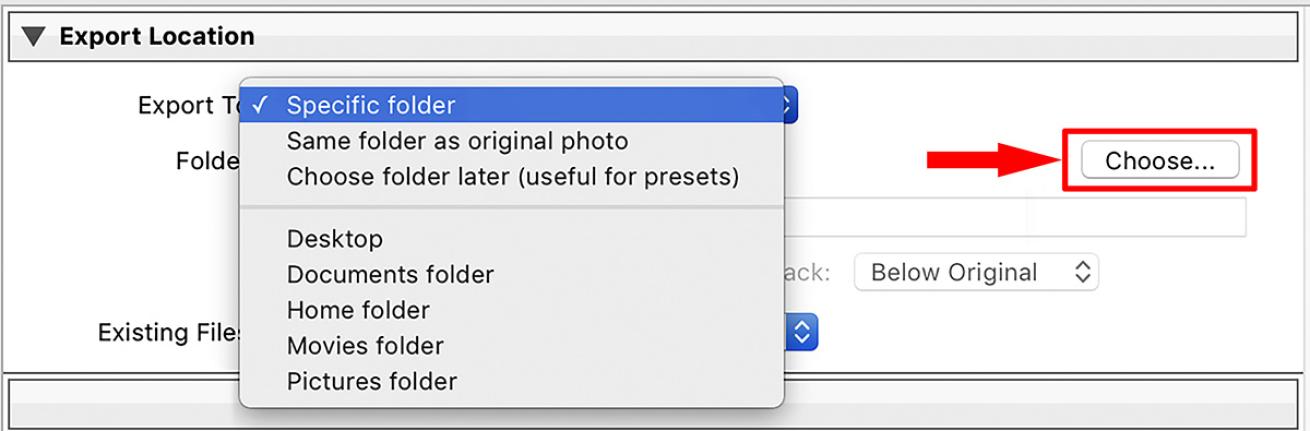
Erin QuigleySelect folder to export to.

Erin QuigleyFilename template editor
“Choose Folder Later” also lets you specify the final destination for your exported files, but only as the last step in the export process. This is useful for presets, where over time you might be exporting groups of images with the same settings to different folders.
5) If you want to rename your exports, check ON the “Rename To:” checkbox, and choose from any of the default naming presets or create your own.
To create a new naming template, select “Edit” at the bottom of the pop-up menu and configure the Filename Template Editor. If you don’t want to rename your images, make sure the “Rename” checkbox is checked OFF.
6) If you have video files in your export, check ON “Include Video Files.” The formats to choose from are DPX, H.264, or a copy of the original, unedited video clip. H.264 works best for uploads to social media.
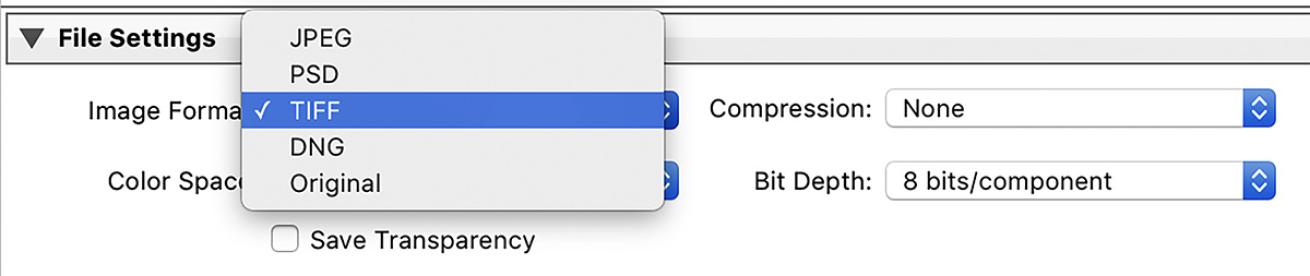
7) In the File Settings panel, you can choose the Image Format, Quality and Color Space. Available formats are JPEG, PSD, TIFF, DNG and Original. For Color Space, choose sRGB if you are planning to export the images or images for email, social media, or projection on a computer screen or monitor. Choose Adobe RGB for most general-purpose printing, and choose Pro Photo RGB to stay within the native color space of Lightroom’s Develop Module, or other image-editing software.
Erin QuigleyFile settings
8) If you want to resize your exported images, check ON the “Resize to Fit:” checkbox. The popup menu lets you choose from a variety of criteria for resizing. I most often use “Long Edge.” You can set dimensions using pixels, inches or centimeters. Image resolution matters only if you’re exporting for print, and if you are, 300 pixels per inch is the most common setting.

Erin QuigleyImage sizing
9) Output sharpening in Lightroom is simple. If you want to sharpen your export, Check ON “Sharpen For:” checkbox, and choose Screen, Matte Paper or Glossy Paper in a Standard amount.
10) The Metadata panel lets you specify how much or how little metadata you want. If you’re uploading to social media, choose “Copyright Only”; if submitting for stock, choose “All Metadata” for the maximum amount of information.
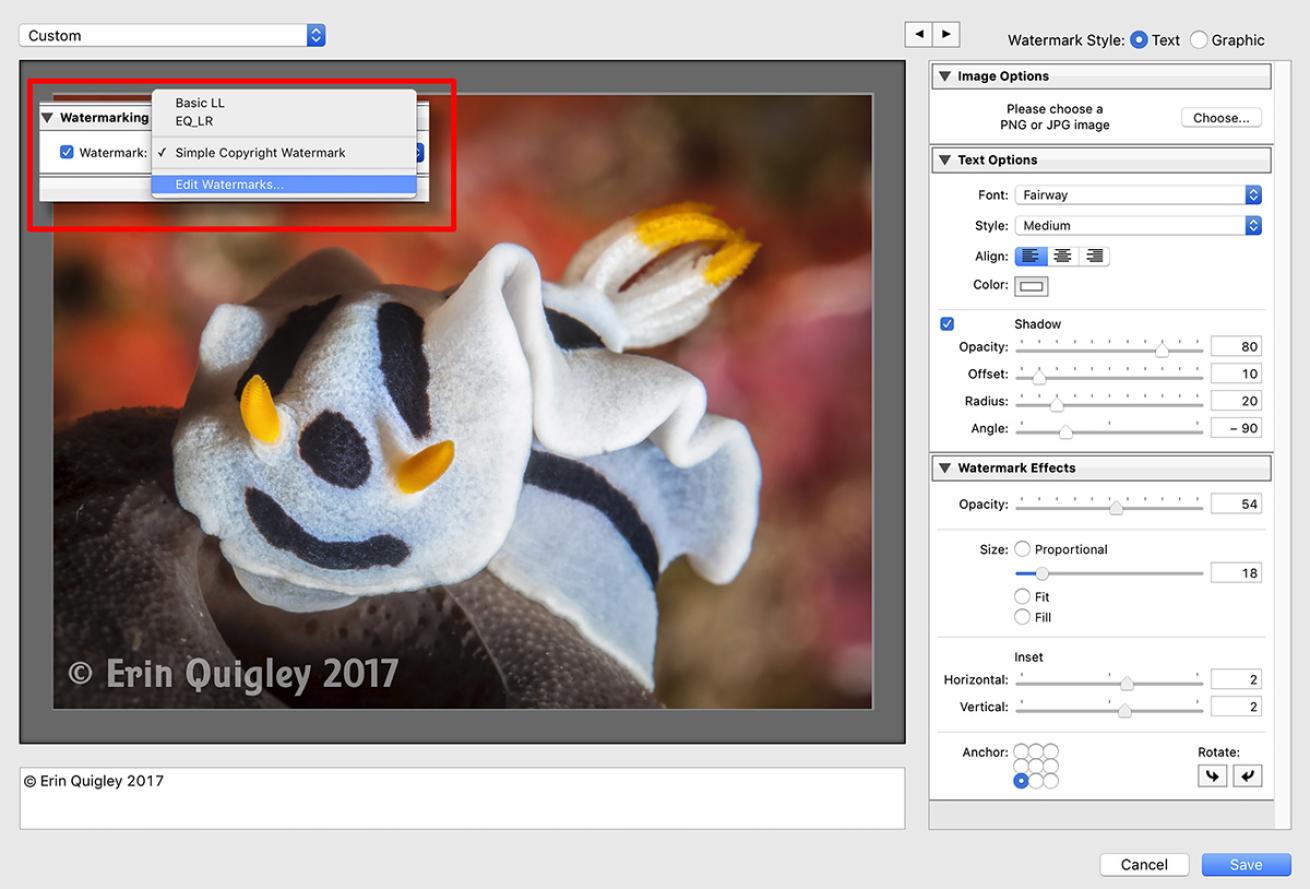
11) To add a watermark to your exports, check ON the “Watermark” checkbox. By default, Lightroom will add your user name to the bottom left corner of your image. To customize the watermark, select Edit Watermarks from the pop-up menu.
Erin QuigleyHow to add a watermark.
12) Leave Post-Processing set to its default of “After Export:”; do nothing.
13) To save your settings as a preset, click on the “Add” tab at the bottom of the Preset panel, and name your preset — for example, “Facebook,” or “12x18 Print.” Next time you open the Export Dialog box, click on a preset to apply those settings automatically.
Erin Quigley is an Adobe ACE-certified digital-imaging consultant and an award-winning shooter. GoAskErin.com provides custom tutorials and one-on-one instruction for the underwater-photographic community.