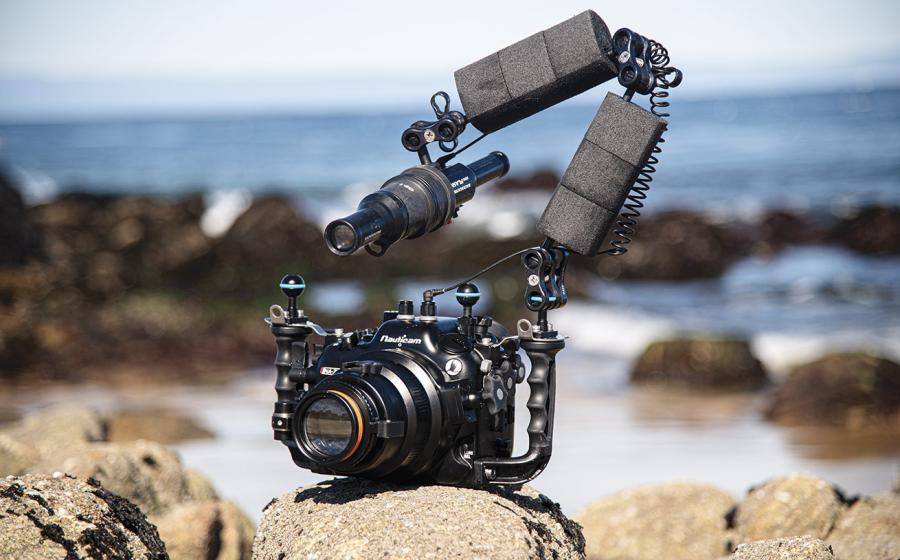
How To Shoot Like A Pro
You’ve got the rig of your dreams — Or the rig you’re ready for now — And you’re out there trying your hardest every dive. But somehow your shots do not look like the pages of Scuba Diving magazine. Need some help? Here are tips from frequent Scuba Diving contributor Tanya G. Burnett to point you in the right direction.
AVAILABLE LIGHT
Leave your strobes at home

Tanya G. BurnettAvailable light technique.
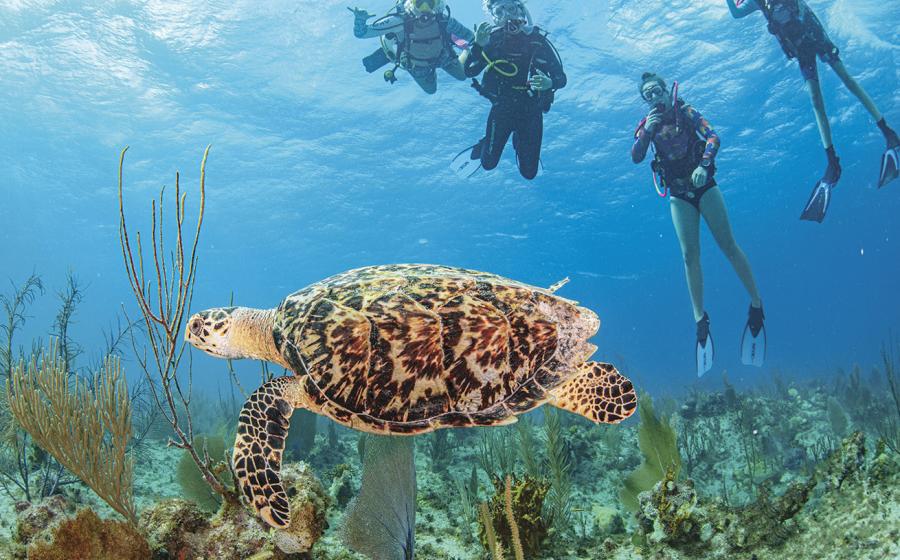
Ambient-light, or natural-light, shooting gives you a streamlined profile and freedom of movement underwater to keep pace with large marine animals in their natural environment. It’s almost essential to keep the position of the sun and direction of the light behind you to light your subject and improve the look of the water. A higher shutter speed is helpful to freeze both water and subject movement, and may require more ISO adjustment than usual. Shooting in Manual mode will most often give you the control needed. In available-light photography, white balance is more important, and shallow- er conditions are often easier for achieving a natural look. (Raw images can also be white balanced in Adobe Lightroom or Photoshop.) Some cameras white-balance better under- water than others. You can cheat a camera that struggles with settings like “cloudy,” or manually create a custom profile in the depth range you are shooting. If you don’t have a primary ambient subject, then the composition needs to tell the story — choose a scene where shape is more important than color. If an image looks too at or low-contrast on the computer, try making it a black-and-white image instead; it might pop.
QUICK TIPS
1 ) If deeper than 5 to 10 feet, try setting your camera to a custom white balance and using your hand or a neutral slate to set it underwater.
2 ) “F/8 and be there” is the old adage for shooting large animals. Wide-angle ambient underwater will look sharper with an aperture of f/8 or smaller.
3 ) To keep marine mammals looking sharp, freeze light rays and make surface texture interesting; try keeping your shutter speed well over 1/250.
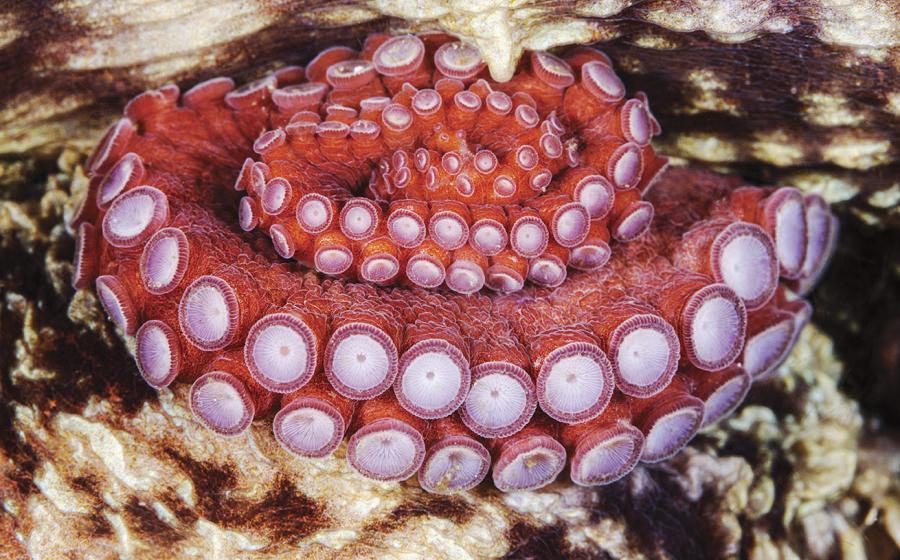
SUPER MACRO
Opening a window on a tiny world
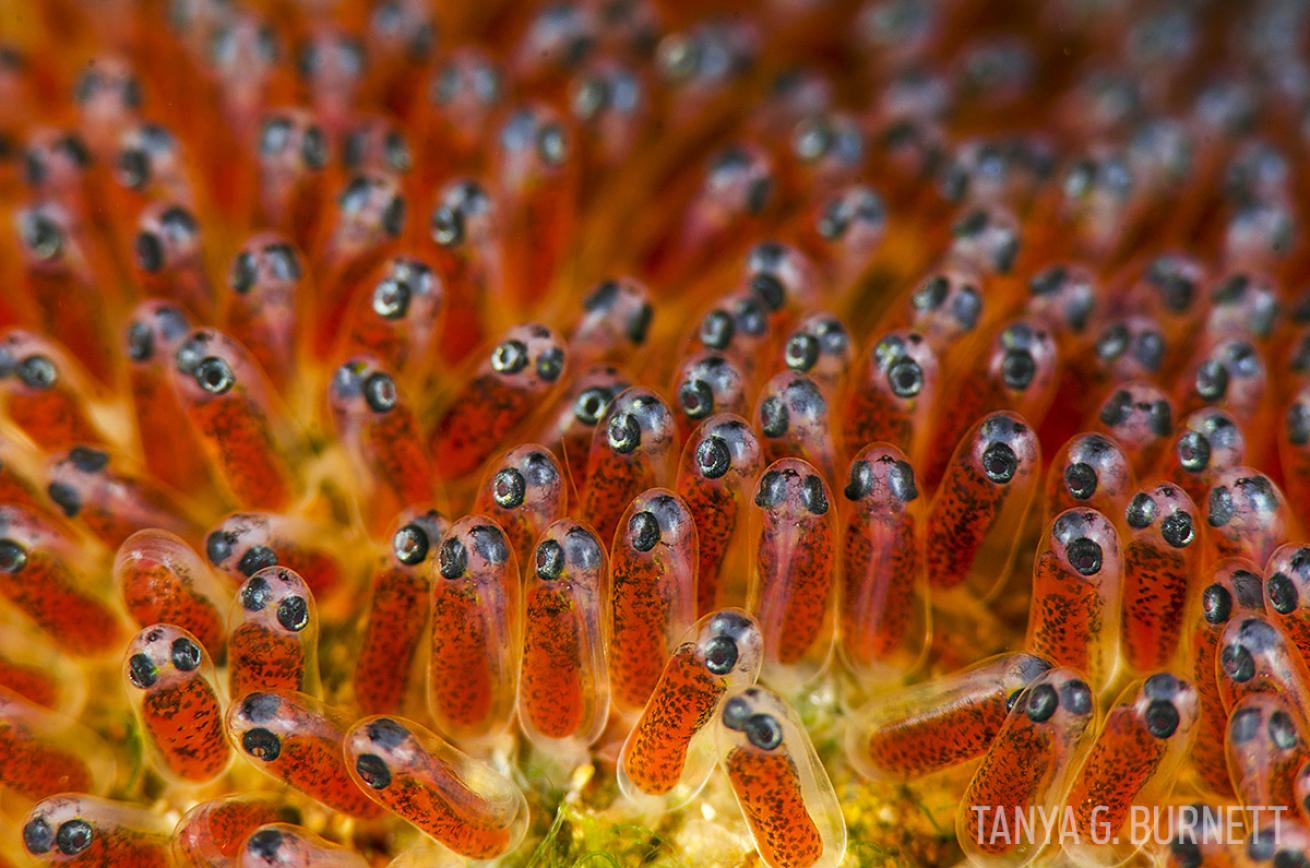
Tanya G. BurnettSuper macro technique.
In the old days, divers employed tele-extenders, extension tubes, dry diopters and stacked, close-up wet lenses in an attempt to capture the ocean’s tiniest denizens. Those did work to varying degrees, but there has been a revolution in macro wet lenses. They’re higher quality, and magnification can border on the extreme, so there’s little reason to give up normal macro-lens function when you can just flip on the super macro when you want it. If new to this genre, you might not want to start with the most powerful close-up wet lens until you have a few images under your weight belt. Practice on your kitchen table so you have a better understanding of how close and how far away you can focus. Where do you need to aim your strobes to light your now-very-close subject? If you can’t light it at the kitchen table, you won’t be able to underwater. Macro rigs are heavier underwater than wide-angle; add some flotation so you aren’t struggling with your setup. Last but not least: The more magnification you create with your lenses, the less depth of field (the part that is in focus) you will have. As with all macro, focus on the one key element that you want to be sharp — often an eye — and understand that much of the rest of the image might not be in focus. That’s where the art of super macro comes into play.
QUICK TIPS
1 ) How hard is it to autofocus? Do you need a new focus technique such as “lock and rock”? A manual focus gear? These vary with the lenses and camera you use.
2 ) Once underwater, choose subjects that are easy and stationary to practice your technique. A muck stick can help steady you.
3 ) Try using your left hand to guide your port into place. Don’t hunt through your viewfinder until you know you are close enough to focus on the subject.
CLOSE-FOCUS WIDE- ANGLE
Get even closer
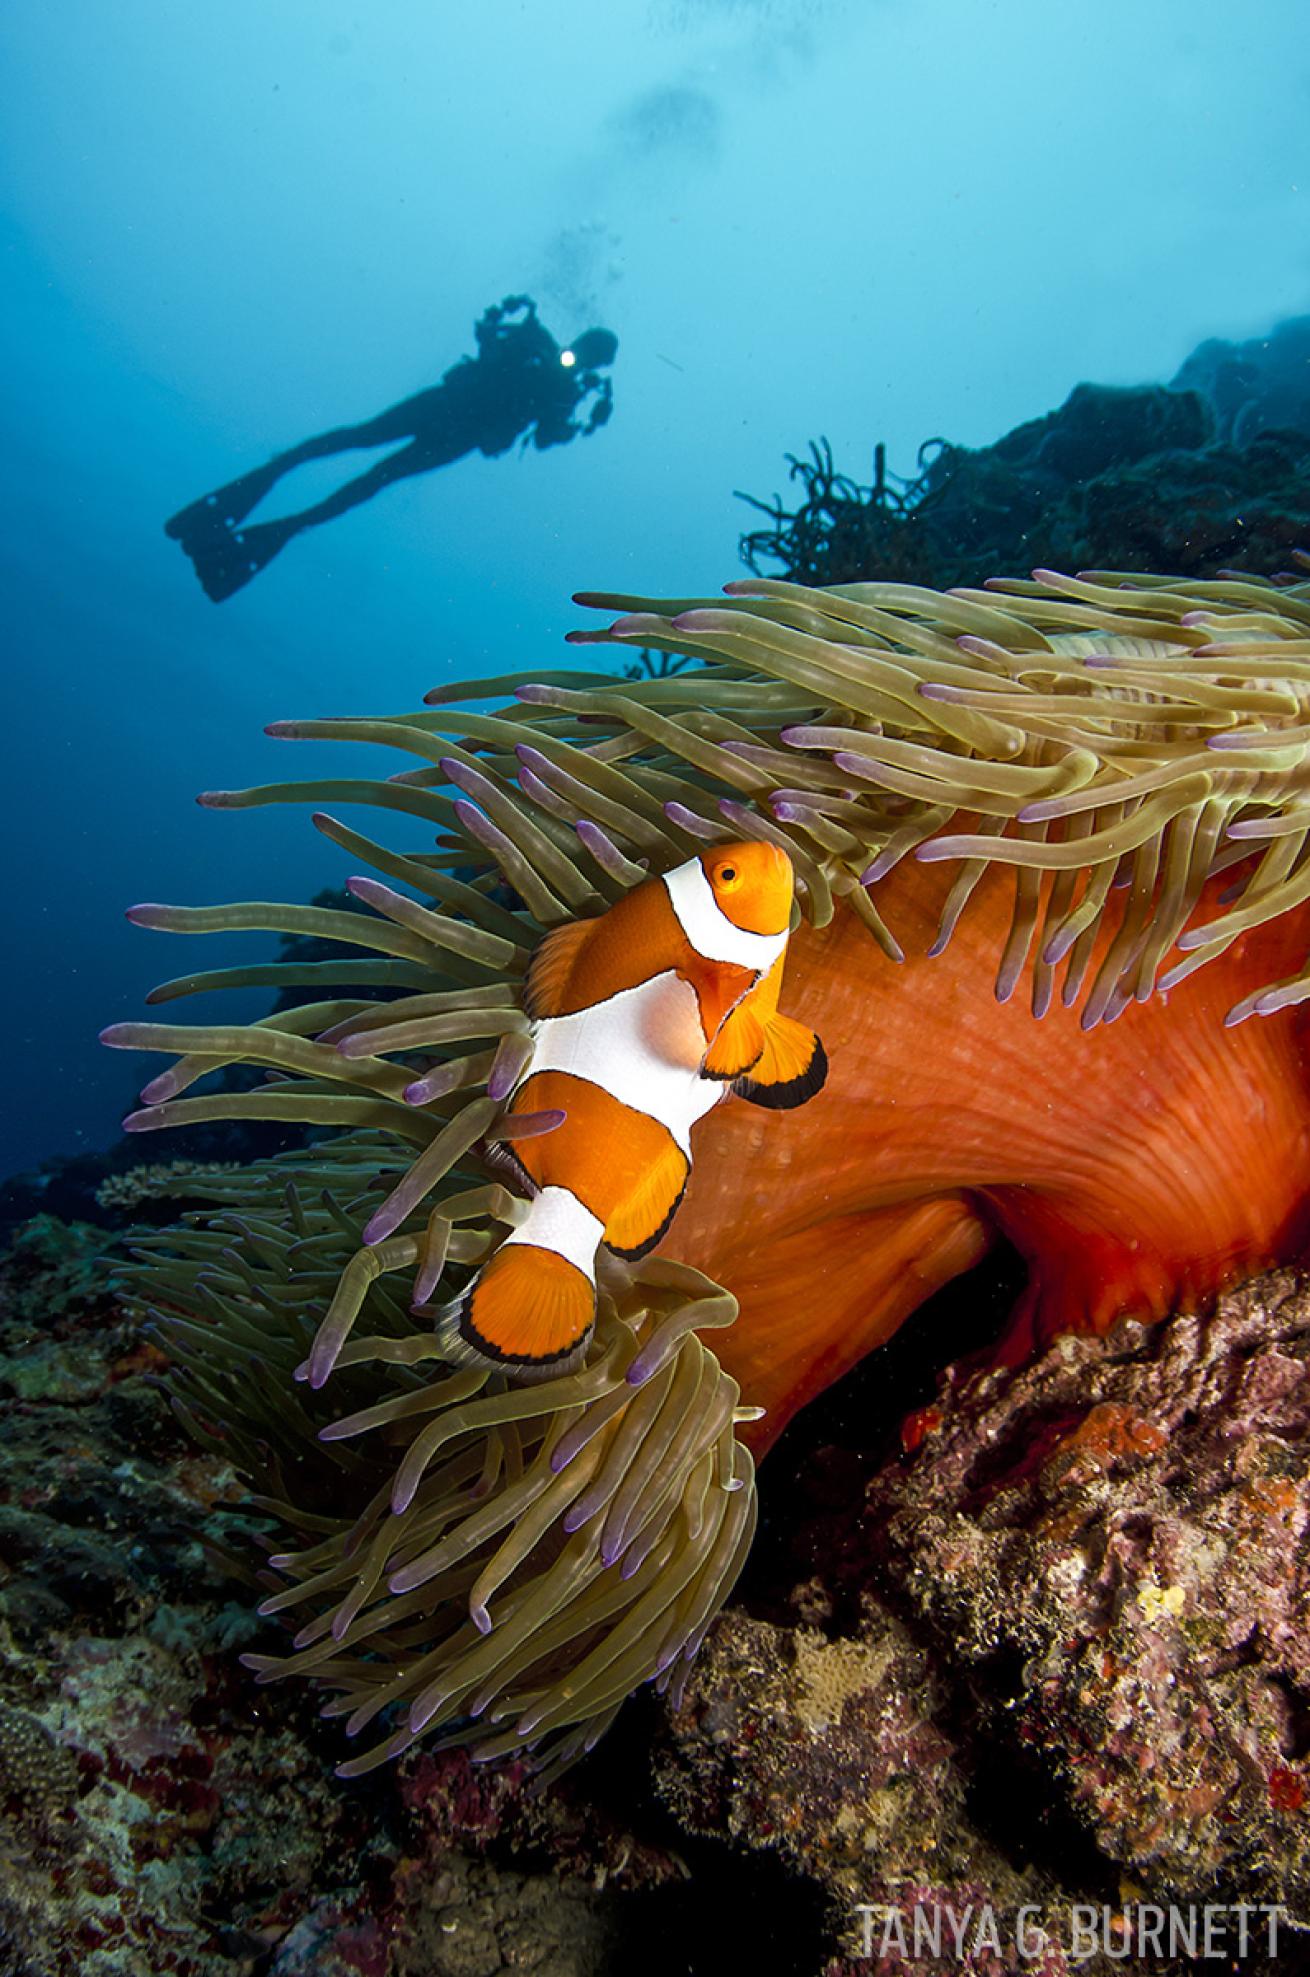
Tanya G. BurnettClose-focus wide-angle technique.
Close-focus wide-angle is fun photography, and best achieved by using a fisheye (or extremely wide-angle rectilinear) lens. Using this ultrawide-angle lens gives you the ability to get within 4 to 18 inches and a lower angle on your subject, while allow- ing you to shoot at more of an upward angle. Your subjects will appear larger in relation to what’s happening in the background, which can make for interesting and dynamic effects, such as a diver swim- ming past or a boat silhouette on the surface.
Strobe placement is critical — it can be challenging to light a close subject and keep the strobes out of the eld of view. Keep strobes tight and angled precisely, and if shooting a vertical, turn o the bottom strobe or move it upward. Try to separate your subject from the background; by keeping the light on the close primary subject, it will stand out. A small dome port will open up your possibilities considerably. It’s important to remember that every inch closer you get to your subject will increase its presence immensely in the frame. The payoff: the last few inches of close-focus will o er an exponential magnifying effect. But it’s also a fine line: Some subjects (including people) are not flattered by super-close-focus technique without careful positioning.
QUICK TIPS
1 ) Exchange long arms for short arms; try to keep your rig small.
2 ) Remember to look beyond the subject to see what else you can incorporate in the image.
3 ) Be aware of your surroundings because at times you will be super close to fragile creatures.
SPLIT SHOTS
Over/unders and half-and-halfs
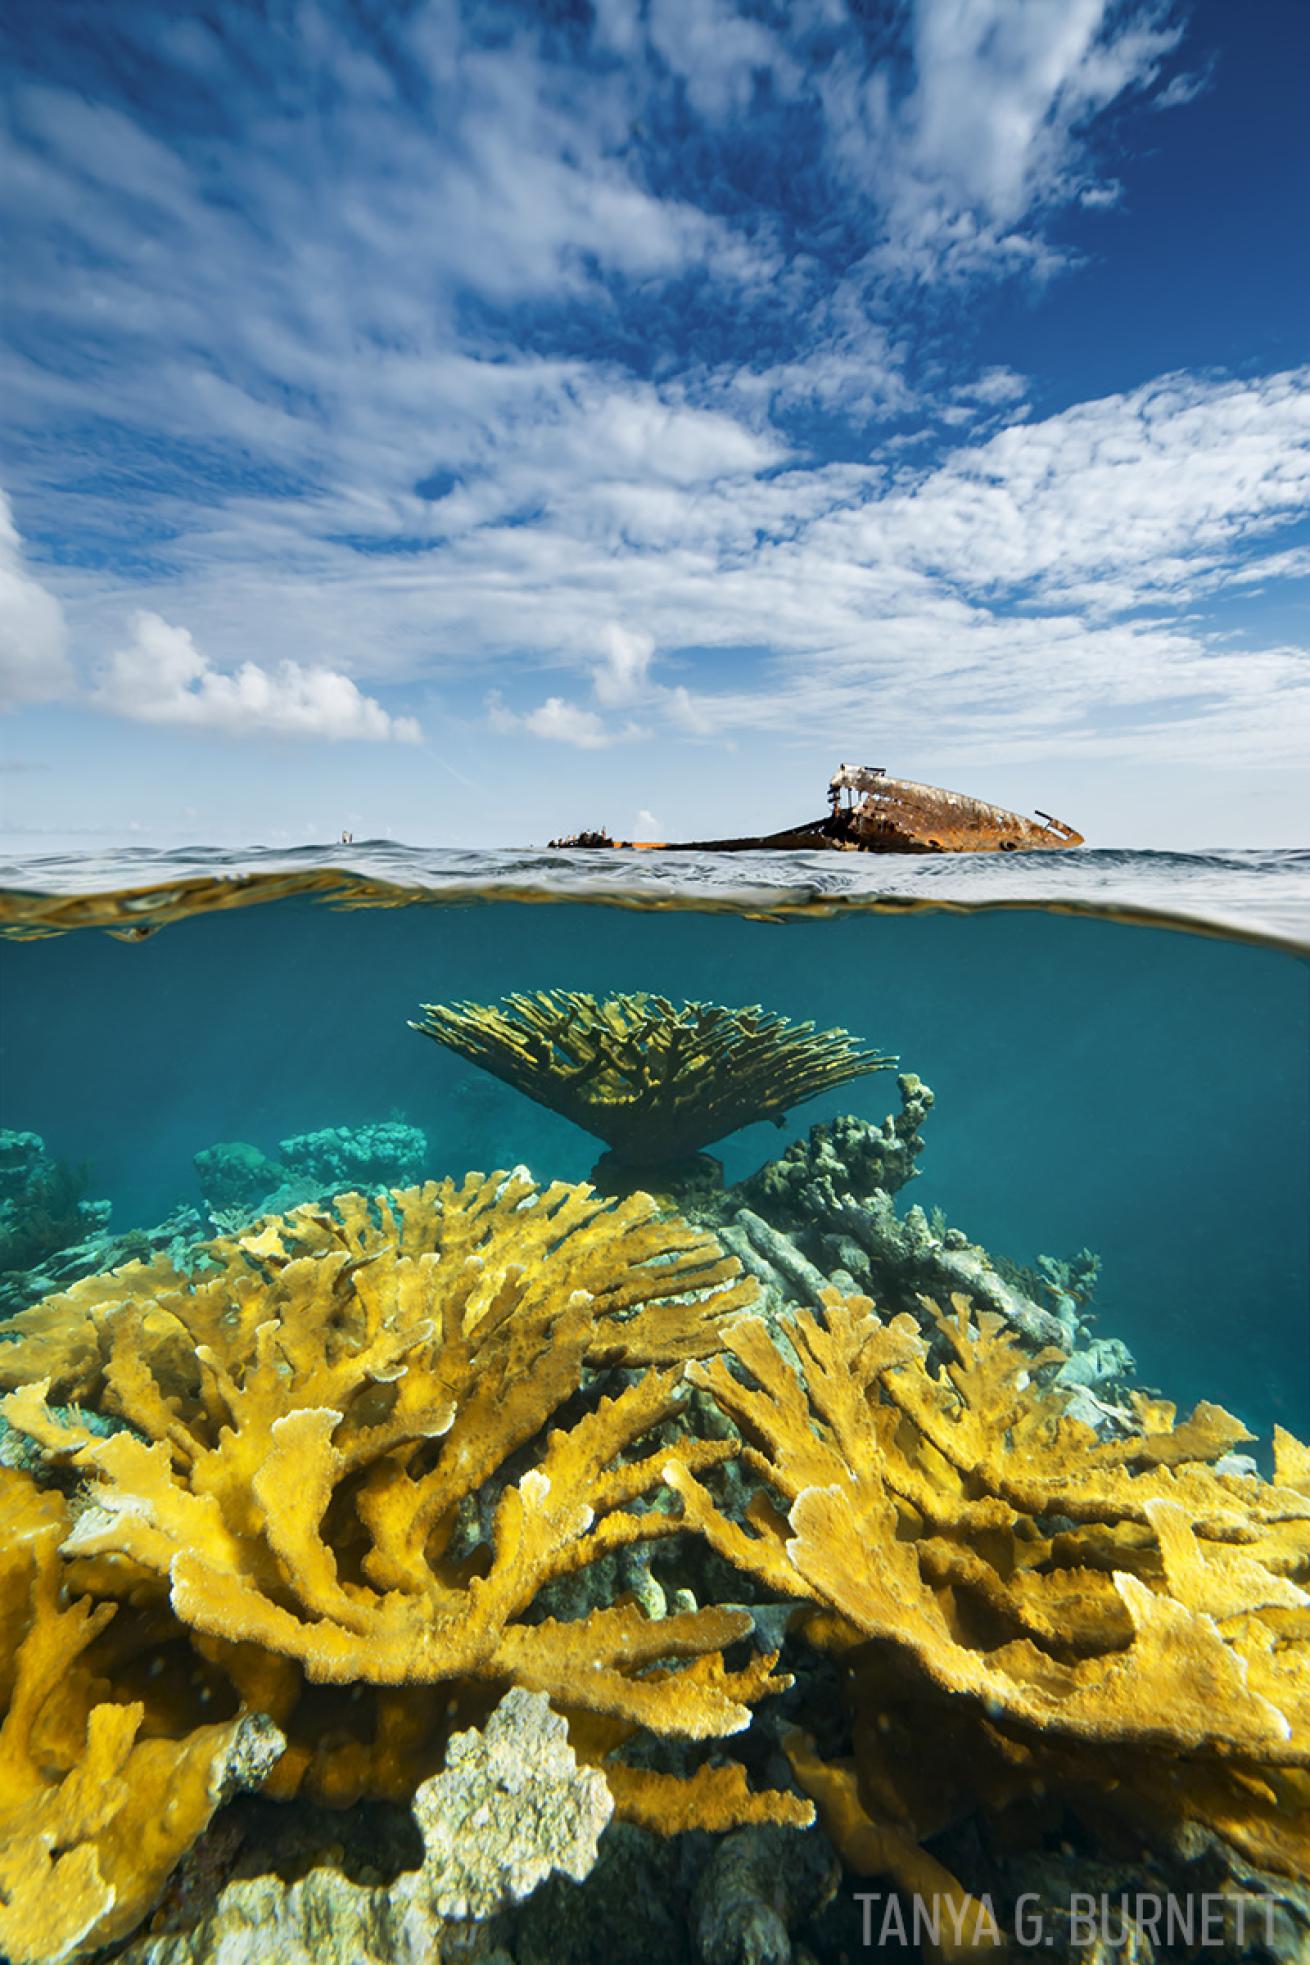
Tanya G. BurnettSplit shot technique.
For most applications, you will need to start with a super-wide-angle lens — rectilinear or fisheye — a large dome port and the right environment for an interesting photograph. For this type of image to be successful, the subject needs to be interesting above and be- low the waterline. So what’s the problem? Above the water is bright and sunny; below the water is usually darker. Above water, the camera focuses on the nearest subject many feet away; below the waterline, the camera focuses on a virtual image created by the dome only a few inches away. Solution: Without creating custom diopter and neutral density filters (complex), work with what you have. You might need to bump up your ISO in order to keep your aperture small: f/11, f/16 or higher. This will help increase your depth of field to minimize the difference in focus between the two mediums. If you have space to kneel or stand on a boat ladder, this is easier. Otherwise, inflate your BC to the fullest so you have control of the waterline. Now, hope for calm water and shoot a lot of images. You never know when the water will “pose” with an interesting line or splash against the dome.
QUICK TIPS
1 ) Use the sun to your advantage (generally behind you); if you need to fill in with strobe light below, be conservative and try to make it look natural.
2 ) Remember you have to be close to your subjects both above and below, which usually means shallow water is best.
3 ) Always pick which subject is most important to be sharp and put your focal point there.
SILHOUETTES
Shooting against the light
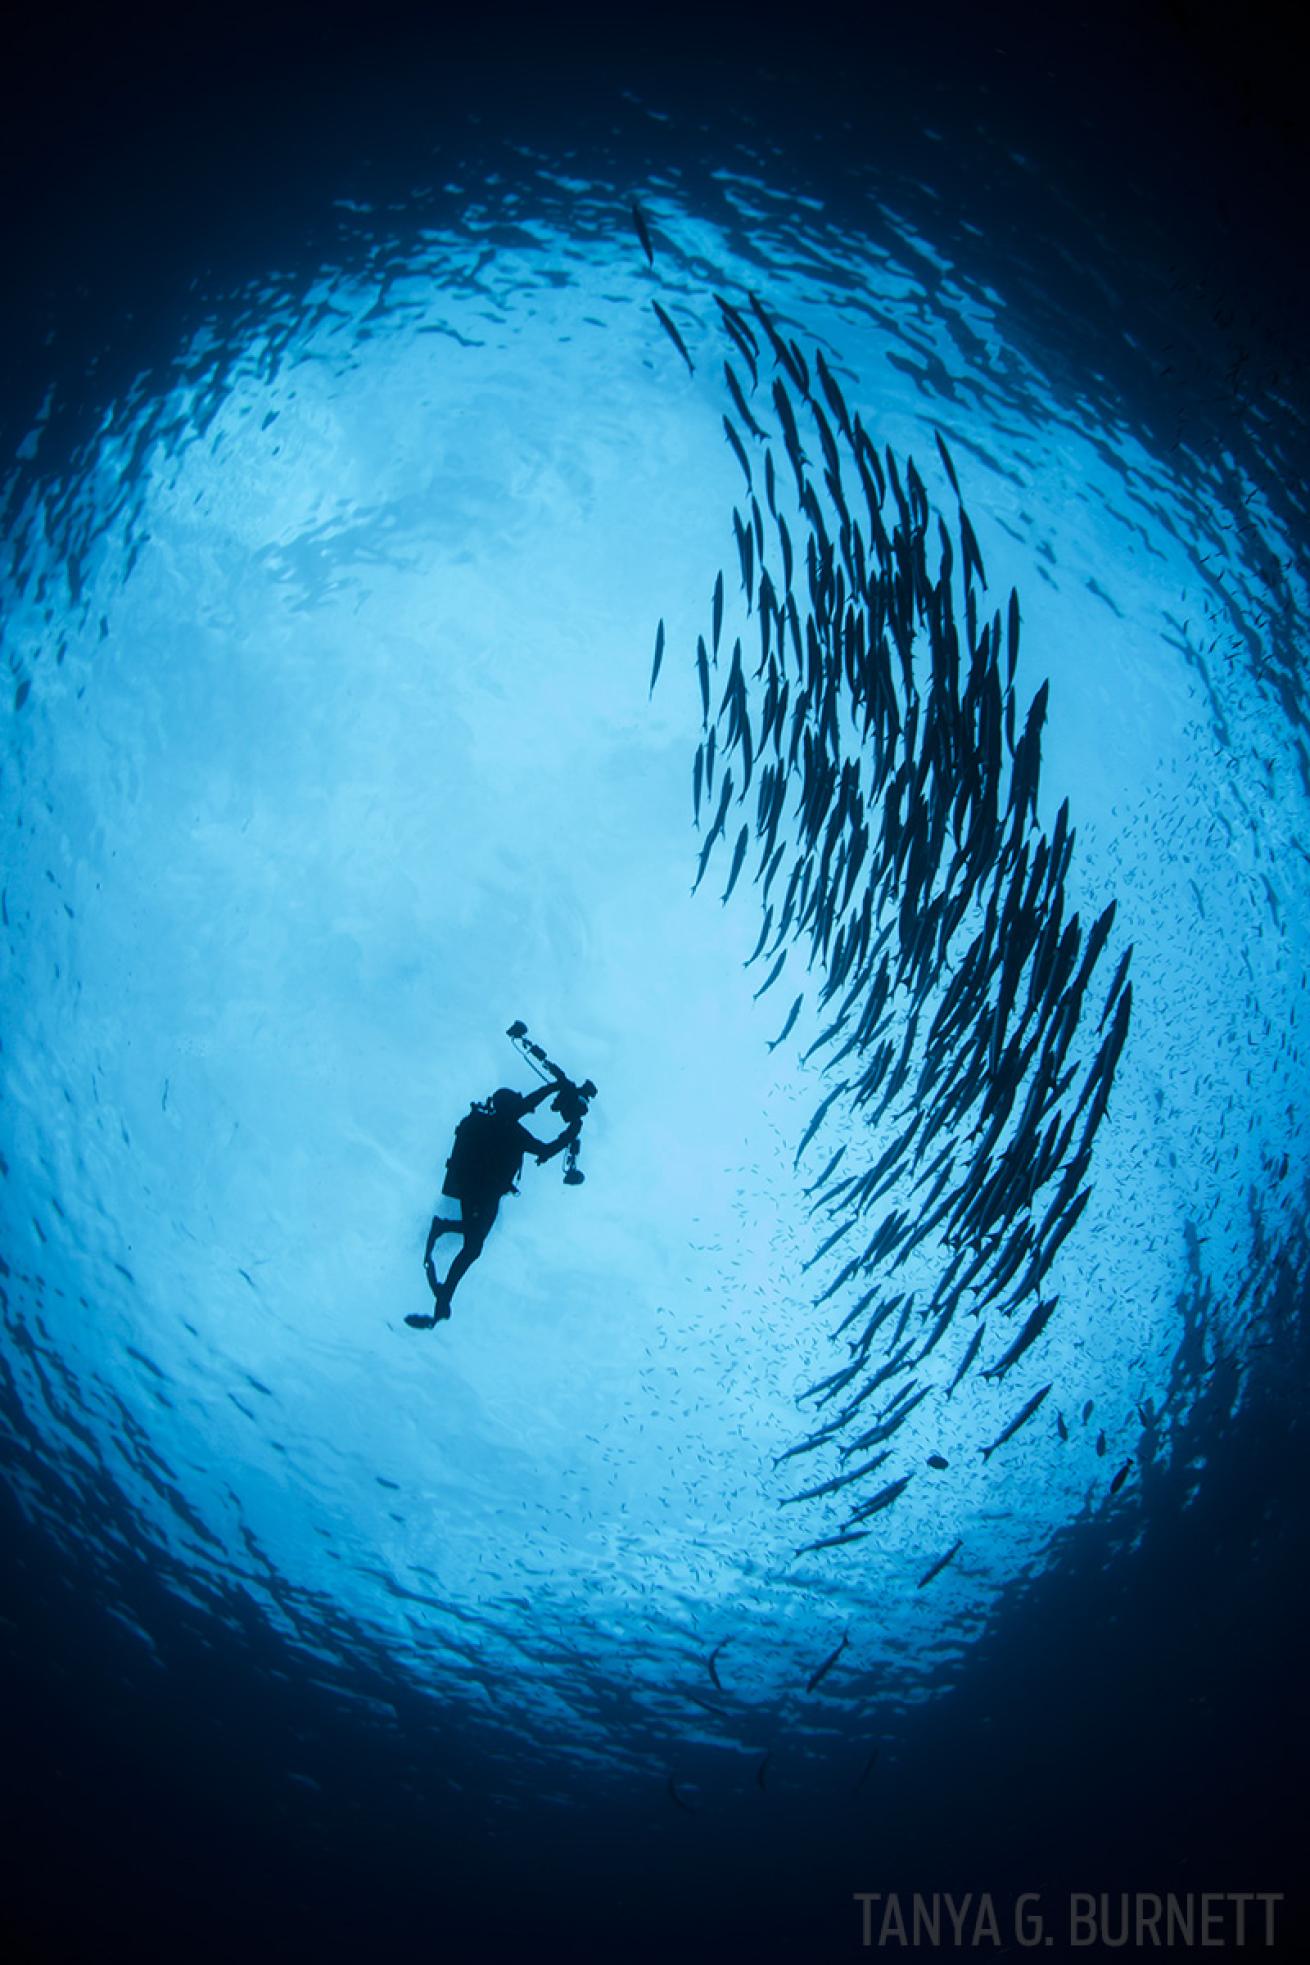
Tanya G. BurnettSilhouettes
When shooting a silhouette — diver, turtle, shark, manta — the subject should be black or very near black. Shooting against a reasonably bright background is essential to make sure there is a strong enough contrast, but be cautious of direct sun, which can look great behind a large animal or o to the side but can take away crisp edges if your silhouette is too small. Try to keep your f-stop small — f/11 or smaller — and if possible, keep your shutter speeds high: 1/160 to 1/320. This will help keep your silhouette crispy-sharp and freeze pleasing sun rays if present. Silhouettes can be stand-alone subjects in ambient-light photography, or they can nicely ll negative space and complement a strobe-lit fore- ground of a reef, wreck or other environment. Because silhouettes are often shot at an upward angle with wide-angle lenses, be very aware of where your bubbles are in the negative space; they can spoil a great shot if in the wrong place at the wrong time.
QUICK TIPS
1 ) If your silhouette is a diver and you have a chance to plan, work out some basic hand signals to help him get into the best position for your photograph — he can’t see what you see.
2 ) If the water is relatively calm when you shoot upward toward the surface, you can incorporate the round circle effect known as Snell’s window.
3 ) Learn your system so you can change from lighting a subject to shooting the same in silhouette quickly. That way you don’t miss the random manta soaring overhead.
Professional underwater photographer Tanya G. Burnett has led dive-travel expeditions all over the world for nearly 20 years; she also leads photo-instructional trips. Find out more about travel and instruction with Burnett at islandexposure.us.