How to Use Creative Blur Effects in Photoshop
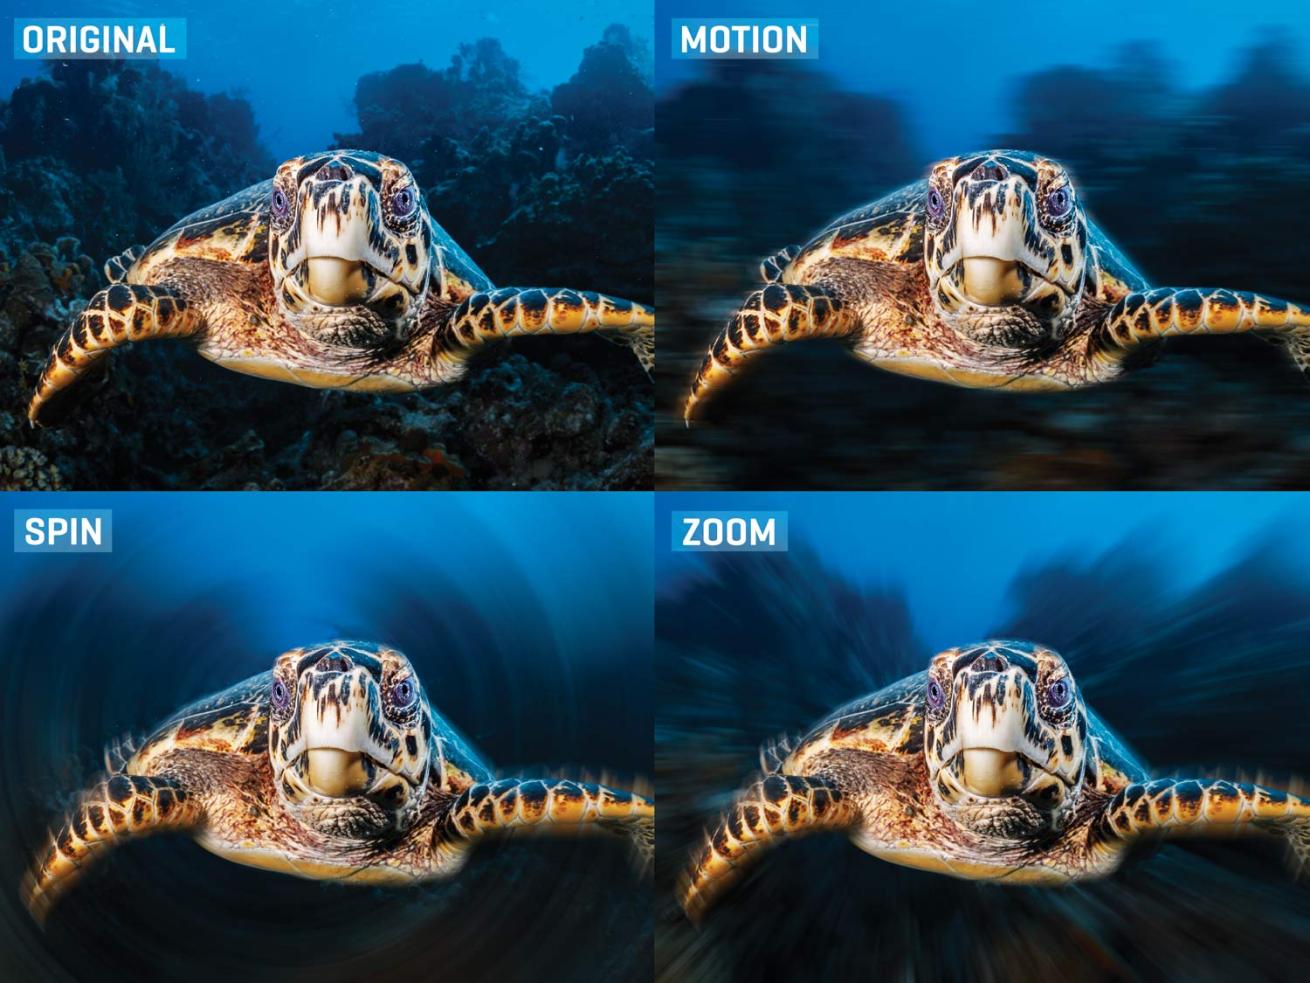
Erin QuigleyMotion, Spin and Zoom blur examples.
Panning or rotating the camera at slow shutter speeds creates motion blur. It’s a technique that can yield exciting, evocative images, but the learning curve for producing predictable results is steep, and the percentage of keepers — in my personal experience — is low.
Alternatively, Photoshop offers tons of filters that mimic in-camera effects. I’ve chosen a few of my faves to delve into here.
Spin and Zoom Effects
There are two filters in Photoshop that are designed to create spin blur. The legacy filter, Radial Blur, offers both spin and zoom effects and is easiest to use, but it doesn’t include a live preview or any of the more-granular controls of its newer, more-complex sibling in the Blur Gallery, Spin Blur.
The Radial Blur Filter (easy to use)
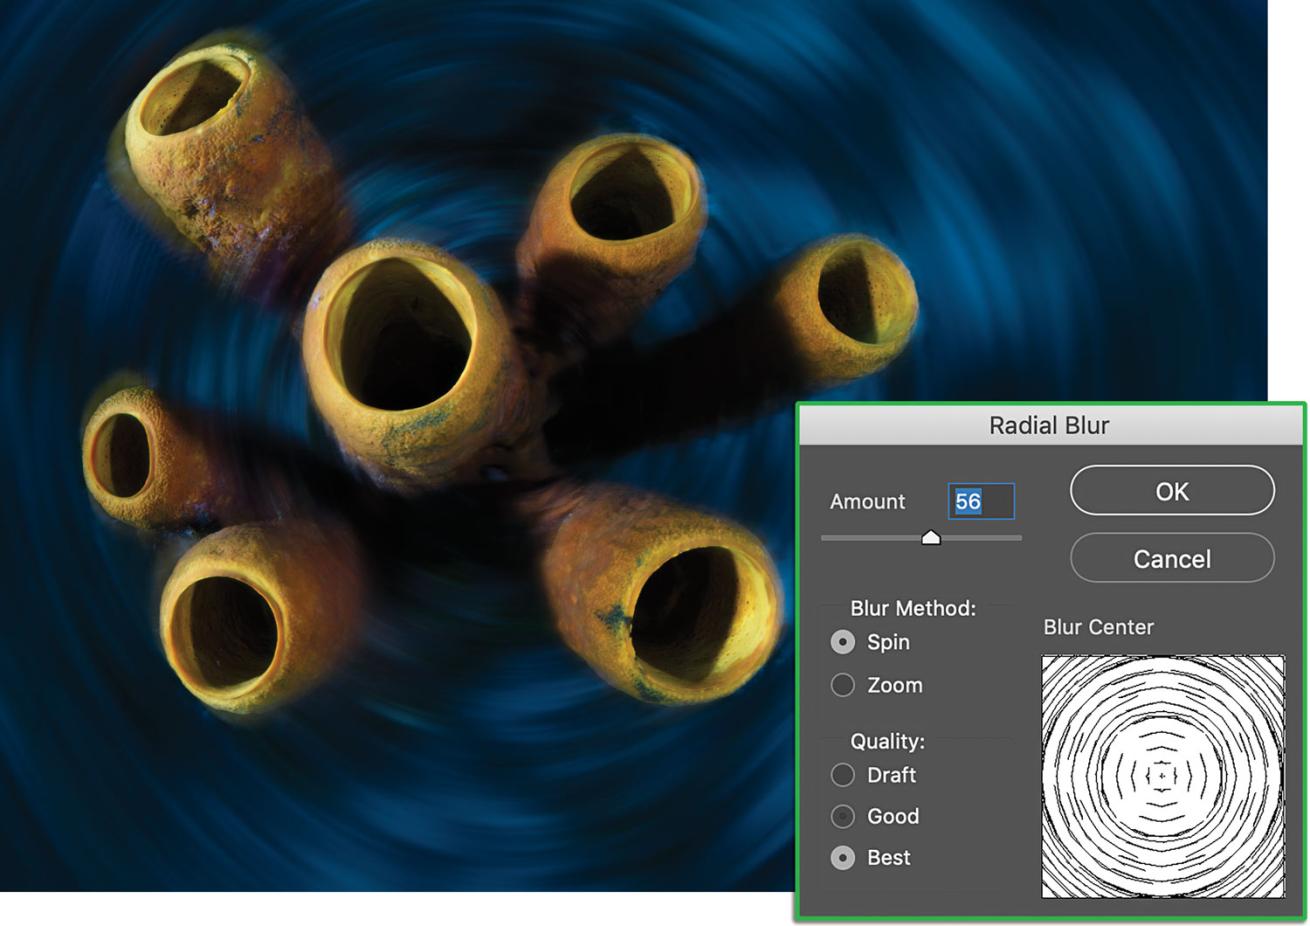
Erin QuigleyPhotoshop Radial Blur Panel
- In Photoshop, duplicate the Background layer and rename the new selected layer BLUR.
- Go to Filter>Blur>Radial Blur.
- Select either Spin or Zoom blur method, and a quality of Best.
- Set the Amount based on the graphic in the preview window.
- Set the center of the effect by clicking and dragging the crosshair in the middle of the preview window.
- Click OK.
- Add a layer mask to the BLUR layer, and paint with black on the mask to hide the blur where desired. Black on a layer mask blocks out corresponding image pixels on the layer to which it’s attached, making the original pixels on the unblurred layer beneath it visible. If you make a mistake, paint with white to restore the blur effect.
Use varying opacities of black on the layer mask to approximate the manner in which the flash from a real-life strobe would impact a blur — the most brightly lit areas would be frozen by the flash and appear sharpest, with increasingly more blur introduced as objects in the frame recede from the light source. Adjust the opacity of the brush in the brush options bar, or by tapping 1 to 9 (10 percent to 90 percent) on the keyboard while the brush is active. Tapping zero sets the brush opacity back to 100 percent.
The Spin Blur Filter (advanced)
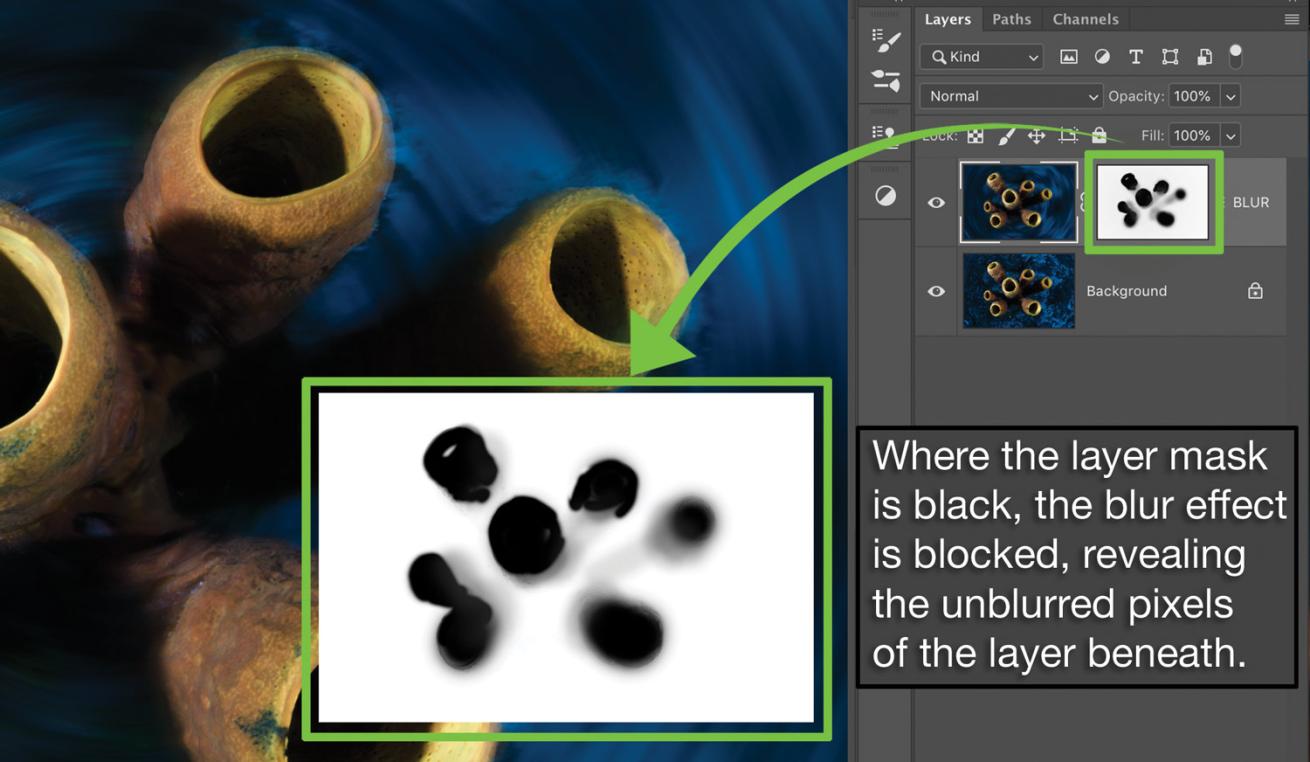
Erin QuigleyPhotoshop Layer Mask
- In Photoshop, duplicate the Background layer and rename the newly selected layer BLUR.
- Go to Filter>Blur Gallery>Spin Blur.
- Adjust the intensity of the blur using the Blur Angle Slider, or the Blur ring in the overlay controls.
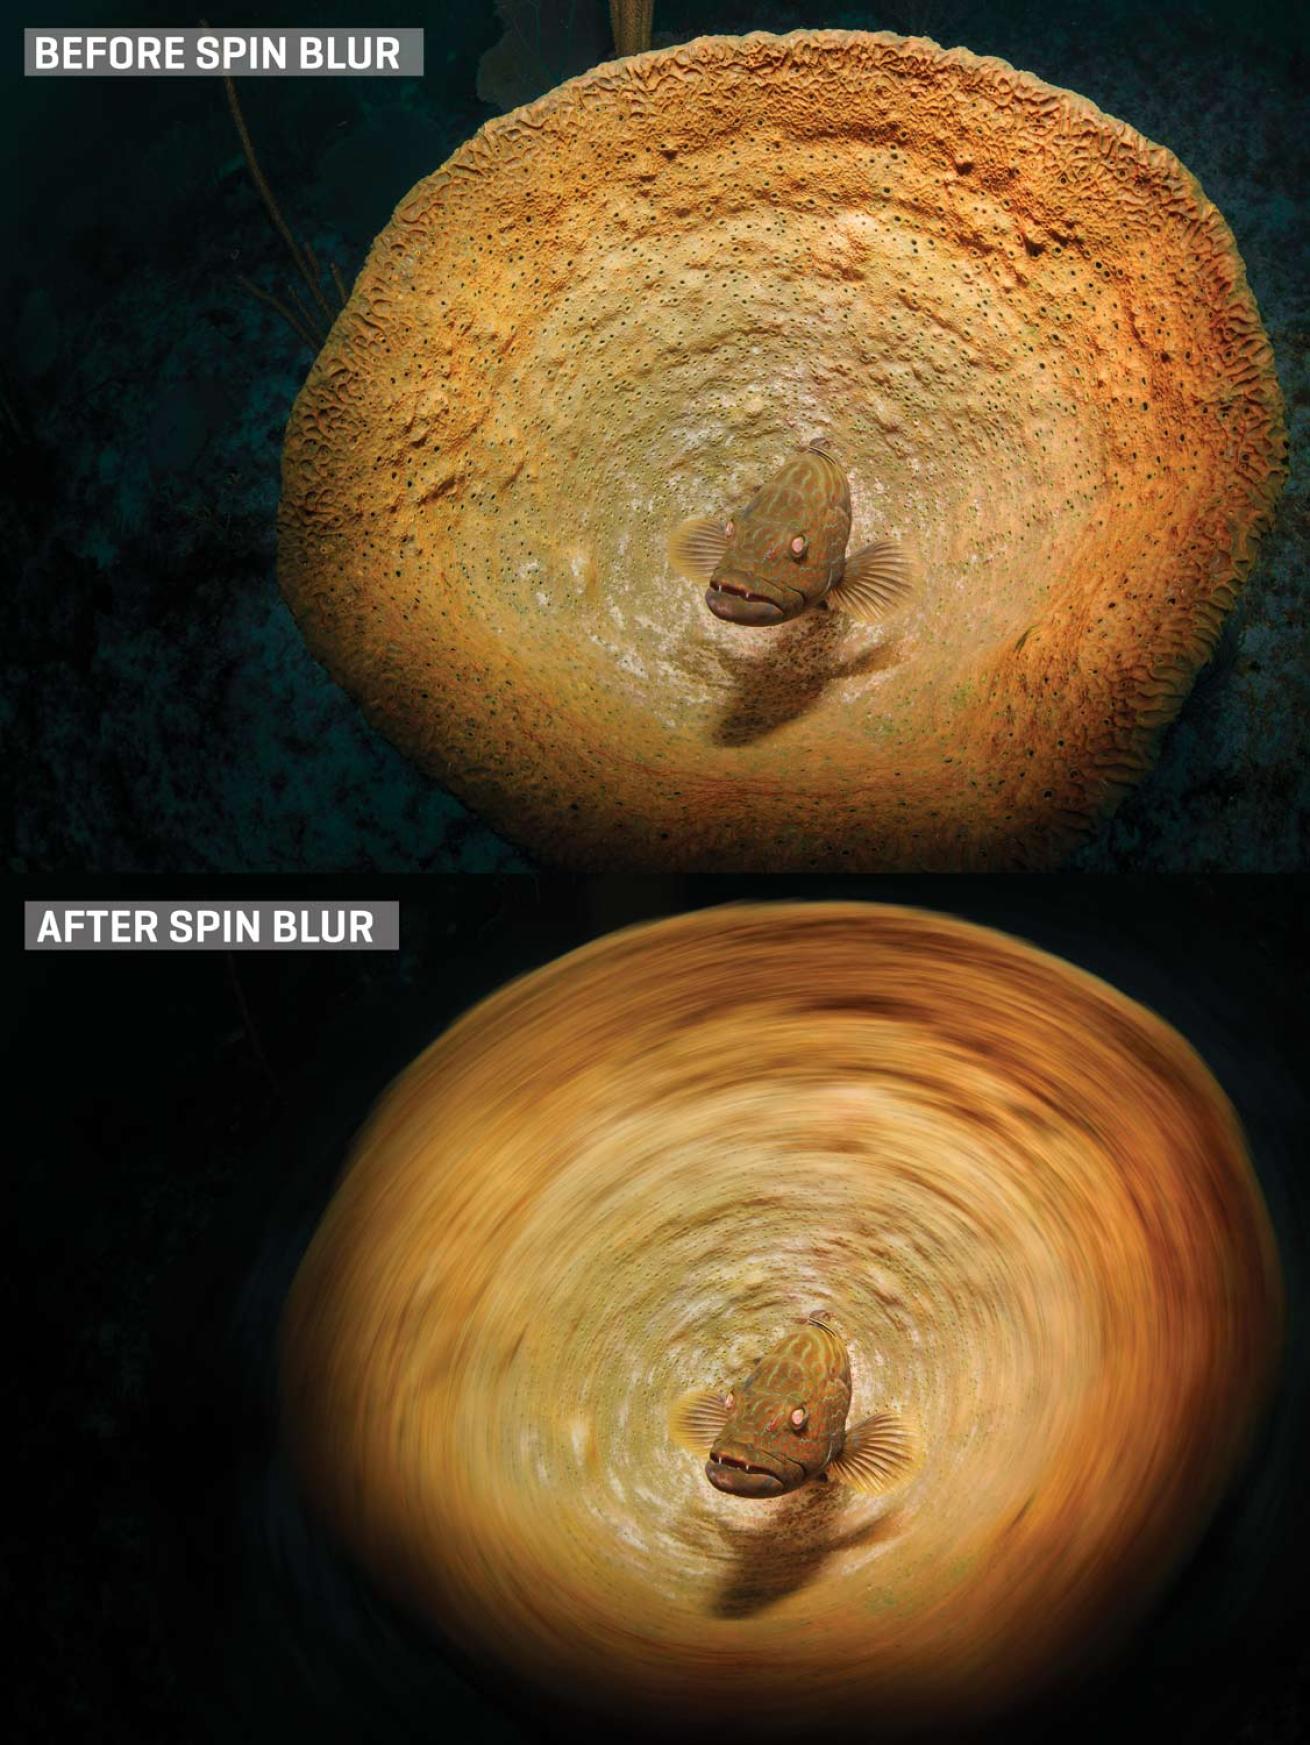
Erin QuigleyPhotoshop Spin Blur Before and After
- Change the size, shape, position, and feather of the blur effect using the overlay controls.
- On the Motion Blur Effects tab, set the Strobe Flash number to 1.
- Set the Strobe Strength to control the balance between ambient light and the virtual strobe flash.
- Set the Strobe Flash Duration to specify the length of the exposure. Don’t overthink the settings; just slide things around until you get an effect you like.
- Click OK.
- Add a layer mask to the BLUR layer, and paint with black where you want to see the original on the layer beneath.
Motion and Path Blur Effects
The Motion Blur filter is an older tool that has limited options and control. It simulates linear camera panning at slow shutter speeds. Its newer variant, the Path Blur filter in the Blur Gallery, lets you create multiple straight or curved blurs.
The Motion Blur Filter (easy to use)
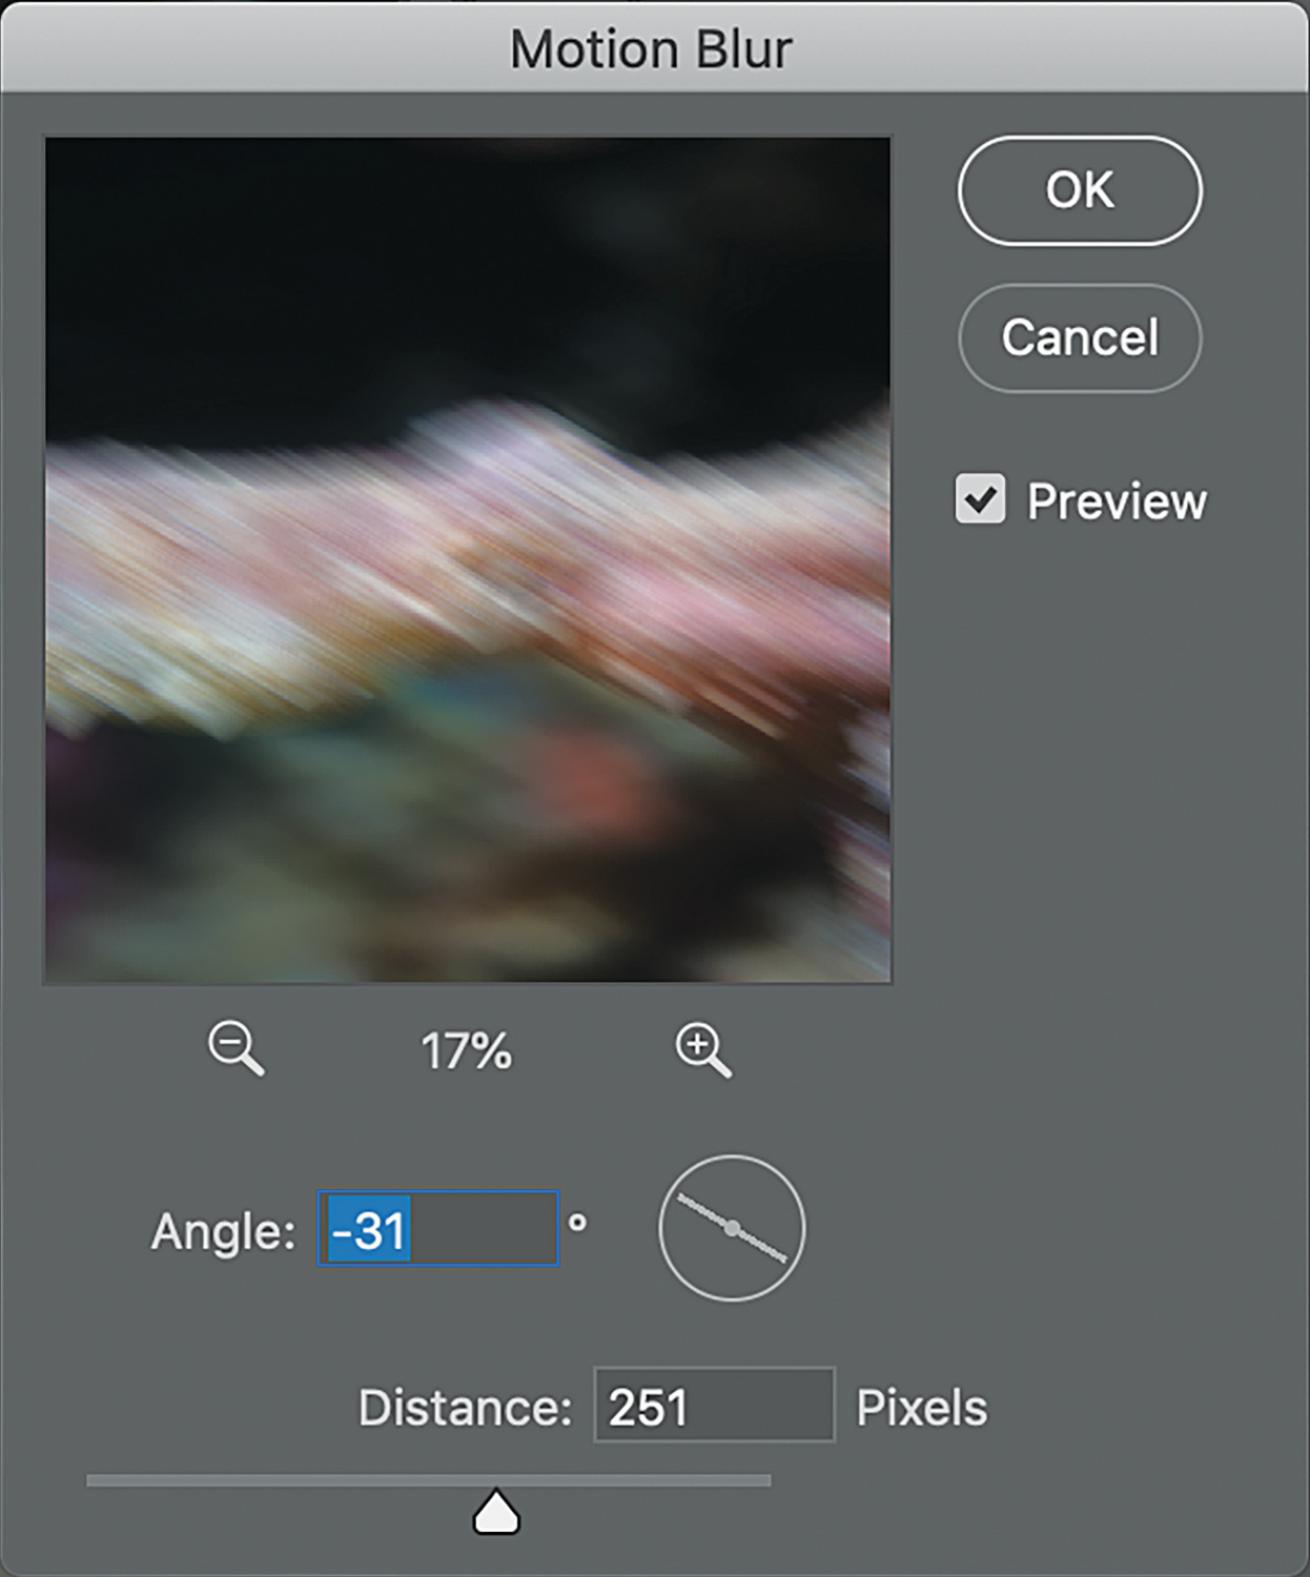
Erin QuigleyPhotoshop Motion Blur Panel
- In Photoshop, duplicate the Background layer and rename the new selected layer BLUR.
- Go to Filter>Blur>Motion Blur.
- Set the Angle (direction) and Distance (intensity).
- Click OK.
- Add a layer mask to the BLUR layer and paint on the mask with black to block the blur effect where desired.
The Path Blur Filter (advanced)
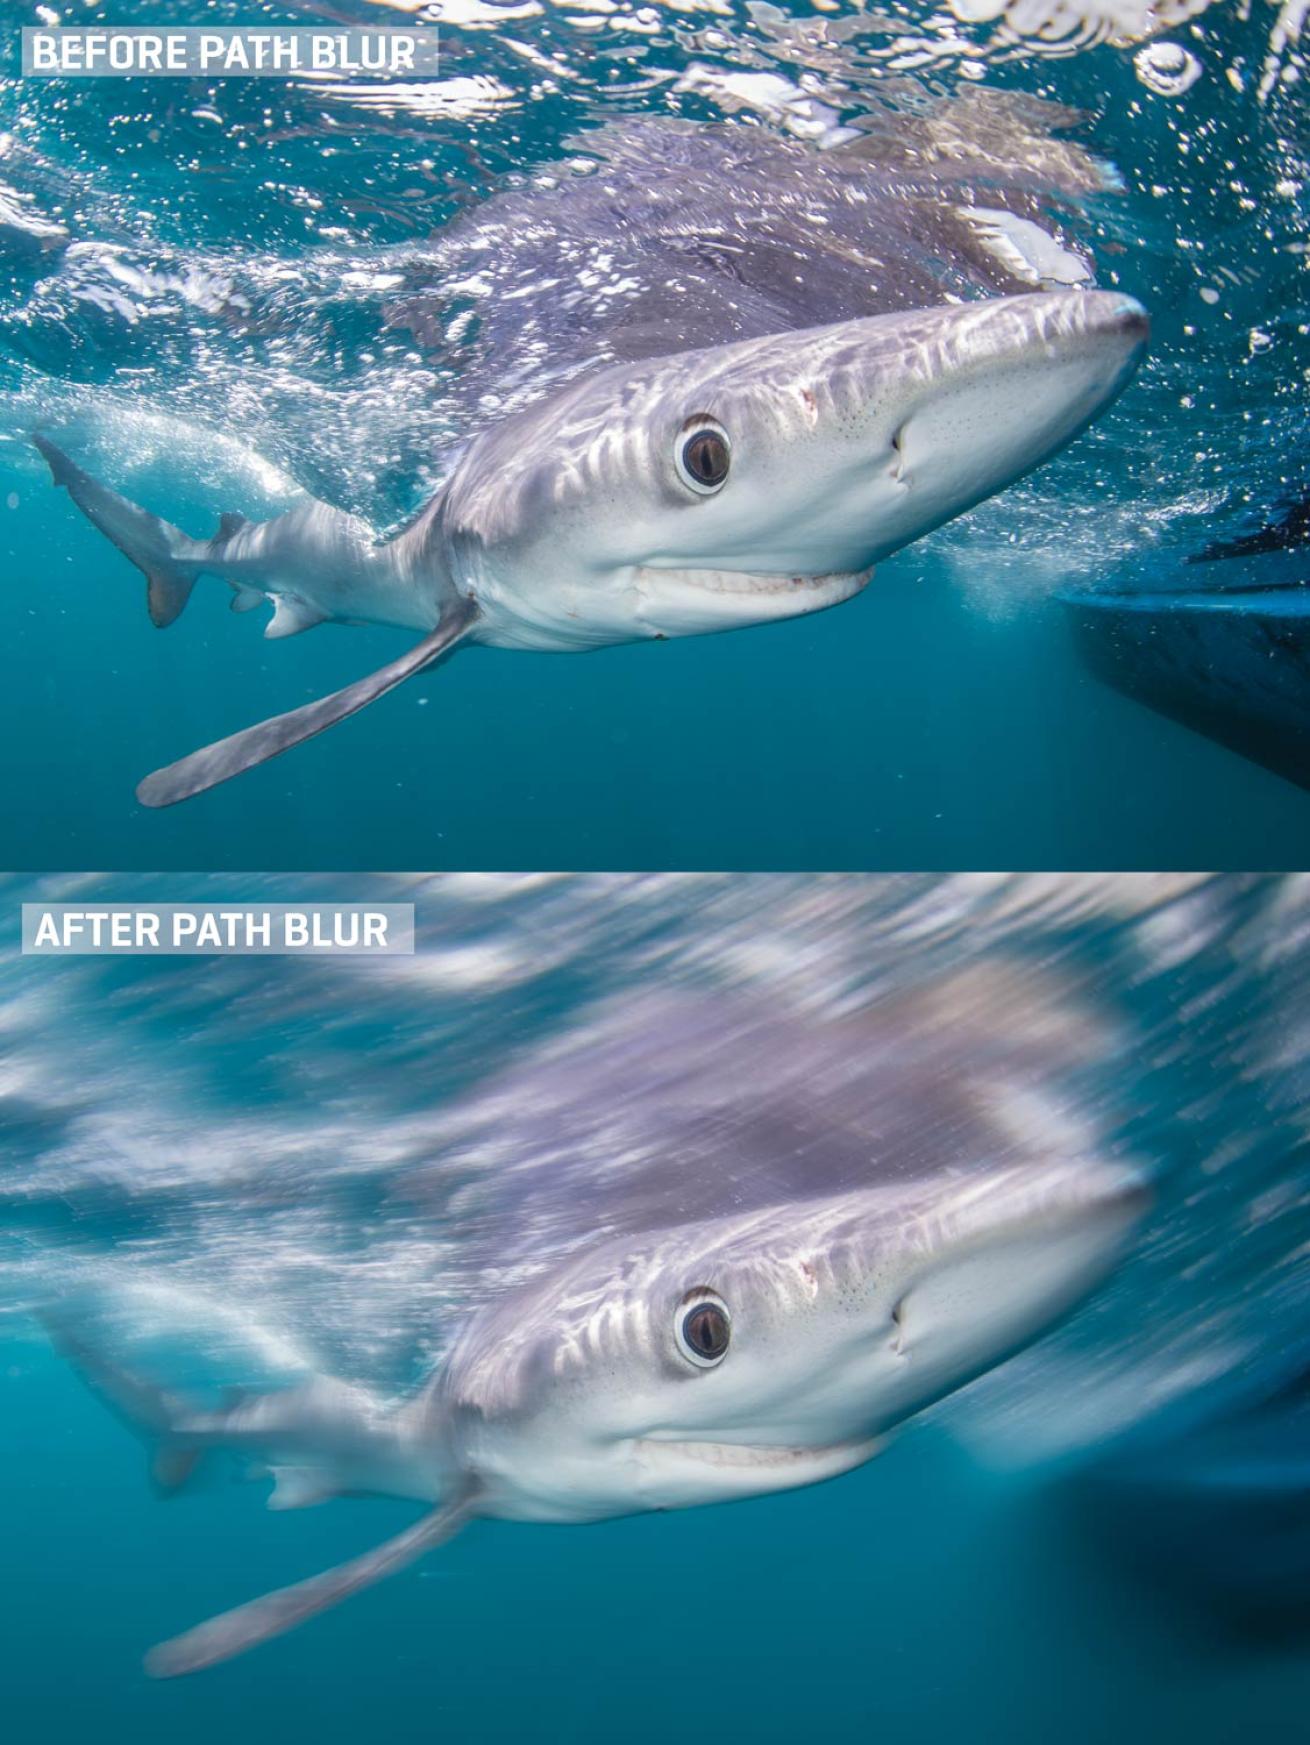
Erin QuigleyPath Blur Before and After
- Duplicate the Background layer in Photoshop, and rename the new selected layer BLUR.
- Go to Filter>Blur Gallery>Path Blur.
- In the Blur Tools panel under the Path Blur section, specify Rear Sync Flash. Rear Sync simulates the effect of a strobe fired at the end of an exposure.
- Use the blue on-image controls to create the direction and shape of your blur.
- Set the Speed (intensity).
- Set the Taper (gradual fade).
- Set the End Point Speed by clicking on any end point to select it, and adjusting the slider. For instance, you might want less blur near the front of your subject, in which case, you would select the leading end point in front of the arrow and set its End Point Speed to zero.
- In the Motion Effects Tab, set Strobe Flashes to 1.
- Set the Strobe Strength. Higher Strobe Strength results in less continuous blur.
- Click OK.
- Add a layer mask to the BLUR layer, and paint with black where you want to reveal unblurred pixels on the layer beneath.
Pro Tip:
Before selecting a blur filter, convert the BLUR layer into a Smart Object. The blur filter you select will be attached to the layer as a Smart Filter, which makes it nondestructive and infinitely editable. Smart Filters come with their own layer mask, and can be adjusted independently from their parent pixel layer.