Imaging Tips: Pimp Your Grid In Lightroom
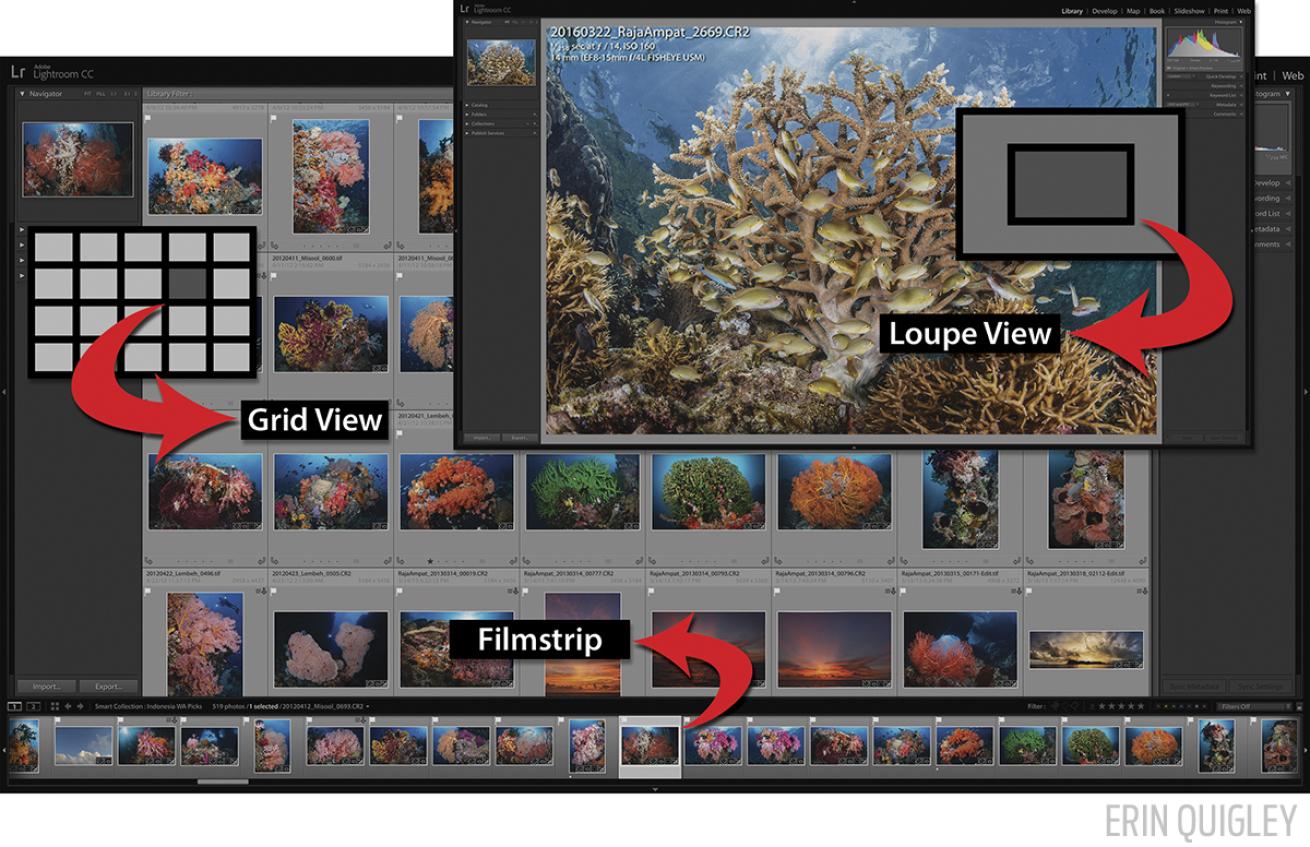
It’s easy to customize the Lightroom Library’s Grid and Loupe views to display useful information. Searching, sorting and rating are much easier when you can see specific metadata right on the image thumbnail, and being able to toggle through additional information like camera settings helps when analyzing your photos in Loupe (single image) view.
Erin QuigleyLoupe view
By default, the Grid view of Lightroom’s Library module shows only large index numbers in the upper right corner of each thumbnail. The index numbers relate to the numerical order of images in the grid, but they aren’t particularly useful when editing.
OPTION 1
CUSTOMIZE THE GRID VIEW
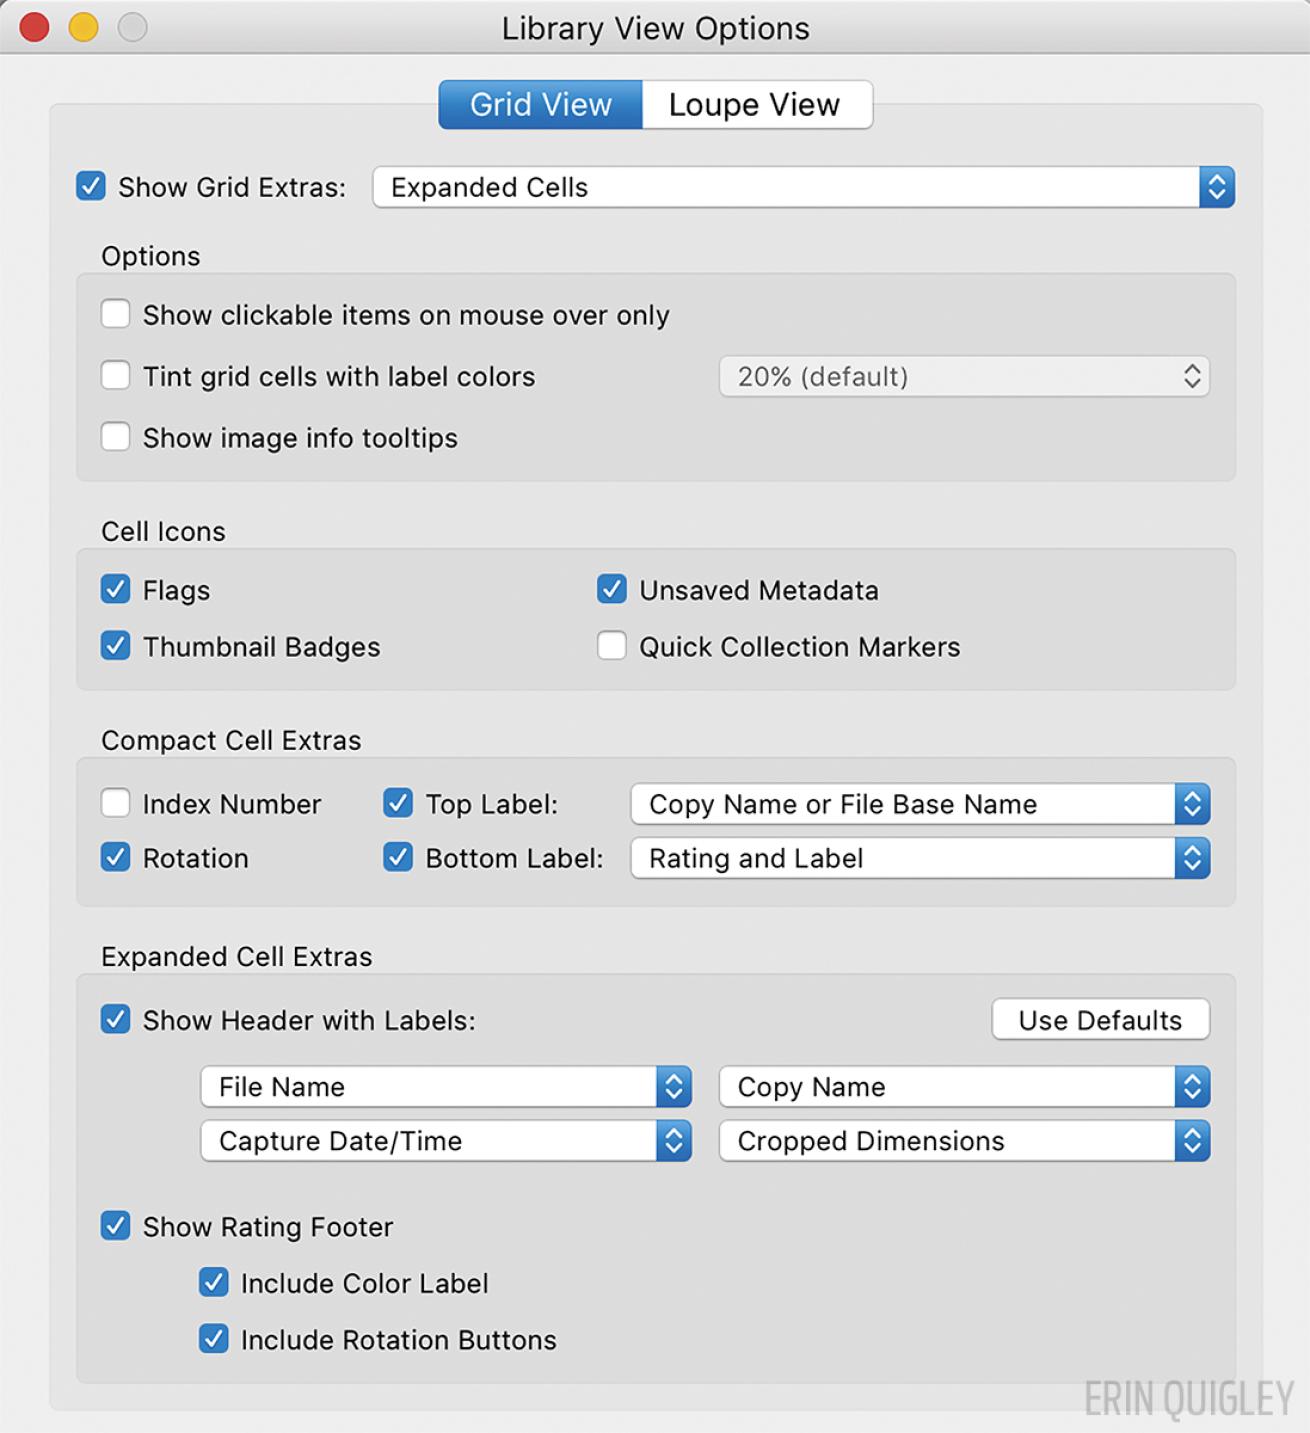
1) In the Library module, go to View > View Options, and select the Grid View tab.
This tutorial suggests using options that I select most often, but I frequently change settings depending on the kind of editing I’m doing.
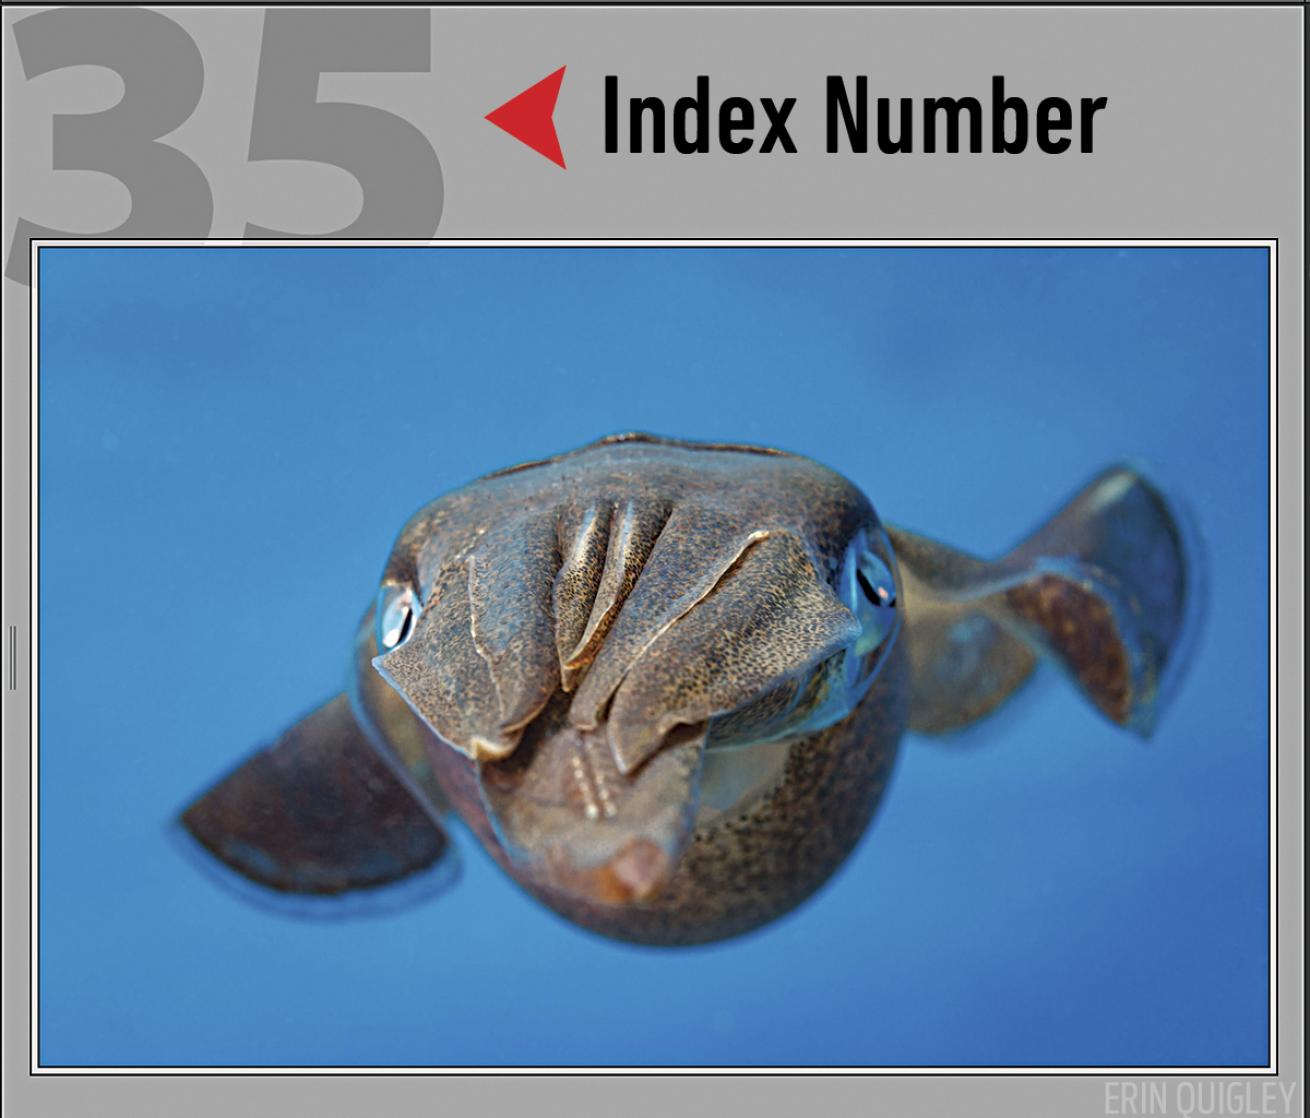
Erin QuigleyThe index numbers relate to the numerical order of images in the grid.
2) Check ON Show Grid Extras to view information and icons in the thumbnail cells. Deselecting this option shows photo thumbnails with no additional information in the Grid view.
3) Choose Expanded Cells for more thumbnail cell real estate. This option displays the most photo information available in the Grid view, including a header with up to four metadata labels. Compact Cells display smaller cells with less photo information, but more thumbnails are visible in Grid view.
4) Check OFF all three checkboxes in the Options section.
Erin QuigleyOPTION 1 FLAGS
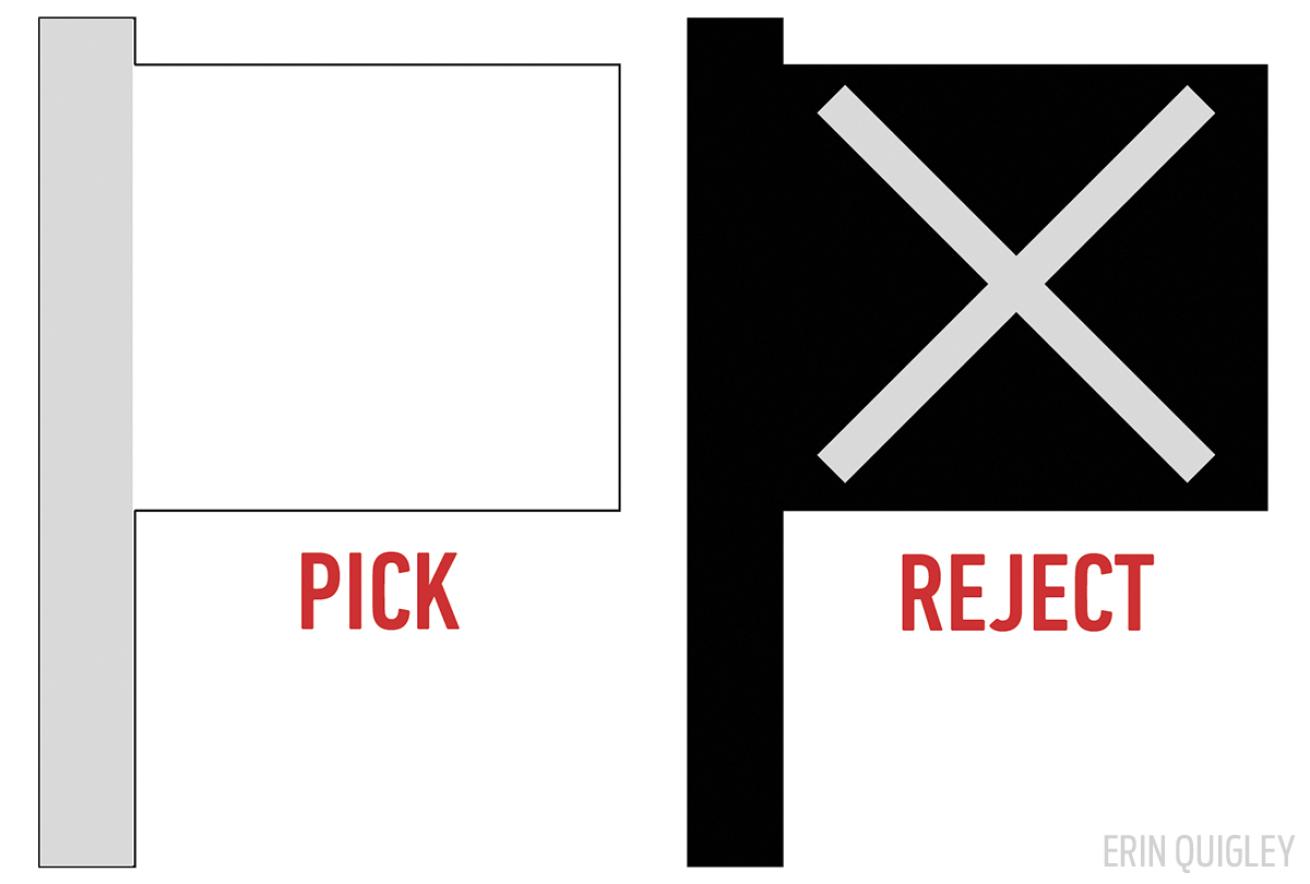
5) Check ON Flags, Thumbnail Badges and Unsaved Metadata. Flags, Thumbnail Badges and Unsaved Metadata icons let you quickly evaluate the status of each image without leaving Grid view.
Erin QuigleyOPTION 1 (5) THUMBNAIL BADGES
Erin QuigleyOPTION 1 (5) UNSAVED METADATA
Flags appear in the upper-left portion of the thumbnail frame area when an image is marked as a “Pick” (white flag) or as “Rejected” (black flag).
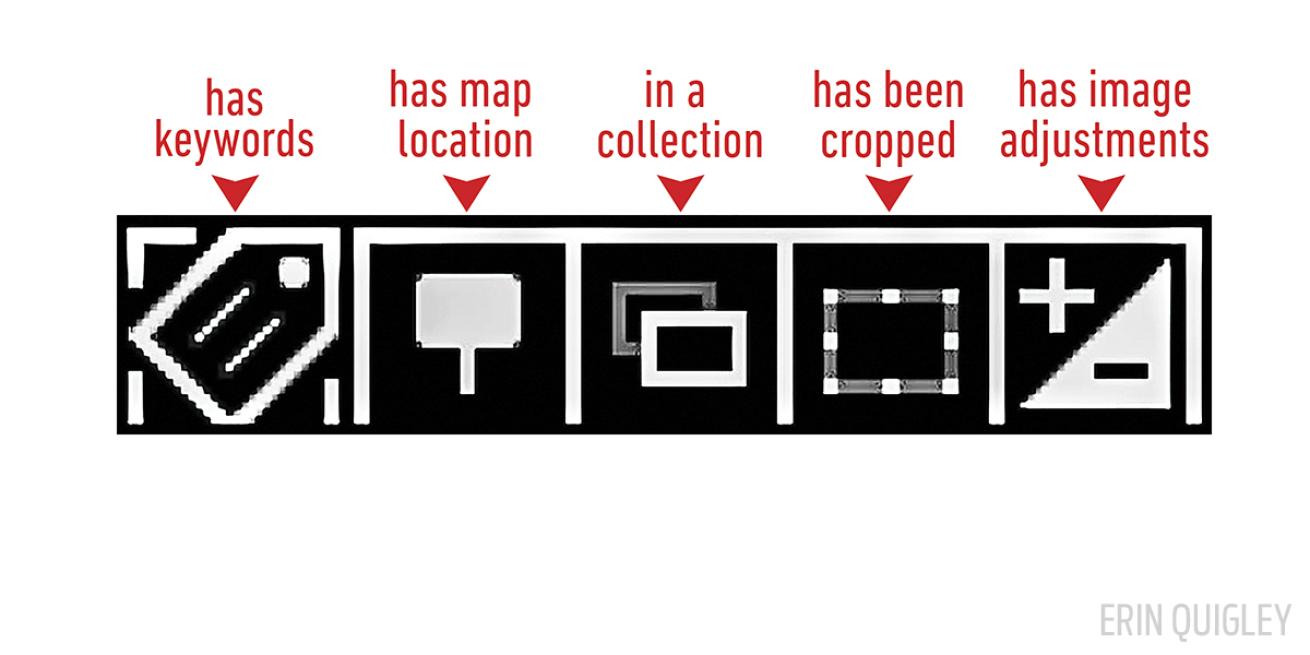
Thumbnail Badges are added to the lower right of the Image Preview area to indicate whether an image has keywords, has been cropped, has image adjustments, is in a collection, or has a map location.
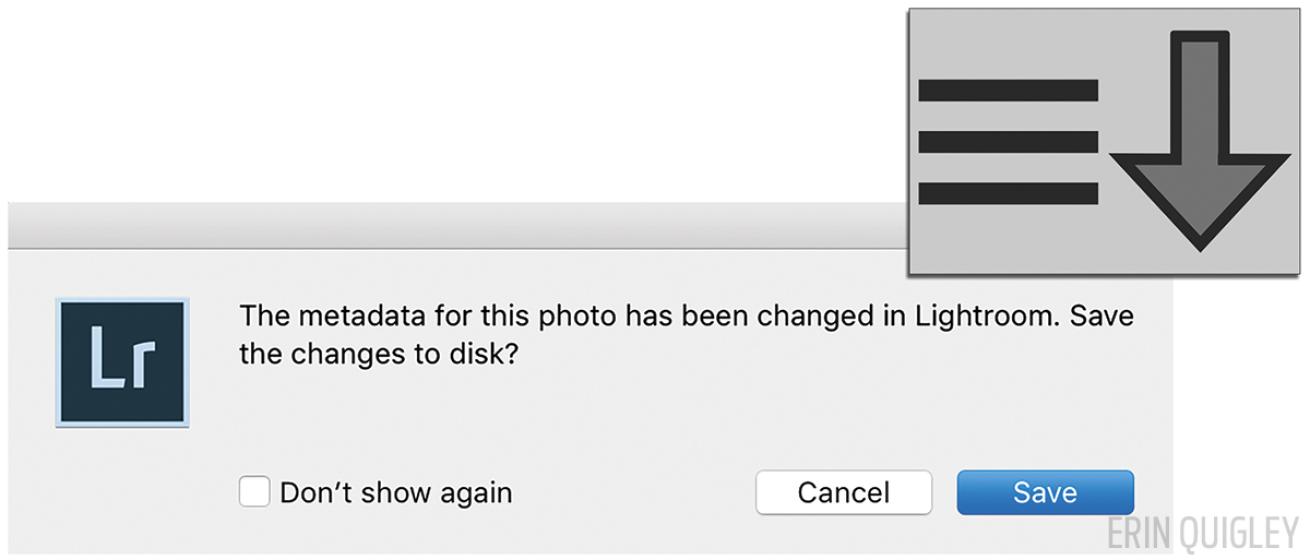
An Unsaved Metadata icon indicates that you’ve changed the image by adding keywords or other metadata like star ratings or develop module changes but haven’t saved the metadata to the file. By default, Lightroom saves all metadata automatically to the Lightroom catalog file but only for use within the Lightroom interface. For other software like Camera Raw, Photoshop and Adobe Bridge to view changes made in Lightroom, the metadata must be saved manually. When you save metadata out to a raw file, the changes are saved in an XMP sidecar file. With other file types, the metadata is embedded in the file itself. Flags, Stacks, Collections and Virtual Copies are not saved to XMP.
6) Check OFF Quick Collection Markers. They just get in the way.
7) Ignore the Compact Cell Extras panel. With Expanded Cells chosen, the Compact Cell extras are inactive.
8) Check ON Show Header with Labels.
You can choose up to four menu items to display. I typically go with File Name (Upper Left), Capture Date/Time (Lower Left), Cropped Dimensions (Lower Right) and Copy Name (Upper Right).
Erin QuigleyOPTION 1 (6-11)
9) Check ON Show Rating Footer.
10) Check ON Include Color Label.
11) Check ON Include Rotation Buttons.
OPTION 2
TRICK OUT LOUPE VIEW
Loupe view is the nice, big, zoomed in version of your photo that you see when you either press the spacebar, type “E”, click the Loupe icon in the Tool Bar, choose View > Loupe, double-click on the photo, click on one of the zoom ratios in the Navigator panel, or choose Photo > Open in Loupe. Whew!
Erin QuigleyOPTION 2 (1-4)
For as many ways as Lightroom offers to get you to Loupe view, you might as well make it worth your while by adding the option to have easy-to-read information about your image at your fingertips. Loupe view can display two different, customizable sets of information as text overlays that appear in the upper-left corner of the Preview area, or you can choose to have the overlay off as a third option.
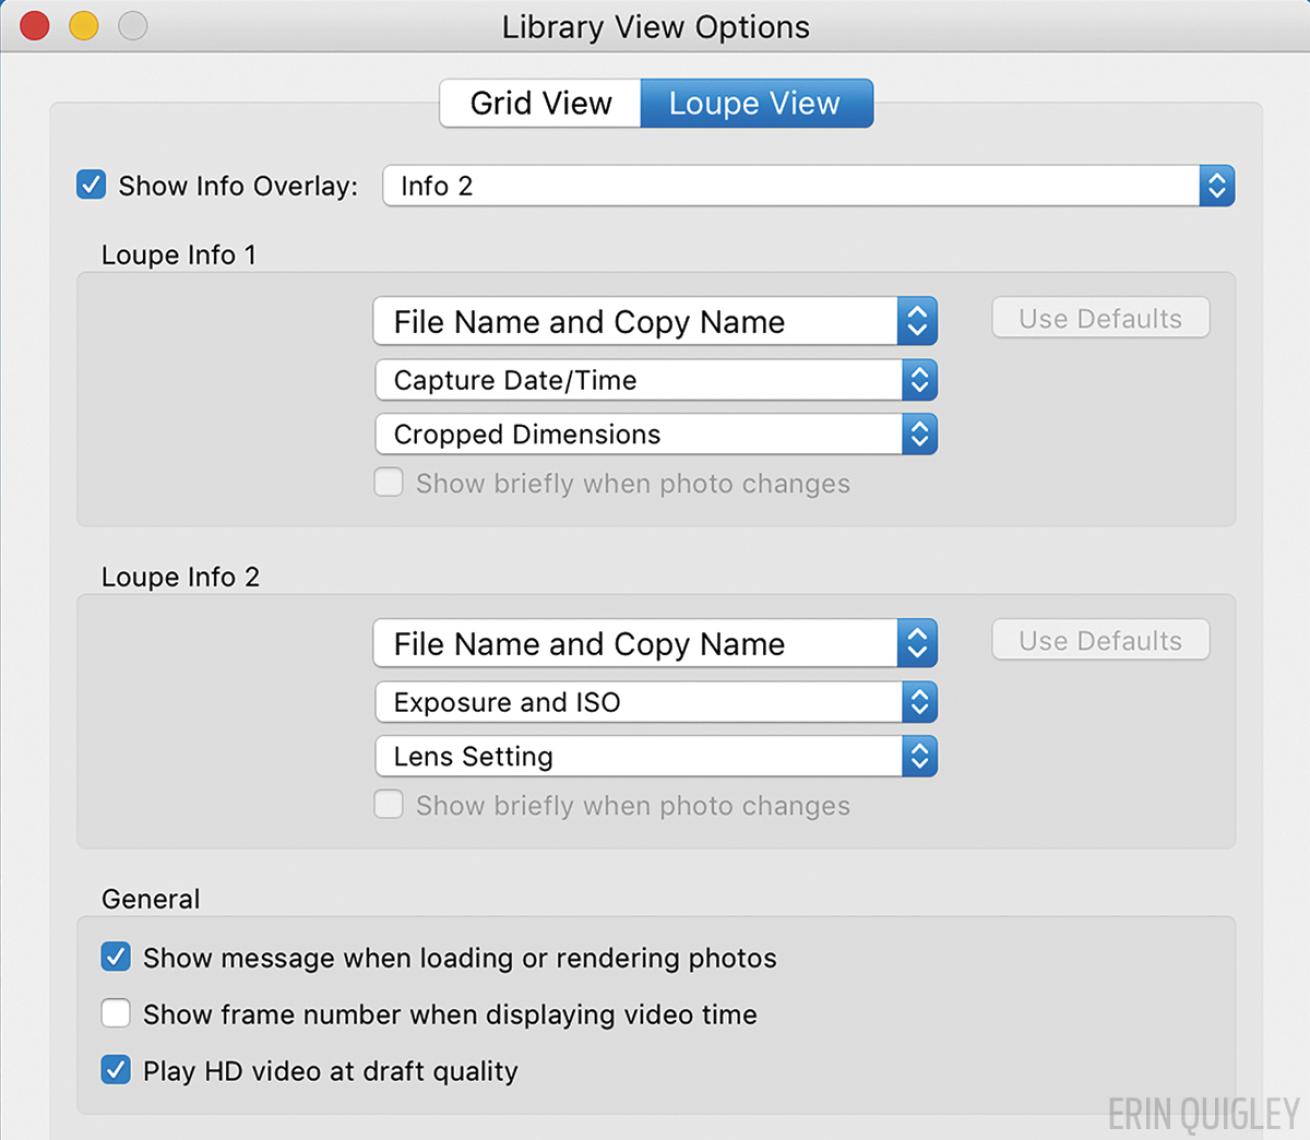
1) In the Library module, go to View > View Options and select the Loupe View tab.
2) Check ON Show Info Overlay.
3) Choose File Name, Capture Date/Time and Cropped Dimensions for Info 1.
4) Choose Camera, Exposure, and ISO and Lens Setting for Info 2. Pressing the letter “i” repeatedly while in Loupe View toggles through Info 1, Info 2 or OFF (for an image preview without the metadata overlay).
Erin QuigleyOPTION 3
OPTION 3
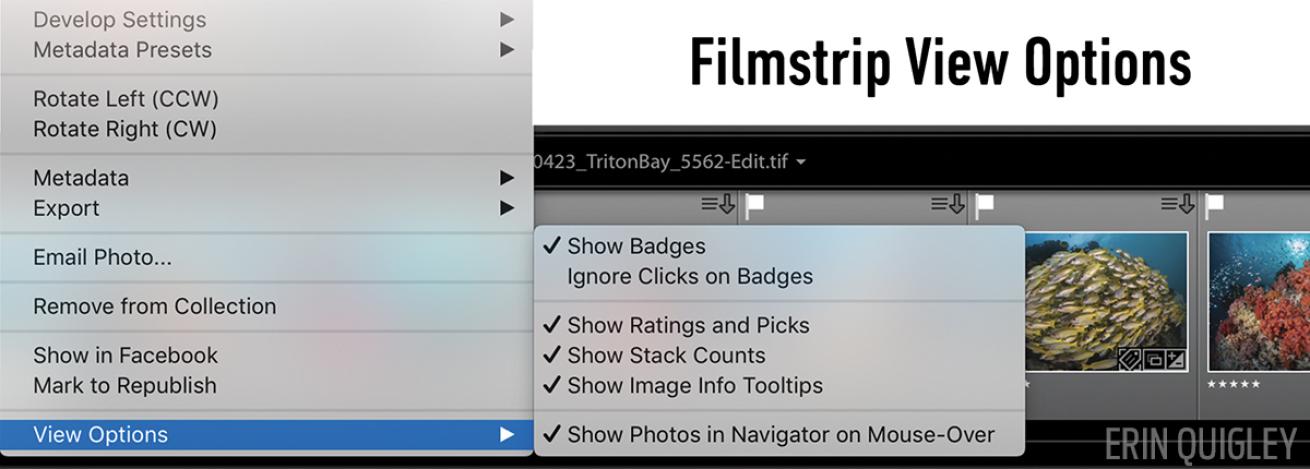
FILMSTRIP VIEW OPTIONS
The Filmstrip panel has a selection of View Options that apply only to the thumbnails in the Filmstrip.
Control-click (Mac) or right-click (PC) on a thumbnail in the Filmstrip panel to reveal the contextual menu. Click on View Options at the bottom of the list, and enable your preferred settings by checking them on. They’ll apply to the Filmstrip in both the Library and Develop modules.
Erin Quigley is an Adobe ACE- certified digital imaging consultant and an award-winning shooter. GoAskErin.com provides custom tutorials and one-on-one instruction for the underwater photographic community.