Imaging Tutorial: How to Use Lightroom For Video Editing
Lightroom is a fantastic jumping- off point for video dabblers who don’t want to miss out on all the fun of motion capture but who are primarily still shooters without the time or ambition to tackle a completely new piece of software.
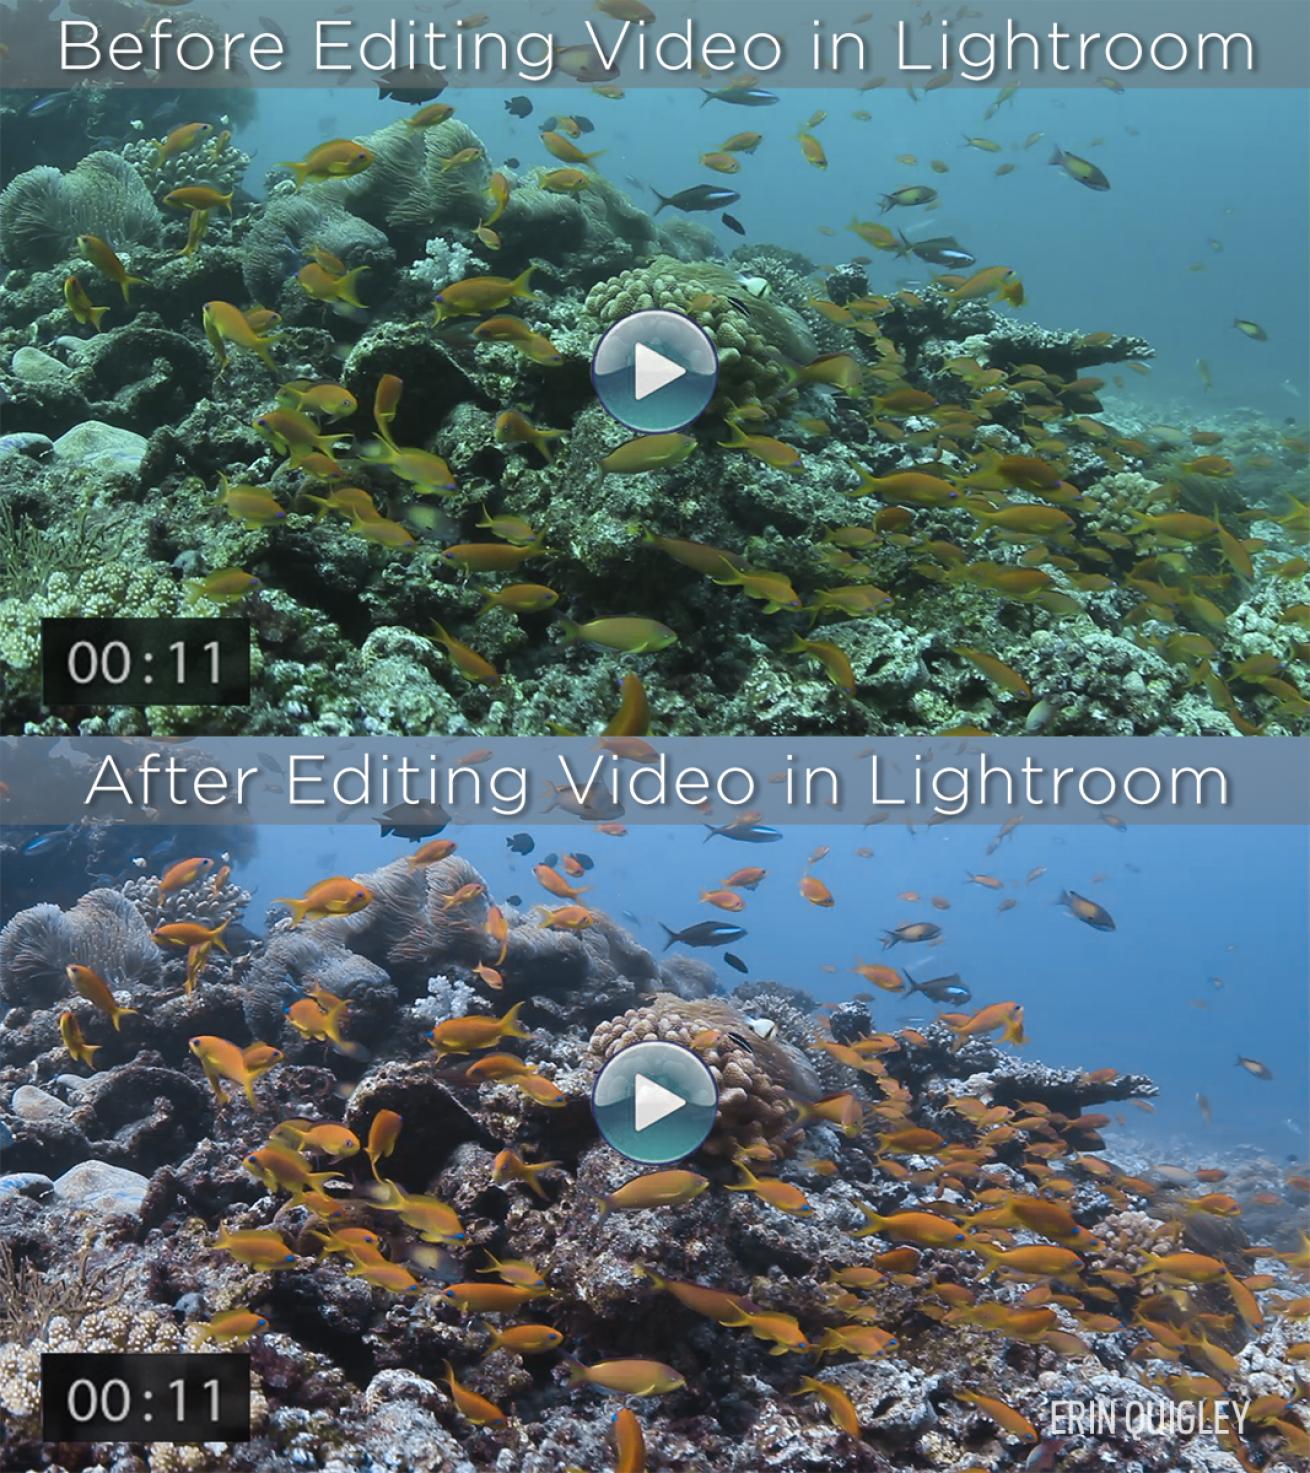
Erin QuigleyBefore & After
In the Lightroom Library, it’s easy to trim video clips, capture still frames, and even do some impressive color correction to your videos — all without having to reinvent your workflow.
STEP 1: VIEWING VIDEO IN THE LIBRARY MODULE
A. In the Lightroom Library, your video shows up in the grid as a thumbnail preview. Video thumbnails display the duration of the video clip in the lower left of the preview, so it’s easy to tell them apart from stills. Hover the cursor over a video’s thumbnail and move it from side to side to scrub through a mini preview of the video’s contents. Double-click the thumbnail, hit the spacebar, or type the keyboard shortcut “E” to see the video in Loupe view.
Erin QuigleyStep 1 (A)
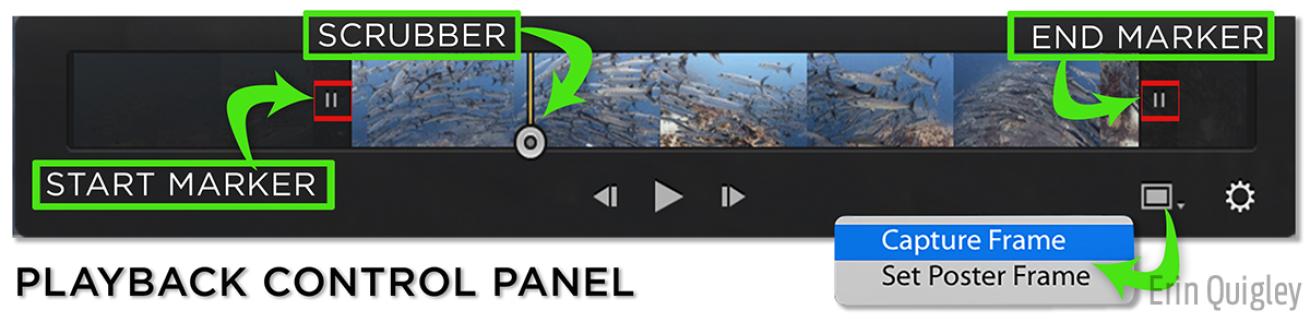
In Loupe view, video clips appear above a small timeline called the play-back control panel. Tapping the space bar will start and stop the clip, as will the standard Play and Pause buttons. Dragging the playhead (aka Current Time Indicator) lets you scrub through the video. Click the small gear icon on the far right of the playback control panel to expand the timeline, and you’ll reveal a couple of marker “handles” on either end of the clip. The handle on the left sets the Start point for the clip, and the one on the right sets the End point. To shorten the clip, drag the Start or End markers to the desired locations.
B. Just to the left of the gear icon on the timeline is the Frame button. Click it to reveal two options: “Capture Frame” and “Set Poster Frame.” A poster frame is what’s displayed in the clip’s thumbnail preview. Setting a custom poster frame is useful to identify a specific clip. For instance, if you have several similar clips of the same scene but only one in which a great hammerhead swims through, you can set the frame with the shark in it as the poster frame, making it easier to ID in the grid.

Erin QuigleyStep 1 (B)
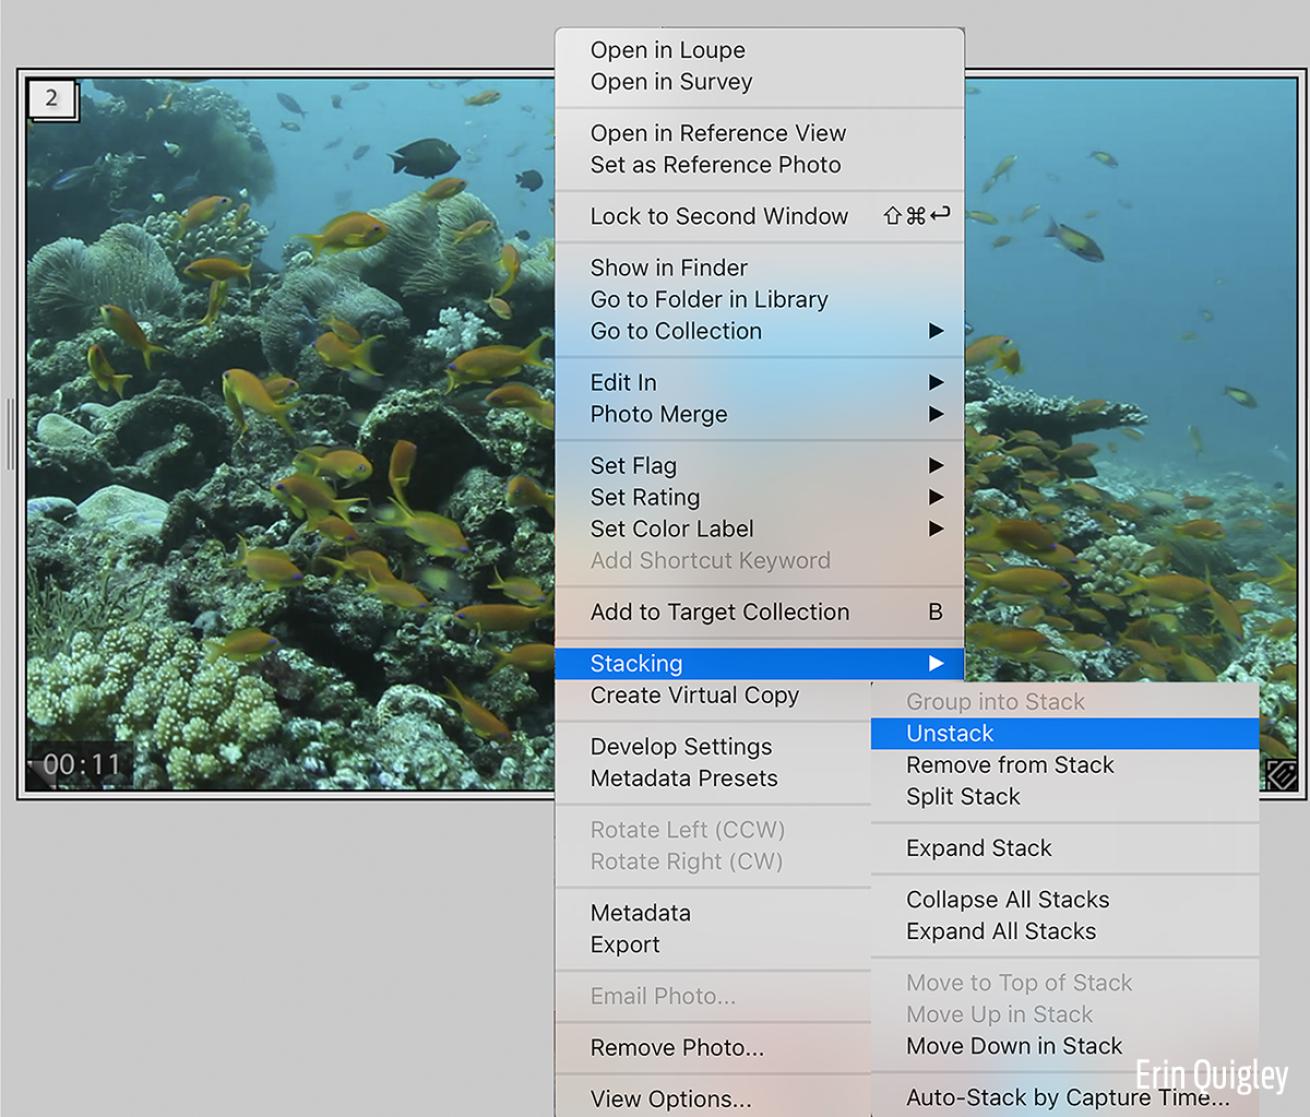
C. Capture Frame lets you pull a JPEG still frame out of the clip, in the same pixel dimensions as the video. Lightroom stacks the captured frame with the video clip. To view the captured frame, expand the stack in the Grid view of the Library module by CTRL or R-Clicking on the stack, and choose Stacking>Unstack from the contextual menu. Be sure you are not working from Previous Import in the Catalog panel, or you won’t be able to create a captured frame.
Erin QuigleyStep 1 (C)
STEP 2: PROCESSING VIDEO BY PROXY
It’s possible to make adjustments on the fly using the somewhat clumsy settings in the Quick Develop panel in the Library Module, but if you try to open video in Develop, Lightroom shuts you out. Luckily, you can take a captured still frame into Develop, process it using Lightroom’s superpowers, and then synchronize the changes back to the original video in the Library.
A. Open a video clip in Loupe View in the Library Module.
B. Find a representative frame and extract a JPEG, using Capture Frame.
C. Take the JPEG into the Develop Module and make adjustments.
D. Return to Grid View in the Library Module, and with the processed JPEG selected, CMD-click (Mac) or CTRL click (PC) on the original video file to add it to the selection. It’s important that the JPEG is selected first, before adding the video clip, so pay attention.
E. Click the “Sync Settings” button at the bottom right of the Library Module. Everything that’s grayed out doesn’t sync to video, but OMG — all the color adjustments, including White Balance, Vibrance and most, miraculously, HSL, will sync up after a few moments of video rendering.
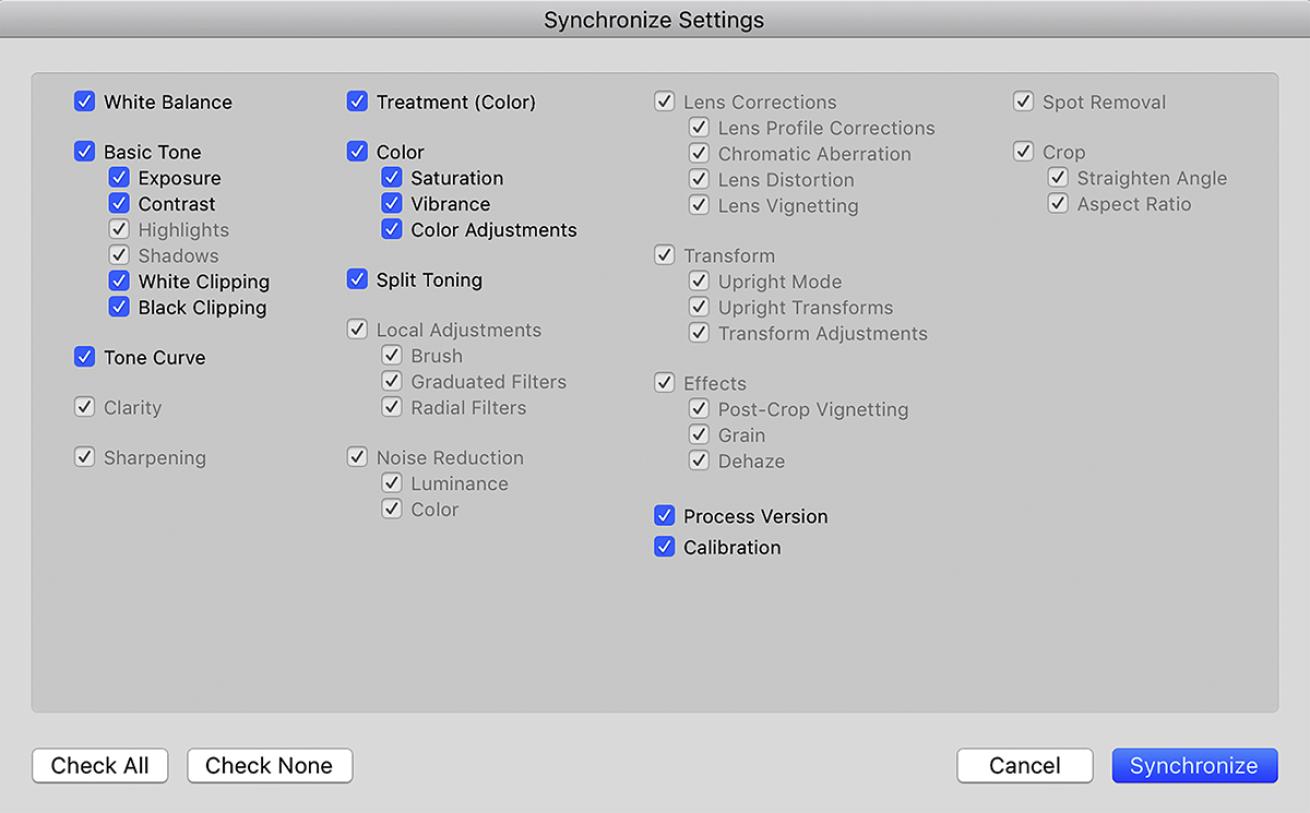
Erin QuigleyStep 2 (E)
STEP 3: EXPORTING VIDEO
A. Select the video you’d like to export, and hit the Export button at the bottom left of the Library Module.
B. In the Export Location tab, set the destination for your edited clip.
C. In the File Naming tab, click ON the “Rename To:” checkbox if you wish to rename this version of your clip. If you don’t want to rename it, leave the box unchecked.
D. In the Video tab, check ON “Include Video Files.”
E. Select one of three formats. DPX is an image sequence that can be used for transfer to another editing program; H.264 is the best all-around bet for sharing; and Original, unedited creates an exact copy of the original, with no Lightroom changes.
Erin QuigleyPro Tip
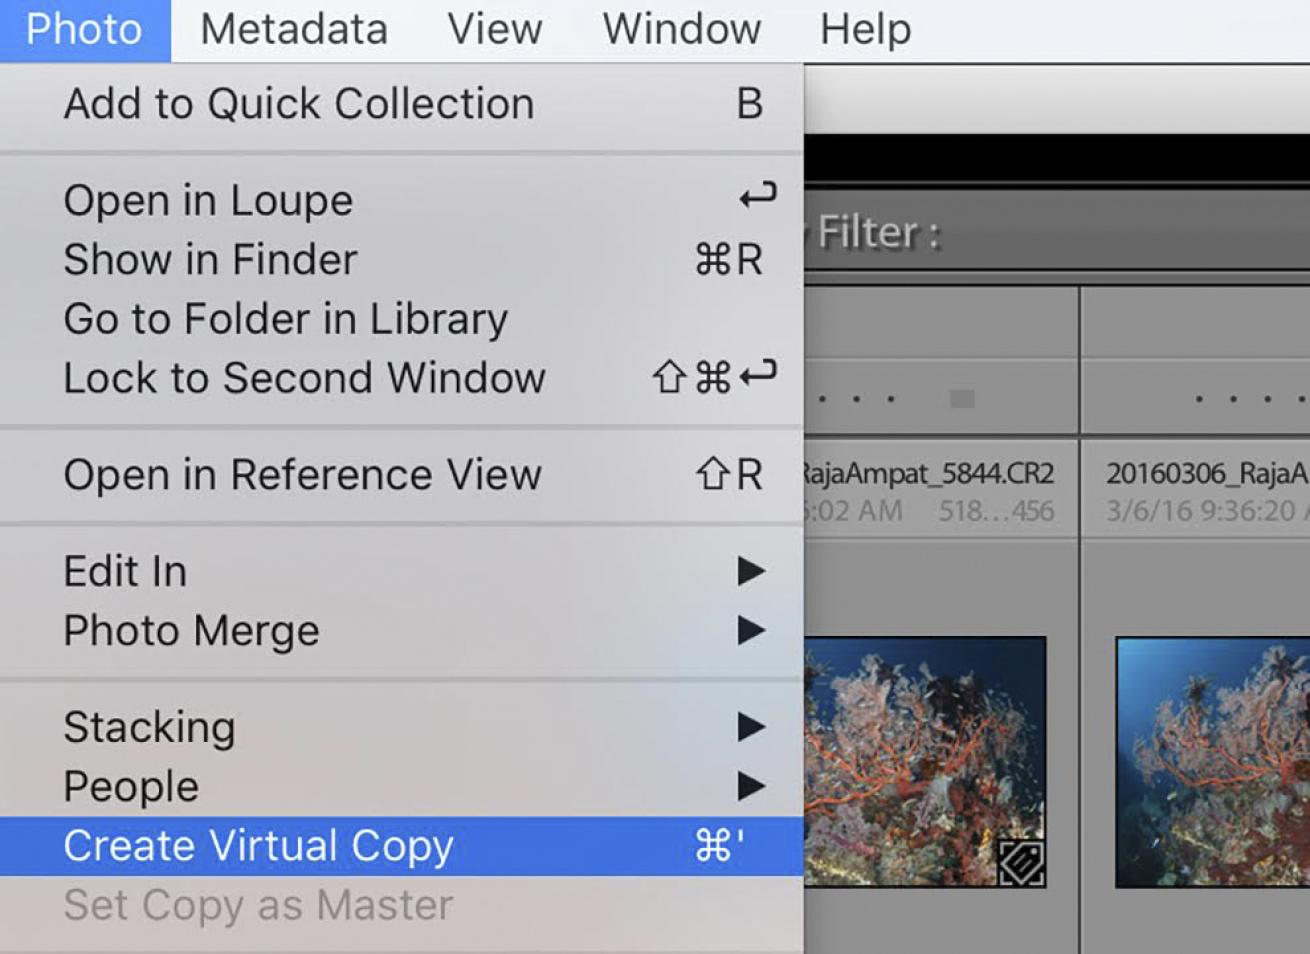
PRO TIP To create multiple clips from different sections of a single master clip, make virtual copies of the master, and set different in and out points on each copy. Creating a virtual copy doesn’t make an actual copy of the media on your drive, but you can export a virtual copy to make a physical copy. To make a virtual copy, select the original video and go to Photo>Create Virtual Copy.
See a tutorial video demonstrating this process.
» Erin Quigley is an Adobe ACE- certified digital-imaging consultant and an award-winning shooter. GoAskErin.com provides custom tutorials and one-on-one instruction for the underwater photographic community.