How The Pros Do It
Motion-Blur
Text & Photo by Stuart Westmorland
 |
Successful motion-blur imaging is all about maintaining a sharp focus on the central subject while letting the background melt into a mosaic of fluid color. Capturing these images requires timing a slow shutter speed with a delayed flash, all while panning the camera at the same speed as the subject. The panning is the easy part, especially with a graceful subject like this green sea turtle off Sipadan Island, Malaysia, but you'll need to experiment with extended shutter speeds--I find 1/15 to one second works best. The trickiest part is timing the strobes. A conventional flash always triggers at the beginning of the shutter activation, but for this type of image, you need the strobes to fire at the end of the shutter activation, a technique called rear-curtain or second-shutter sync. Nikon shooters have an advantage as all pro series Nikon cameras since the N90 film camera will perform this seamlessly with any strobe. Canon shooters will need a Heinrichs Weikamp adapter to sync with external TTL flash units. For the record, I got this shot with a Canon EOS 5D camera in a Subal housing and twin Ikelite 200 strobes set on full power. Shutter speed: 1/6 sec. at f/10, with a 100 ISO setting. For more examples, see stuartwestmorland.com.
Reef Scenes
Text & Photo by Rod Klein
||
|---|
|  |
|
Diving in Raja Ampat, Indonesia, I found myself at a site called Nusa Indah. Moving into the shallows, I spotted this large anemone with two animated clownfish, but what really captured my attention was the stream of light that seemed to pour through a cut in the rock wall in front of me. The light appeared to touch the top of the anemone and illuminate the clownfish. My challenge: Getting the camera to capture what I was seeing. The key to making this happen was using my three Inon strobes to get good color saturation in the foreground, while making a proper exposure for the background using a combination of aperture and shutter speed. I positioned the strobes so that the center strobe illuminated the center portion of the frame. To reduce backscatter, I directed the outside strobes so that only the inside edge of their beams illuminated the rest of the frame. I had all strobes on full power so I could use a relatively small aperture, f/4, to illuminate the foreground with good depth of field. Because the background area was quite dark, I used a slow shutter speed (1/25 sec.) and made sure to hold the housing very still to avoid blurring the image. For more images, see rhkuw.com.
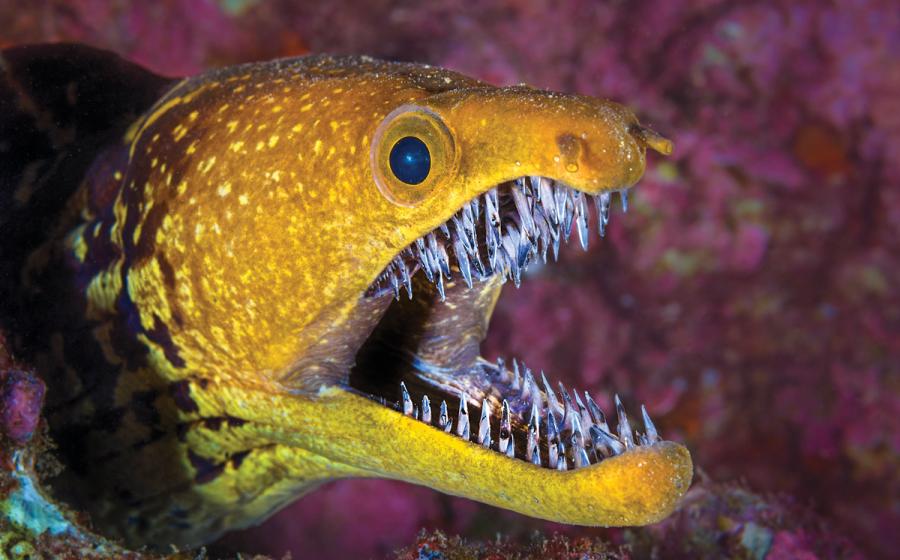
Fish Portraits
Text & Photo by Alex Mustard
||
|---|
|  |
|
Fish are certainly one of the most popular subjects of underwater pictures, but shooting fish in the ocean is not as easy as in the proverbial barrel. Fish are always on the move, darting in and out of focus, waiting for the exact moment we press the shutter to turn away and leave us snapping at their tails. The key to a good fish portrait is finding a fish that seems to want its picture taken. Wait for one that doesn't flee, then spend some time. Don't take hundreds of photos--wait for the fish to be in the right pose. Shutter lag can be minimized by pressing the shutter halfway and then waiting for the fish to face you before pressing it all the way. My favorite composition technique is shooting them from the front so that their faces are arranged in a human structure with two eyes over a nose and mouth. This allows viewers to project a human personality onto the subject. Fish can look grumpy, sad, curious and surprised. When people start mentioning emotions, you know you've captured something memorable. This photo shows a John Dory, a solitary predator, found in temperate waters from Europe to New Zealand. The pattern in its eye is a reflection of my strobes. I got this shot with a Nikon D2x, using a Sigma 150mm macro lens and a Canon 500D diopter in a Subal housing with two Inon Z240 strobes. Settings: 1/250 sec. at f/14. For more, see amustard.com.
Big Animals
Text & Photo by Amos Nachoum
 |
Big animals are moving targets, often accessible only when feeding or mating behavior draws them close to the surface, so you need to understand the behavior and previsualize the shots you want. You'll have time for this on the boat, as it may take hours of searching to find a humpback whale and her calf resting on the surface, like this pair off Tonga (inset), or to catch a squadron of sailfish herding a bait ball off Isla Mujeres, Mexico. The big challenge, however, is getting close enough to capture shots that show the animal's true size, and that's where strong swimming and free-diving skills come into play. You don't have to go deep to capture shots like these--you only need to kick down 5 or 10 feet to get on the animal's level--but you do need to keep up. Composition tip: Put something in the frame to show the animal's size--in these examples, the humpback calf and the school of bait fish help define the main subject. Finding the proper exposure settings in the ambient light of shallow water can be tricky. I usually shoot on aperture priority because, as I open the aperture, I also get a higher shutter speed to match the action. Conversely, I can stop down with a smaller aperture when the motion is slow, when I want special panning effects or when I want to enhance depth of field. To even out light and dark spots, I rely on matrix metering and will purposely underexpose by two-thirds to a full stop. And yes, I bracket every shot. My primary rig is a Canon EOS 1Ds Mark III in a Seacam housing. Depending on the situation, I'll use either a fixed 14mm wide-angle lens or a 16-35mm zoom lens. The zoom is particularly useful for filling the frame when I can't get as close to a subject as I'd like. My final piece of advice for shooting big animals: just do it. This is the most physically demanding genre of underwater photography, but it's also the most rewarding. For more images, see biganimals.com.
The Half-and-Half
Text & Photo by David Doubilet
 |
The crucial element to a powerful half-and-half image is composition. The surface part of the image should be as compelling as the water part, and I find the strongest half-and-half images are made in shallow water, where a seafloor with brilliant wave-sculpted sands or textured corals stretches away toward an underwater horizon. You'll need an extreme wide-angle lens such as a 14, 15 or 16 mm (for full frame sensor) or 10.5mm or 12-24mm (for a cropped sensor). The lens must be stopped down to f/16 or f/22 for extreme depth of field, and the housing should have an 8- or 9-inch dome to spread the surface line. Both the air and water portions should be in focus, but if one is going to slip a bit, let it be the topside. You can use a neutral density filter on top, or use strobes to match the light above and below. Here, I used two Sea & Sea YS-200 strobes at half power and bent the arms slightly down to illuminate the turtle's face. The camera was a Nikon F4 in a Nexus housing equipped with an 8-inch dome and 30mm extension ring. The key to this particular image, photographed in the Tuamotus, French Polynesia, was a Tamron 14mm f/2.8 lens that focused to 6 inches, thereby allowing me to get ultra close to the turtle and make a rather small subject dominate the frame. For more, see daviddoubilet.com.
Sharks
Text & Photo by Brandon Cole
 |
||
|---|
|  |
|
Shooting sharks requires the right tools, techniques, preparation, access and that most elusive of ingredients: luck. I recommend narrower optics over wide for most underwater shark shooting. It takes a very friendly shark to fill the frame with a 180-degree fisheye. Instead, consider fixed or zoom lenses in the 24-50mm equivalent focal-length range. In the case of this great hammerhead shot, I was using a Canon 1D Mark II camera with a 17-40mm f/4 lens that allowed me to track the sharks as they approached, changing my framing as needed. Quick-recycling Ikelite DS125 strobes helped paint in a bit of light. Camera settings on this shot were 1/250 sec. at f/9, ISO 200. I spot metered adjacent water and dialed in a 2/3-stop exposure compensation. Many shark encounters are seasonal or rely on specific behavior patterns. There's no substitute for the services of experienced guides who will ensure you're in the right place at the right time--and that you stay safe. In the case of the flying great whites off South Africa (above), operators carefully observed natural breaching attacks before they developed their seal-shaped decoy. I used a 70-200mm f/2.8 lens, on a Canon 1V camera body, exposing Kodak E200 film pushed two stops to ISO 800 for 1/2000 sec. at f/4. The low ambient light levels called for a high ISO, and metering was set to shutter priority. I prefocused on the decoy and taped the focus ring in place. And then I waited. When the shark finally jumped, it was over before I knew it. I actually missed the first jump, but I stayed in position and got this image when the shark breached again 30 seconds later. For more images, see brandoncole.com.
Motion-Blur
Text & Photo by Stuart Westmorland
Successful motion-blur imaging is all about maintaining a sharp focus on the central subject while letting the background melt into a mosaic of fluid color. Capturing these images requires timing a slow shutter speed with a delayed flash, all while panning the camera at the same speed as the subject. The panning is the easy part, especially with a graceful subject like this green sea turtle off Sipadan Island, Malaysia, but you'll need to experiment with extended shutter speeds--I find 1/15 to one second works best. The trickiest part is timing the strobes. A conventional flash always triggers at the beginning of the shutter activation, but for this type of image, you need the strobes to fire at the end of the shutter activation, a technique called rear-curtain or second-shutter sync. Nikon shooters have an advantage as all pro series Nikon cameras since the N90 film camera will perform this seamlessly with any strobe. Canon shooters will need a Heinrichs Weikamp adapter to sync with external TTL flash units. For the record, I got this shot with a Canon EOS 5D camera in a Subal housing and twin Ikelite 200 strobes set on full power. Shutter speed: 1/6 sec. at f/10, with a 100 ISO setting. For more examples, see stuartwestmorland.com.
Reef Scenes
Text & Photo by Rod Klein
Diving in Raja Ampat, Indonesia, I found myself at a site called Nusa Indah. Moving into the shallows, I spotted this large anemone with two animated clownfish, but what really captured my attention was the stream of light that seemed to pour through a cut in the rock wall in front of me. The light appeared to touch the top of the anemone and illuminate the clownfish. My challenge: Getting the camera to capture what I was seeing. The key to making this happen was using my three Inon strobes to get good color saturation in the foreground, while making a proper exposure for the background using a combination of aperture and shutter speed. I positioned the strobes so that the center strobe illuminated the center portion of the frame. To reduce backscatter, I directed the outside strobes so that only the inside edge of their beams illuminated the rest of the frame. I had all strobes on full power so I could use a relatively small aperture, f/4, to illuminate the foreground with good depth of field. Because the background area was quite dark, I used a slow shutter speed (1/25 sec.) and made sure to hold the housing very still to avoid blurring the image. For more images, see rhkuw.com.
Fish Portraits
Text & Photo by Alex Mustard
Fish are certainly one of the most popular subjects of underwater pictures, but shooting fish in the ocean is not as easy as in the proverbial barrel. Fish are always on the move, darting in and out of focus, waiting for the exact moment we press the shutter to turn away and leave us snapping at their tails. The key to a good fish portrait is finding a fish that seems to want its picture taken. Wait for one that doesn't flee, then spend some time. Don't take hundreds of photos--wait for the fish to be in the right pose. Shutter lag can be minimized by pressing the shutter halfway and then waiting for the fish to face you before pressing it all the way. My favorite composition technique is shooting them from the front so that their faces are arranged in a human structure with two eyes over a nose and mouth. This allows viewers to project a human personality onto the subject. Fish can look grumpy, sad, curious and surprised. When people start mentioning emotions, you know you've captured something memorable. This photo shows a John Dory, a solitary predator, found in temperate waters from Europe to New Zealand. The pattern in its eye is a reflection of my strobes. I got this shot with a Nikon D2x, using a Sigma 150mm macro lens and a Canon 500D diopter in a Subal housing with two Inon Z240 strobes. Settings: 1/250 sec. at f/14. For more, see amustard.com.
Big Animals
Text & Photo by Amos Nachoum
Big animals are moving targets, often accessible only when feeding or mating behavior draws them close to the surface, so you need to understand the behavior and previsualize the shots you want. You'll have time for this on the boat, as it may take hours of searching to find a humpback whale and her calf resting on the surface, like this pair off Tonga (inset), or to catch a squadron of sailfish herding a bait ball off Isla Mujeres, Mexico. The big challenge, however, is getting close enough to capture shots that show the animal's true size, and that's where strong swimming and free-diving skills come into play. You don't have to go deep to capture shots like these--you only need to kick down 5 or 10 feet to get on the animal's level--but you do need to keep up. Composition tip: Put something in the frame to show the animal's size--in these examples, the humpback calf and the school of bait fish help define the main subject. Finding the proper exposure settings in the ambient light of shallow water can be tricky. I usually shoot on aperture priority because, as I open the aperture, I also get a higher shutter speed to match the action. Conversely, I can stop down with a smaller aperture when the motion is slow, when I want special panning effects or when I want to enhance depth of field. To even out light and dark spots, I rely on matrix metering and will purposely underexpose by two-thirds to a full stop. And yes, I bracket every shot. My primary rig is a Canon EOS 1Ds Mark III in a Seacam housing. Depending on the situation, I'll use either a fixed 14mm wide-angle lens or a 16-35mm zoom lens. The zoom is particularly useful for filling the frame when I can't get as close to a subject as I'd like. My final piece of advice for shooting big animals: just do it. This is the most physically demanding genre of underwater photography, but it's also the most rewarding. For more images, see biganimals.com.
The Half-and-Half
Text & Photo by David Doubilet
The crucial element to a powerful half-and-half image is composition. The surface part of the image should be as compelling as the water part, and I find the strongest half-and-half images are made in shallow water, where a seafloor with brilliant wave-sculpted sands or textured corals stretches away toward an underwater horizon. You'll need an extreme wide-angle lens such as a 14, 15 or 16 mm (for full frame sensor) or 10.5mm or 12-24mm (for a cropped sensor). The lens must be stopped down to f/16 or f/22 for extreme depth of field, and the housing should have an 8- or 9-inch dome to spread the surface line. Both the air and water portions should be in focus, but if one is going to slip a bit, let it be the topside. You can use a neutral density filter on top, or use strobes to match the light above and below. Here, I used two Sea & Sea YS-200 strobes at half power and bent the arms slightly down to illuminate the turtle's face. The camera was a Nikon F4 in a Nexus housing equipped with an 8-inch dome and 30mm extension ring. The key to this particular image, photographed in the Tuamotus, French Polynesia, was a Tamron 14mm f/2.8 lens that focused to 6 inches, thereby allowing me to get ultra close to the turtle and make a rather small subject dominate the frame. For more, see daviddoubilet.com.
Sharks
Text & Photo by Brandon Cole
Shooting sharks requires the right tools, techniques, preparation, access and that most elusive of ingredients: luck. I recommend narrower optics over wide for most underwater shark shooting. It takes a very friendly shark to fill the frame with a 180-degree fisheye. Instead, consider fixed or zoom lenses in the 24-50mm equivalent focal-length range. In the case of this great hammerhead shot, I was using a Canon 1D Mark II camera with a 17-40mm f/4 lens that allowed me to track the sharks as they approached, changing my framing as needed. Quick-recycling Ikelite DS125 strobes helped paint in a bit of light. Camera settings on this shot were 1/250 sec. at f/9, ISO 200. I spot metered adjacent water and dialed in a 2/3-stop exposure compensation. Many shark encounters are seasonal or rely on specific behavior patterns. There's no substitute for the services of experienced guides who will ensure you're in the right place at the right time--and that you stay safe. In the case of the flying great whites off South Africa (above), operators carefully observed natural breaching attacks before they developed their seal-shaped decoy. I used a 70-200mm f/2.8 lens, on a Canon 1V camera body, exposing Kodak E200 film pushed two stops to ISO 800 for 1/2000 sec. at f/4. The low ambient light levels called for a high ISO, and metering was set to shutter priority. I prefocused on the decoy and taped the focus ring in place. And then I waited. When the shark finally jumped, it was over before I knew it. I actually missed the first jump, but I stayed in position and got this image when the shark breached again 30 seconds later. For more images, see brandoncole.com.