Point-and-Shoot: 10 Tips for Great Photos
||
|---|
|  |
|
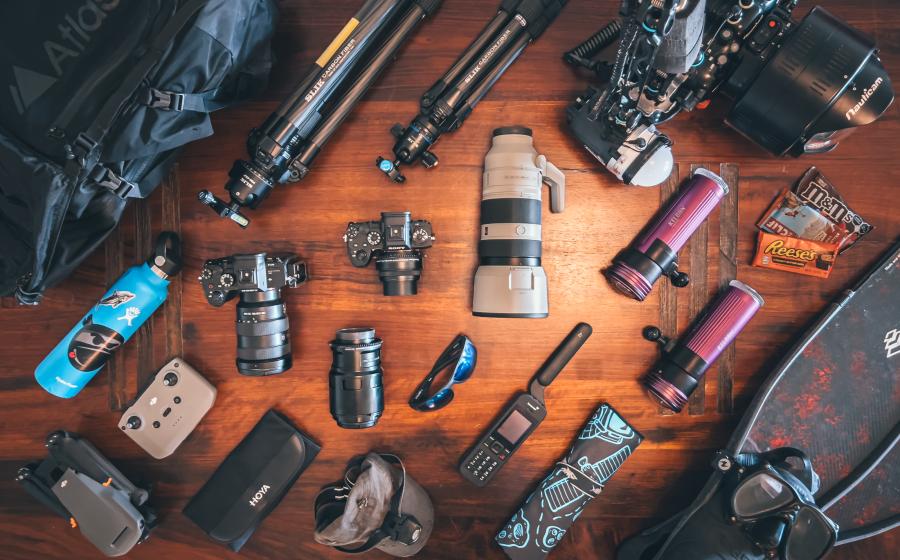
| Pioneer SeaLife Reefmaster RC|
This article does not compare the performance and merits of point-and-shoot systems. Instead, I've taken cameras that can be purchased for a street price of less than $500 (including relevant accessories), and tried to find out what I could do as a photographer to maximize their performance. The cameras I used:
-
Sea & Sea MX-5. No optional accessories available. $189.
-
Ikelite Auto 35. Includes camera, housing, A35 strobe, arm assembly and macro kit. $400.
-
Pioneer SeaLife Reefmaster RC--Pro Set. Includes camera, 3X close-up lens and SeaLife external flash ($419.95), plus Macro Wand Kit ($129.95). $549.90.
Tip 1: Minimize Backscatter
Backscatter is the most important variable in point-and-shoot photography because the strobe is near the lens with most systems. Particles in the water are front-lit by the flash and appear as specks of "backscatter." These are some of the best ways to eliminate backscatter:
-
Work in the clearest possible water.
-
If the water is dirty, find a busy, visually confusing background that may hide particles.
-
Avoid shooting into the open water column, which will accentuate particles.
-
Don't make backscatter worse with poor buoyancy skills. Avoid stirring the sand on the bottom or dislodging the silt on a sponge.
-
Use off-camera strobes (those mounted on arms), if possible. Among the cameras tested, both the Ikelite Auto 35 and the SeaLife Reefmaster RC have articulated strobe arms and a secondary slaved strobe triggered by the deflected light from the camera's built-in flash. An advantage of off-camera strobes is that when particles are illuminated, it is with rim-light rather than front-light, and the backscatter effect is minimized.
-
Position your strobe high and to the side, pointing down to the subject.
Tip 2: Find the Sweet Spot
Each primary lens or supplementary lens has an ideal "sweet spot" where performance is best.
-
The Ikelite Auto 35 and the MX-5 work well in the two- to four-foot range.
-
The Reefmaster RC requires the addition of the 3X lens to work in the two- to four-foot range, but fortunately it is an easy friction-fit optic that slips on and off under water.
-
Beyond four or five feet, none of these cameras delivers good sharpness, color or resolution, but that is generally true of underwater photography, not a flaw of these systems.
Tip 3: Shrink the Water Column
||
|---|
|  |
|
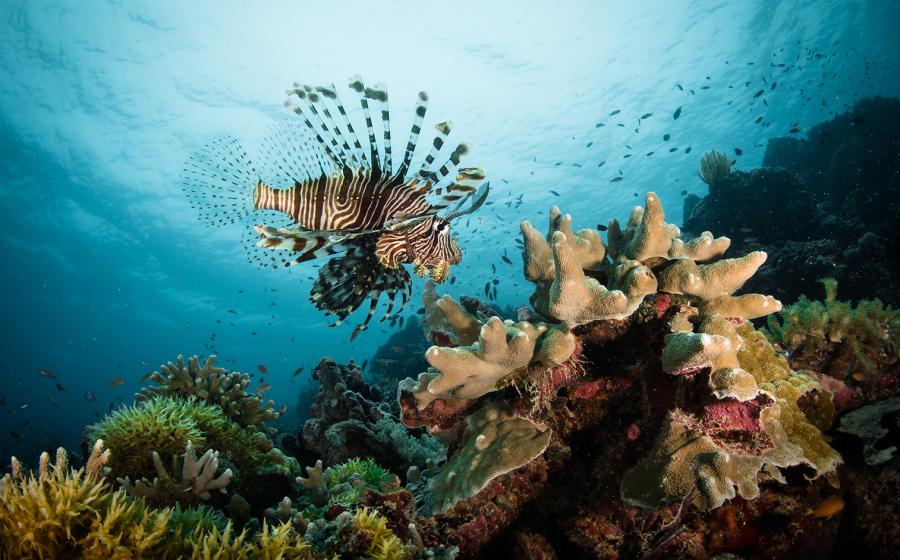
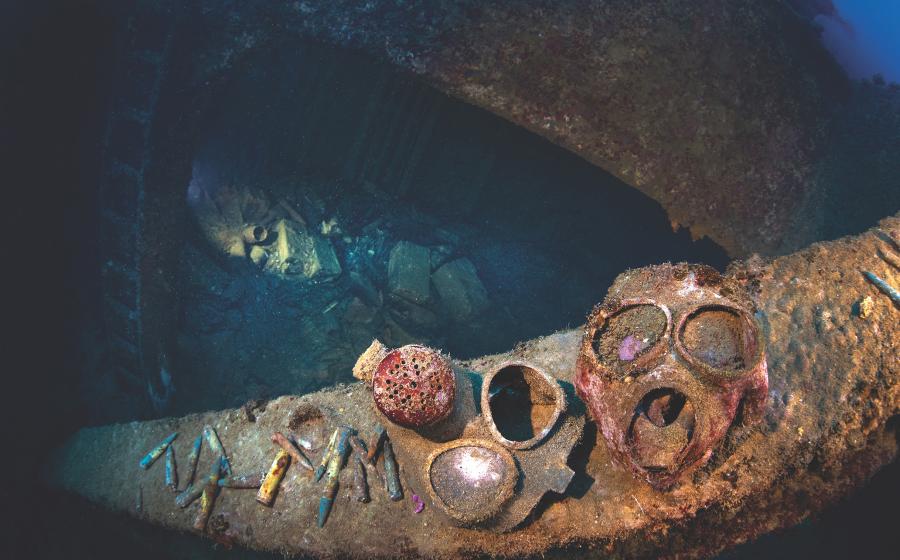
| When trying to photograph larger subjects from a distance, point-and-shoot cameras are challenged by the increased size of the water column. The colors are somewhat less intense and backscatter is apparent in the blue water at the top of the image.|
Water--800 times denser than air-- quickly absorbs light and is a massive cyan (blue-green) filter. So, to achieve rich, vibrant colors in underwater photography, you must:
-
Use artificial light (a strobe).
-
Work close. Choose a point-and-shoot that focuses to at least two feet with a primary lens, or has an easy system of adding supplemental lenses to get close.
The cameras tested have considered the essential axiom of "get close": The MX-5 uses a close-focusing primary lens. The Ikelite Auto 35 and Reefmaster RC offer accessories for working progressively closer to the subject.
However, only the Sea & Sea MX-10 offers a wide-angle lens. So, if you intend to shoot divers, shipwrecks, reef scenics or large marine mammals, the MX-10 permits working close yet still captures the large view.
Tip 4: Read the Owner's Manual
I've been diving and taking photographs for 23 years, but I still had to do some pre-dive reading to optimize performance of these systems. You must know the point of focus for the primary lens and each accessory optic. Plus, you should understand the idiosyncrasies of each of the options. For example, with the Reefmaster RC, there is a clever focus wand that helps estimate focus when using its macro lenses. I couldn't figure out how to mount the wand on the tray until I read the owner's manual.
Tip 5: Know Your Accessories
Learn the specific advantages and limitations of each accessory. For example, with the Reefmaster RC's focus wand, I needed a couple of dives to visualize the exact angle of view of both the 8X and 16X macro lenses. In contrast, the close-up framer on the Ikelite Auto 35 was intuitive from the very first use.
Tip 6: Choose the Right Subject
||
|---|
|  |
|
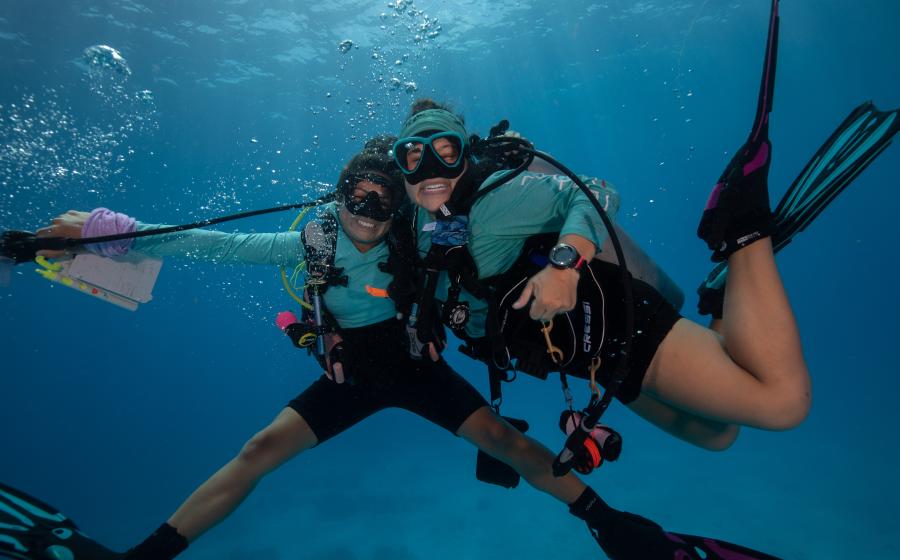
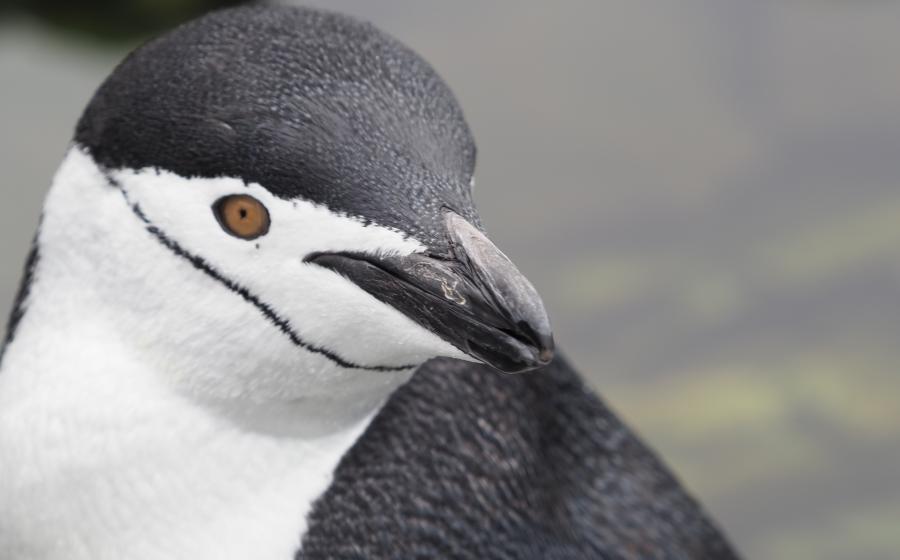
| Taken with the SeaLife Reefmaster RC, 3X close-up lens, and auxiliary strobe. The off-camera strobe on the Reefmaster RC allows superior lighting for this dolphin shot, and the 3X lens brings the subject in sharp focus from two to four feet. |
Because the best results will be obtained when working close, there is a limited universe of subjects possible with these cameras. Examples: With the MX-5's 28mm lens, a full-figure shot of divers must be taken from eight to 10 feet away, making the shot inevitably monochromatic blue. Applying the "get close" axiom, a head-and-shoulders shot taken from three feet away will be better.
A cluster of Christmas tree worms is too small for the normal lens with the Ikelite Auto 35. Trying to get close enough to fill the frame will not help, and out-of-focus pictures will result. However, the simple addition of the macro lens and framer will allow sharp focus and stunning color of coral reef macro life.
Tip 7: Know Your Limitations
These cameras are wonderful tools for what they are intended to do, but there is an obvious trade-off in price versus features. You can't vary shutter speeds to control ambient light backgrounds or change apertures to maximize depth of field, to name just a few examples. If you intend to increase your skill level and the range of images you capture, your next system should be a housed SLR, Nikonos V, Sea & Sea Motormarine II-EX, or even one of the new digital systems like the Light and Motion Tetra for the Megapixel Olympus camera.
Tip 8: Use Quality Processing
Even once the print negatives are properly finished in the C-41 process, the final print depends on the skill of the technician. Kodak has addressed this issue with its Sea Processing system, and offers an excellent processing solution for point-and-shooters. If you want the best underwater print processing available, your only choice today is Kodak's Sea Processing Lab.
Tip 9: Make Yourself Heard
Even with the local drugstore, processing improvements are possible. Ask the local lab technician to reprint. Tell him/her what color the water, fish or sponge should be. Most local processors rarely see underwater photos and even fewer have ever been diving.
Tip 10: Use Print Film
Point-and-shoot cameras don't have advanced metering systems and need the exposure latitude of print film. Shooting slides with a point-and-shoot will be an exercise in frustration.
Point-and-Shoot Workshop
||
|---|
|  |
|
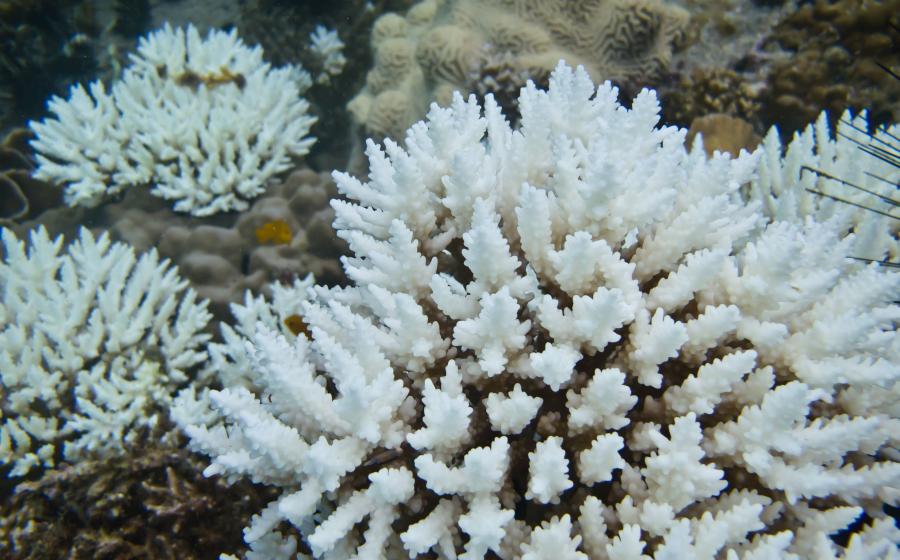
This series of four photos taken with the SeaLife Reefmaster RC camera and external flash shows the tremendous effect water has on color saturation. In the first photo, no close-up lens was used and the subject is approximately five feet away. Note the dull, muted colors. In the second photo, the 3X close-up lens allowed the subject to be captured in sharp focus from only two feet away.
The progressively closer third and fourth photos were taken with the 8X and 16X macro lenses.
I Just Want to Try Underwater Photography--How Much Should I Spend?
It all depends on your goal:
Goal -- Souvenir snapshots.
Option -- Single-use cameras.
If you only want to shoot a couple of rolls on your dive holiday, and really want little more than souvenir snapshots, maybe a $20 disposable ("single-use") camera is all you need. Depth restrictions on these cameras are usually around 20 feet, so these are for shallow reef and snorkeling only.
For deeper water, the Ikelite Aquashot 3 ($60) is an excellent choice. This clever housing accommodates Kodak, Fuji or Ikelite single-use 35mm flash cameras or the Kodak single-use Funsaver APS camera and makes very basic underwater photography affordable and reasonably hassle-free.
Goal -- Quality underwater photos of small to mid-sized subjects.
Option -- A simple point-and-shoot camera.
One of the best values is the Sea & Sea MX-5: for about $189, you get a sharp glass 28mm lens, built-in motor drive, built-in flash, depth capability to 120 feet, and clever ergonomic features like a viewfinder that folds down to be a lens protector and automatic rewind (plus mid-roll rewind). This camera is the epitome of point-and-shoot simplicity. Yet the MX-5 does not pretend to be an advanced system camera. It has no macro or wide-angle accessories, nor does it offer a supplementary strobe. What it does, it does very well. It gives good pictures of small to medium-sized reef creatures from an optimal distance of two to four feet, ideally in clear water.
Goal -- Quality underwater photos of a variety of subjects.
Option -- The point-and-shoot camera systems.
In this test, both the SeaLife Reefmaster RC and Ikelite Auto 35 have the possibility of adding an external strobe and close-up capability.
Only the Sea & Sea MX-10 gives you the choice of a wide-angle lens as well as macro and a standard lens (total system price of $798).
If you have questions about underwater photography, address them to Viewfinder editor Stephen Frink at [email protected].
|| |---|
||
| Pioneer SeaLife Reefmaster RC|
This article does not compare the performance and merits of point-and-shoot systems. Instead, I've taken cameras that can be purchased for a street price of less than $500 (including relevant accessories), and tried to find out what I could do as a photographer to maximize their performance. The cameras I used:
Sea & Sea MX-5. No optional accessories available. $189.
Ikelite Auto 35. Includes camera, housing, A35 strobe, arm assembly and macro kit. $400.
Pioneer SeaLife Reefmaster RC--Pro Set. Includes camera, 3X close-up lens and SeaLife external flash ($419.95), plus Macro Wand Kit ($129.95). $549.90.
Tip 1: Minimize Backscatter
Backscatter is the most important variable in point-and-shoot photography because the strobe is near the lens with most systems. Particles in the water are front-lit by the flash and appear as specks of "backscatter." These are some of the best ways to eliminate backscatter:
Work in the clearest possible water.
If the water is dirty, find a busy, visually confusing background that may hide particles.
Avoid shooting into the open water column, which will accentuate particles.
Don't make backscatter worse with poor buoyancy skills. Avoid stirring the sand on the bottom or dislodging the silt on a sponge.
Use off-camera strobes (those mounted on arms), if possible. Among the cameras tested, both the Ikelite Auto 35 and the SeaLife Reefmaster RC have articulated strobe arms and a secondary slaved strobe triggered by the deflected light from the camera's built-in flash. An advantage of off-camera strobes is that when particles are illuminated, it is with rim-light rather than front-light, and the backscatter effect is minimized.
Position your strobe high and to the side, pointing down to the subject.
Tip 2: Find the Sweet Spot
Each primary lens or supplementary lens has an ideal "sweet spot" where performance is best.
The Ikelite Auto 35 and the MX-5 work well in the two- to four-foot range.
The Reefmaster RC requires the addition of the 3X lens to work in the two- to four-foot range, but fortunately it is an easy friction-fit optic that slips on and off under water.
Beyond four or five feet, none of these cameras delivers good sharpness, color or resolution, but that is generally true of underwater photography, not a flaw of these systems.
Tip 3: Shrink the Water Column
|| |---|
||
| When trying to photograph larger subjects from a distance, point-and-shoot cameras are challenged by the increased size of the water column. The colors are somewhat less intense and backscatter is apparent in the blue water at the top of the image.|
Water--800 times denser than air-- quickly absorbs light and is a massive cyan (blue-green) filter. So, to achieve rich, vibrant colors in underwater photography, you must:
Use artificial light (a strobe).
Work close. Choose a point-and-shoot that focuses to at least two feet with a primary lens, or has an easy system of adding supplemental lenses to get close.
The cameras tested have considered the essential axiom of "get close": The MX-5 uses a close-focusing primary lens. The Ikelite Auto 35 and Reefmaster RC offer accessories for working progressively closer to the subject.
However, only the Sea & Sea MX-10 offers a wide-angle lens. So, if you intend to shoot divers, shipwrecks, reef scenics or large marine mammals, the MX-10 permits working close yet still captures the large view.
Tip 4: Read the Owner's Manual
I've been diving and taking photographs for 23 years, but I still had to do some pre-dive reading to optimize performance of these systems. You must know the point of focus for the primary lens and each accessory optic. Plus, you should understand the idiosyncrasies of each of the options. For example, with the Reefmaster RC, there is a clever focus wand that helps estimate focus when using its macro lenses. I couldn't figure out how to mount the wand on the tray until I read the owner's manual.
Tip 5: Know Your Accessories
Learn the specific advantages and limitations of each accessory. For example, with the Reefmaster RC's focus wand, I needed a couple of dives to visualize the exact angle of view of both the 8X and 16X macro lenses. In contrast, the close-up framer on the Ikelite Auto 35 was intuitive from the very first use.
Tip 6: Choose the Right Subject
|| |---|
||
| Taken with the SeaLife Reefmaster RC, 3X close-up lens, and auxiliary strobe. The off-camera strobe on the Reefmaster RC allows superior lighting for this dolphin shot, and the 3X lens brings the subject in sharp focus from two to four feet. |
Because the best results will be obtained when working close, there is a limited universe of subjects possible with these cameras. Examples: With the MX-5's 28mm lens, a full-figure shot of divers must be taken from eight to 10 feet away, making the shot inevitably monochromatic blue. Applying the "get close" axiom, a head-and-shoulders shot taken from three feet away will be better.
A cluster of Christmas tree worms is too small for the normal lens with the Ikelite Auto 35. Trying to get close enough to fill the frame will not help, and out-of-focus pictures will result. However, the simple addition of the macro lens and framer will allow sharp focus and stunning color of coral reef macro life.
Tip 7: Know Your Limitations
These cameras are wonderful tools for what they are intended to do, but there is an obvious trade-off in price versus features. You can't vary shutter speeds to control ambient light backgrounds or change apertures to maximize depth of field, to name just a few examples. If you intend to increase your skill level and the range of images you capture, your next system should be a housed SLR, Nikonos V, Sea & Sea Motormarine II-EX, or even one of the new digital systems like the Light and Motion Tetra for the Megapixel Olympus camera.
Tip 8: Use Quality Processing
Even once the print negatives are properly finished in the C-41 process, the final print depends on the skill of the technician. Kodak has addressed this issue with its Sea Processing system, and offers an excellent processing solution for point-and-shooters. If you want the best underwater print processing available, your only choice today is Kodak's Sea Processing Lab.
Tip 9: Make Yourself Heard
Even with the local drugstore, processing improvements are possible. Ask the local lab technician to reprint. Tell him/her what color the water, fish or sponge should be. Most local processors rarely see underwater photos and even fewer have ever been diving.
Tip 10: Use Print Film
Point-and-shoot cameras don't have advanced metering systems and need the exposure latitude of print film. Shooting slides with a point-and-shoot will be an exercise in frustration.
Point-and-Shoot Workshop
|| |---|
||
This series of four photos taken with the SeaLife Reefmaster RC camera and external flash shows the tremendous effect water has on color saturation. In the first photo, no close-up lens was used and the subject is approximately five feet away. Note the dull, muted colors. In the second photo, the 3X close-up lens allowed the subject to be captured in sharp focus from only two feet away.
The progressively closer third and fourth photos were taken with the 8X and 16X macro lenses.
I Just Want to Try Underwater Photography--How Much Should I Spend?
It all depends on your goal:
Goal -- Souvenir snapshots.
Option -- Single-use cameras.
If you only want to shoot a couple of rolls on your dive holiday, and really want little more than souvenir snapshots, maybe a $20 disposable ("single-use") camera is all you need. Depth restrictions on these cameras are usually around 20 feet, so these are for shallow reef and snorkeling only.
For deeper water, the Ikelite Aquashot 3 ($60) is an excellent choice. This clever housing accommodates Kodak, Fuji or Ikelite single-use 35mm flash cameras or the Kodak single-use Funsaver APS camera and makes very basic underwater photography affordable and reasonably hassle-free.
Goal -- Quality underwater photos of small to mid-sized subjects.
Option -- A simple point-and-shoot camera.
One of the best values is the Sea & Sea MX-5: for about $189, you get a sharp glass 28mm lens, built-in motor drive, built-in flash, depth capability to 120 feet, and clever ergonomic features like a viewfinder that folds down to be a lens protector and automatic rewind (plus mid-roll rewind). This camera is the epitome of point-and-shoot simplicity. Yet the MX-5 does not pretend to be an advanced system camera. It has no macro or wide-angle accessories, nor does it offer a supplementary strobe. What it does, it does very well. It gives good pictures of small to medium-sized reef creatures from an optimal distance of two to four feet, ideally in clear water.
Goal -- Quality underwater photos of a variety of subjects.
Option -- The point-and-shoot camera systems.
In this test, both the SeaLife Reefmaster RC and Ikelite Auto 35 have the possibility of adding an external strobe and close-up capability.
Only the Sea & Sea MX-10 gives you the choice of a wide-angle lens as well as macro and a standard lens (total system price of $798).
If you have questions about underwater photography, address them to Viewfinder editor Stephen Frink at [email protected].