Photography Tutorial: How To Get Better Shark Photos Underwater
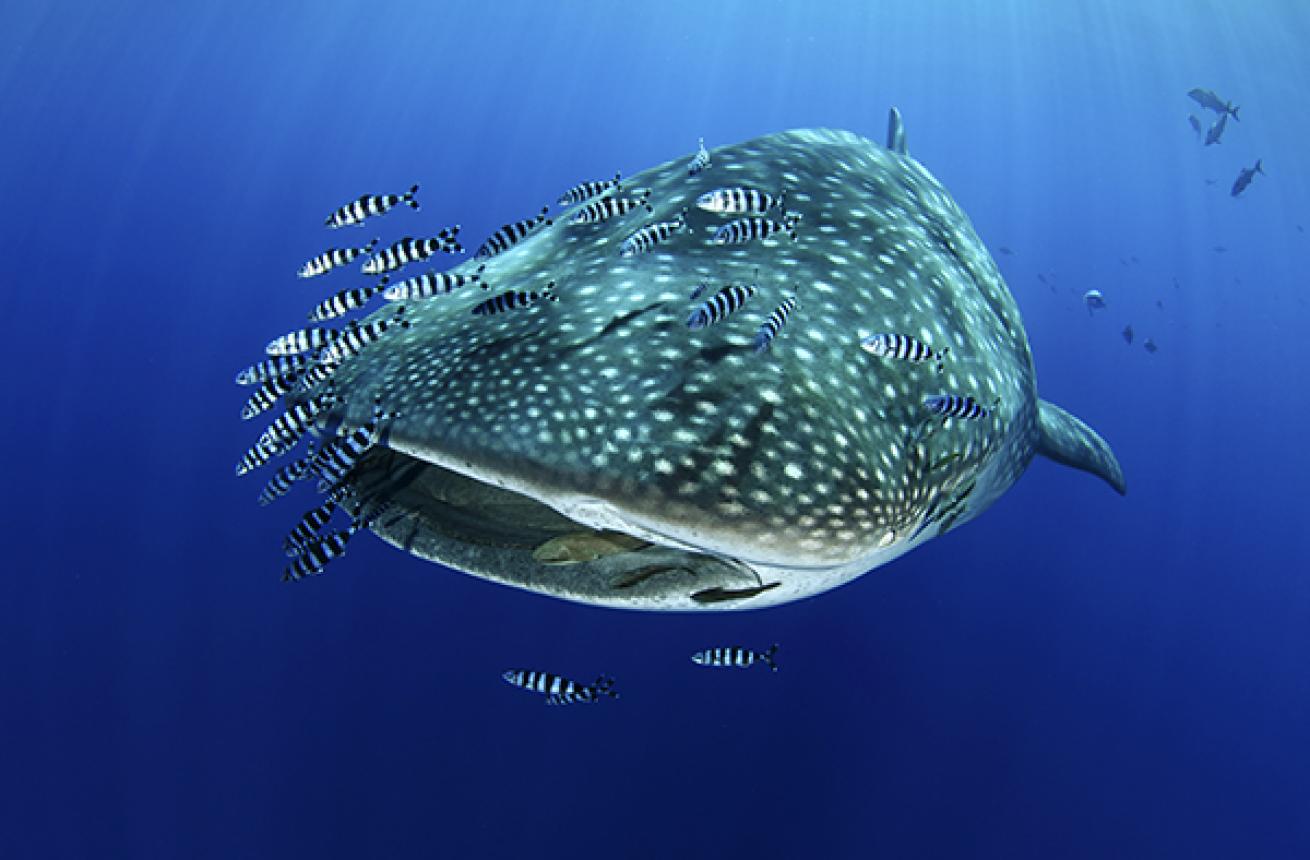
Few subjects are more intense or satisfying to photograph than sharks.
For most people, images of sharks communicate mystery, awe and a bit of apprehension about the ocean environment.
The reality is that sharks are the ones at risk, due to relentless and unsustainable fishing, and they deserve to be celebrated instead of feared.
1. CHOOSE THE RIGHT OPTIC In general, shark photography benefits from wide-angle lenses, though macro lenses can be used for interesting detail images of eyes and skin textures.
Fisheye lenses are essential for super-wide photography when the action is close, especially if you want to capture multiple animals in the frame. Mid-range zooms like the 16-35mm on full frame cameras, or the 9-18mm on Micro 4/3 cameras come in handy for shark portraiture, where distortion is not desirable, as well with more skittish sharks where the reach is absolutely needed.
2. SET YOUR STROBES Your images will benefit by keeping your strobe arms fairly wide and using a strobe with power that can be dialed down.
When sharks make an extremely tight pass, it’s all too easy to blow out critical highlight detail in their faces and bright undersides. Sharks like the hammerheads of Galapagos and Cocos do not come as close to divers on open circuit, and a higher strobe power may be needed in order to throw enough light on them.
3. DIALING IN EXPOSURE Balancing the ambient light with the foreground is always crucial to successful underwater wide-angle photography. This is especially so with shark images, which have more complexity by adding a moving subject to the mix. The fastest shutter speed that your strobes will sync with is ideal in order to freeze the motion of a moving shark and capture crisp detail.
4. LOCK YOUR FOCUS In a feeding situation, it’s often fairly consistent to predict where sharks will pass. It helps to pre-set and lock focus on a static object, or on your fin. When the action heats up, the last thing you want is your camera’s autofocus hunting, trying to find a moving subject. Just remember to update your focus as soon as the typical distance between your camera and subject changes.
5. DITCH YOUR VIEW FINDER Once you get comfortable with pre-setting your focus, you’re ready leave your viewfinder behind and start taking images by instinct. As you begin to understand the field of view of your various lenses, you’ll be able to frame fairly accurately by pointing your camera. This technique is very useful in any high-adrenaline, big-animal situation, as it’s the photographer’s own safety that is the number one priority.
Sterling Zumbrunn
Few subjects are more intense or satisfying to photograph than sharks.
For most people, images of sharks communicate mystery, awe and a bit of apprehension about the ocean environment.
The reality is that sharks are the ones at risk, due to relentless and unsustainable fishing, and they deserve to be celebrated instead of feared.
1. CHOOSE THE RIGHT OPTIC In general, shark photography benefits from wide-angle lenses, though macro lenses can be used for interesting detail images of eyes and skin textures.
Fisheye lenses are essential for super-wide photography when the action is close, especially if you want to capture multiple animals in the frame. Mid-range zooms like the 16-35mm on full frame cameras, or the 9-18mm on Micro 4/3 cameras come in handy for shark portraiture, where distortion is not desirable, as well with more skittish sharks where the reach is absolutely needed.
2. SET YOUR STROBES Your images will benefit by keeping your strobe arms fairly wide and using a strobe with power that can be dialed down.
When sharks make an extremely tight pass, it’s all too easy to blow out critical highlight detail in their faces and bright undersides. Sharks like the hammerheads of Galapagos and Cocos do not come as close to divers on open circuit, and a higher strobe power may be needed in order to throw enough light on them.
Sterling Zumbrunn
3. DIALING IN EXPOSURE Balancing the ambient light with the foreground is always crucial to successful underwater wide-angle photography. This is especially so with shark images, which have more complexity by adding a moving subject to the mix. The fastest shutter speed that your strobes will sync with is ideal in order to freeze the motion of a moving shark and capture crisp detail.
4. LOCK YOUR FOCUS In a feeding situation, it’s often fairly consistent to predict where sharks will pass. It helps to pre-set and lock focus on a static object, or on your fin. When the action heats up, the last thing you want is your camera’s autofocus hunting, trying to find a moving subject. Just remember to update your focus as soon as the typical distance between your camera and subject changes.
5. DITCH YOUR VIEW FINDER Once you get comfortable with pre-setting your focus, you’re ready leave your viewfinder behind and start taking images by instinct. As you begin to understand the field of view of your various lenses, you’ll be able to frame fairly accurately by pointing your camera. This technique is very useful in any high-adrenaline, big-animal situation, as it’s the photographer’s own safety that is the number one priority.