Photoshop Tutorial: How To Remove Backscatter from Underwater Photos
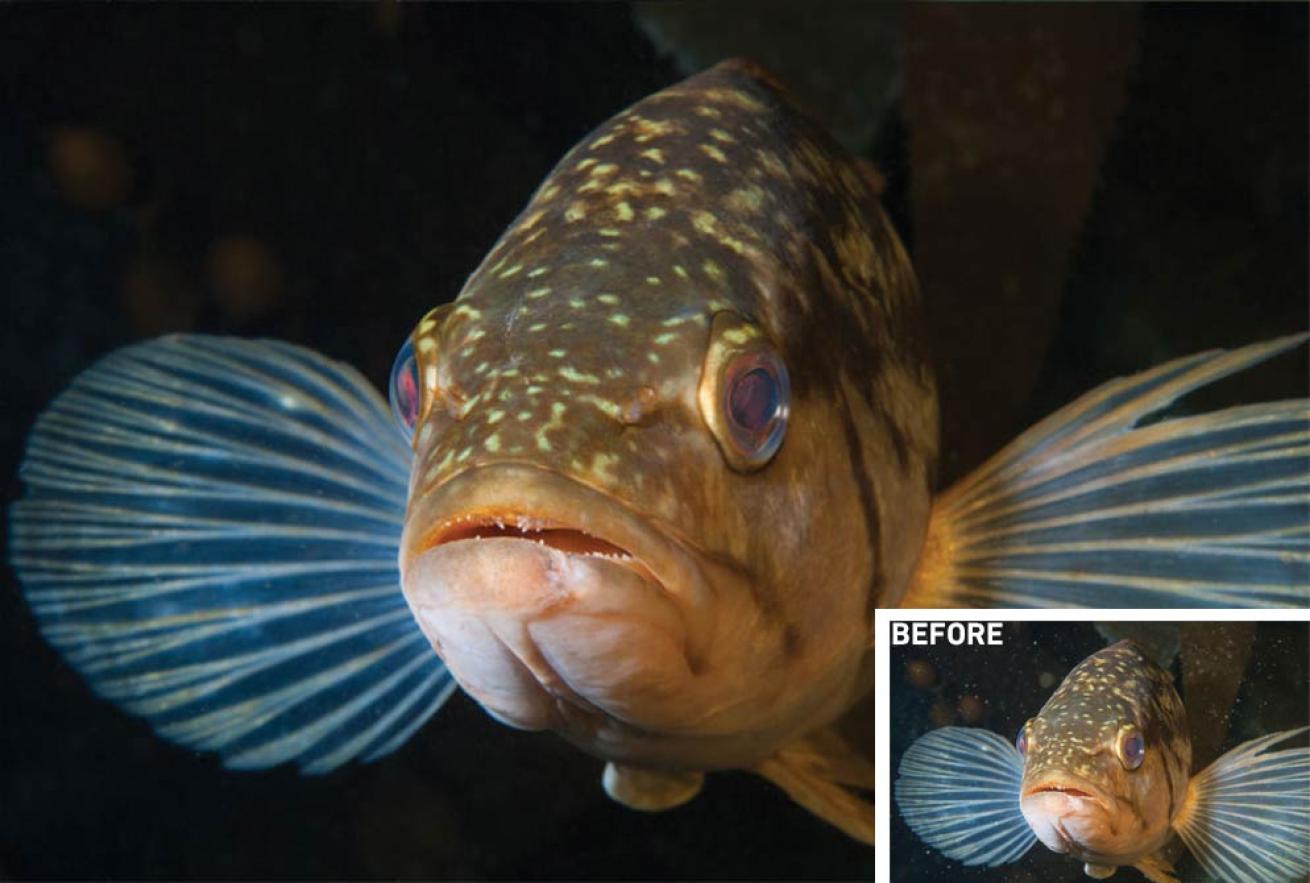
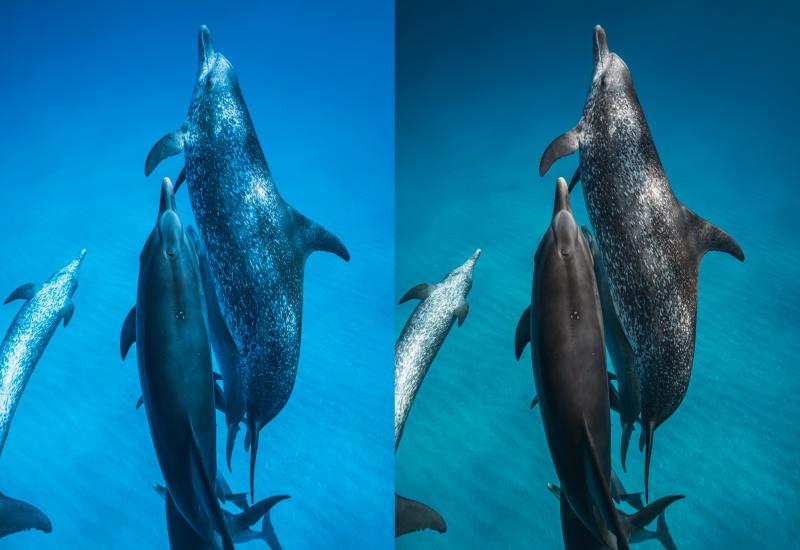
Erin QuigleyBefore and After
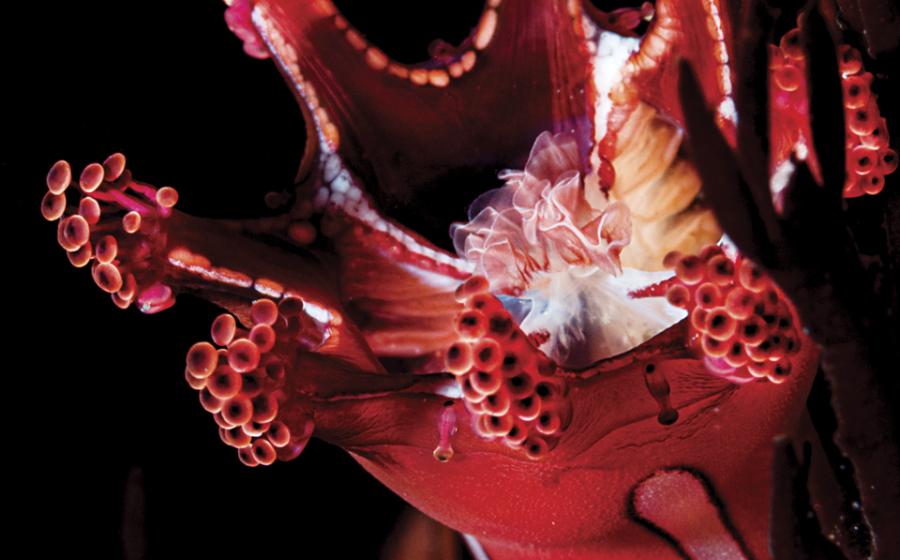
The difference between a picture with-and-without image adjustments is like night and day!
There are as many ways to remove backscatter as there are to shoot it, but the technique I’m going to show you is one of my favorites for a quick and relatively easy fix.
I learned it first from Photoshop guru Eddie Tapp, and although a few versions of Photoshop have come and gone since then, it still remains as apt as ever. This technique’s effectiveness varies with every image, and it works best when there’s not a lot of detailed information in the background.
For More Photoshop and Lightroom Tutorials, Click Here!
STEP 1.
Before you start, make sure you can see your History Panel. If not, go to Menu>Window>History, and make sure that History is checked on.
STEP 2.
Zoom in to at least 100 percent on an area in your image with obvious backscatter. You can double-click on the zoom tool to get there, or use the keyboard shortcut OPT-CMD-0 (Mac) or ALT-CTRL-0 (PC). Hold the space bar down to temporarily access the Hand Tool, and continue holding it while you click and drag to move your photo. Look for a medium-size piece of backscatter to target.
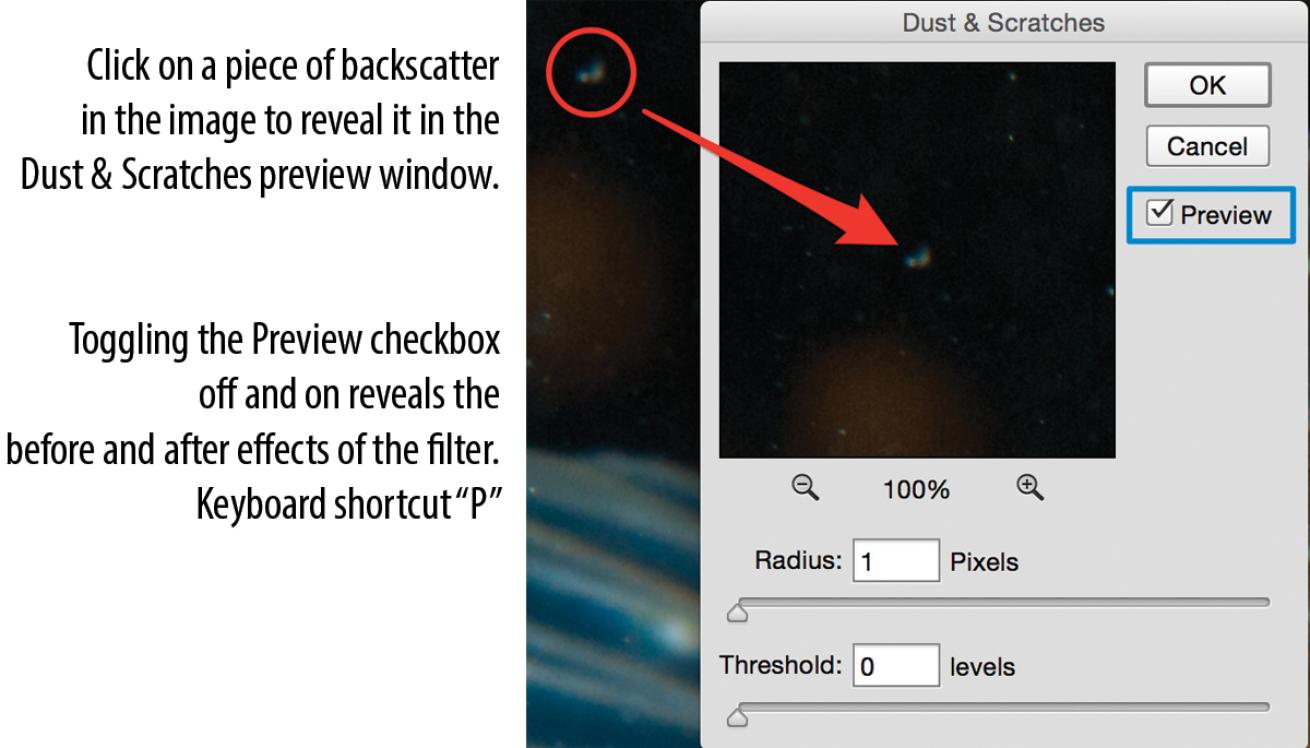
Erin QuigleyUse keyboard shortcut "P" to preview your changes.
STEP 3.
Go to the filter menu and select Noise>Dust and Scratches. In the ensuing panel, reset both sliders to their lowest values. Radius should read 1 and Threshold 0. Click in your image on the piece of backscatter that you located earlier, and you’ll see it appear in the Dust and Scratches preview window . Move the Radius slider to the right until the spot has completely disappeared. Check your image. If there’s still a significant amount of back-scatter, nudge the slider a little farther to the right until most of it is gone. Ignore any large or blurred particles — you’ll fix those later.
STEP 4.
Move the Threshold slider slowly to the right just until the spot begins to reappear, then back it of until you can’t see the spot or any edges surrounding it. The Radius slider removes offending particles, and the Threshold slider restores grain. Check your image closely to make sure there are no artifacts or edges remaining. Toggle the Preview checkbox in the Dust and Scratches window on and of to see the before and after of your image. You can also use the keyboard shortcut “P” for “Preview.”
STEP 5. Even though the entire image appears blurred, click OK.
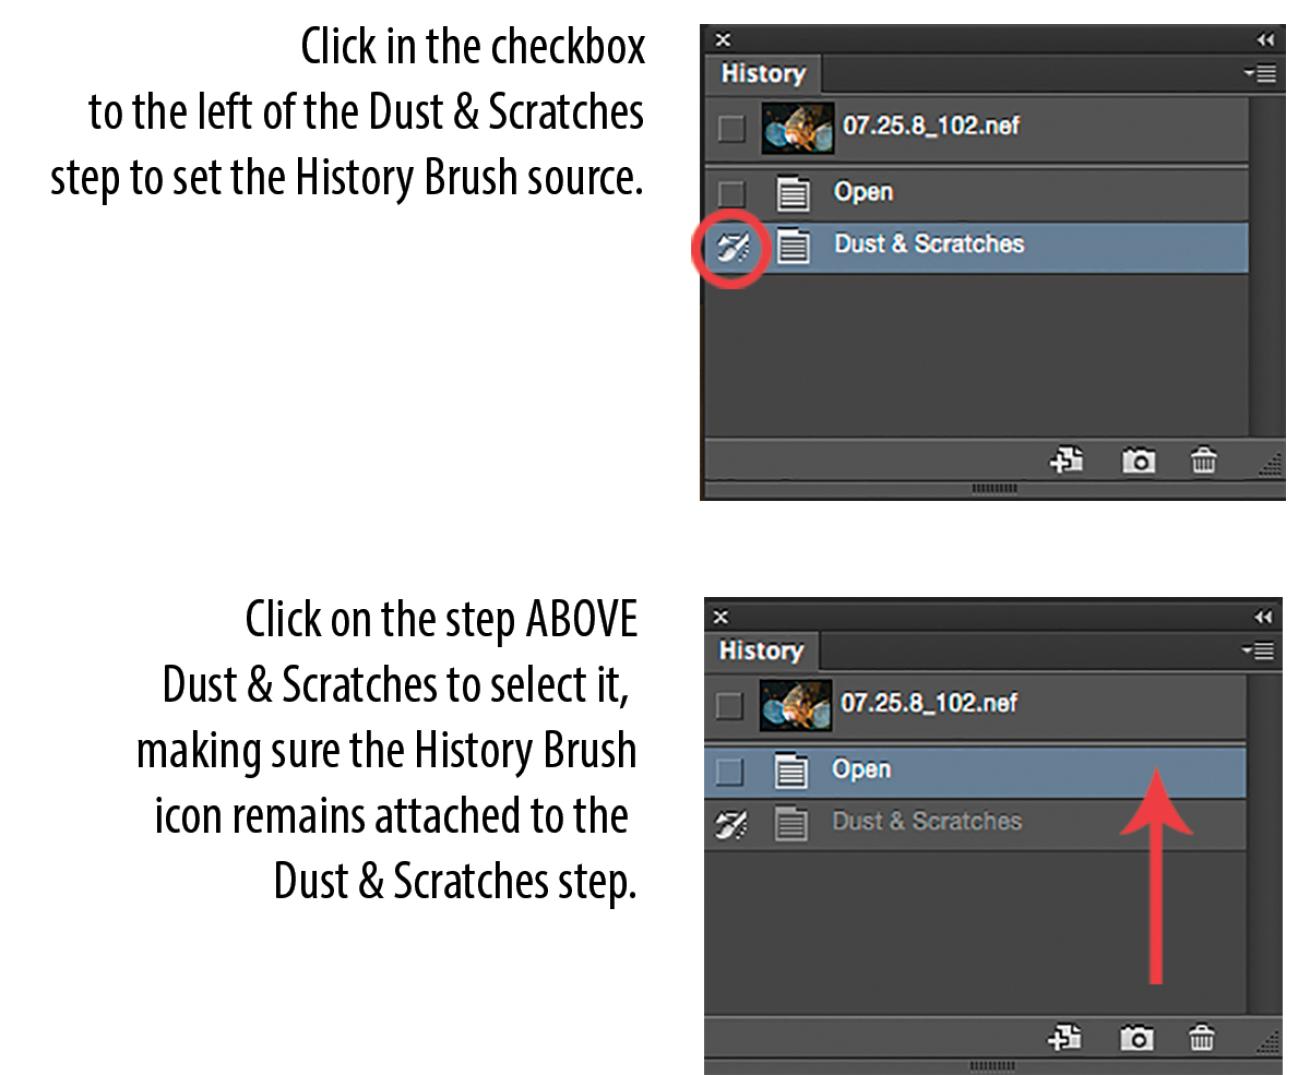
Erin QuigleyThe History Panel in Photoshop tracks all of your edits.
STEP 6. The History Panel tracks all of your edits in Photoshop. Right now, the last step on the list should be “Dust and Scratches,” since that’s the last thing you did. The Dust and Scratches step should also be highlighted (the default color is light blue) to show that it’s selected. Look immediately to the left of the Dust and Scratches step, and you’ll see a small empty box. Click on it to set that step as the source for the History Brush. You should see a teensy icon of a brush with an arrow in the box. Now click on the layer immediately above Dust and Scratches to select it. The History Brush source icon should be next to the Dust and Scratches step. All the work you’ve done will vanish, and you’ll see the image as it was before you opened the Dust and Scratches filter. DON’T FREAK OUT!
STEP 7. Select the History Brush from the Tool Panel. It looks just like the little icon next to the Dust and Scratches step in the History Panel. Make sure you have the History Brush Tool and not the Art History Brush Tool.
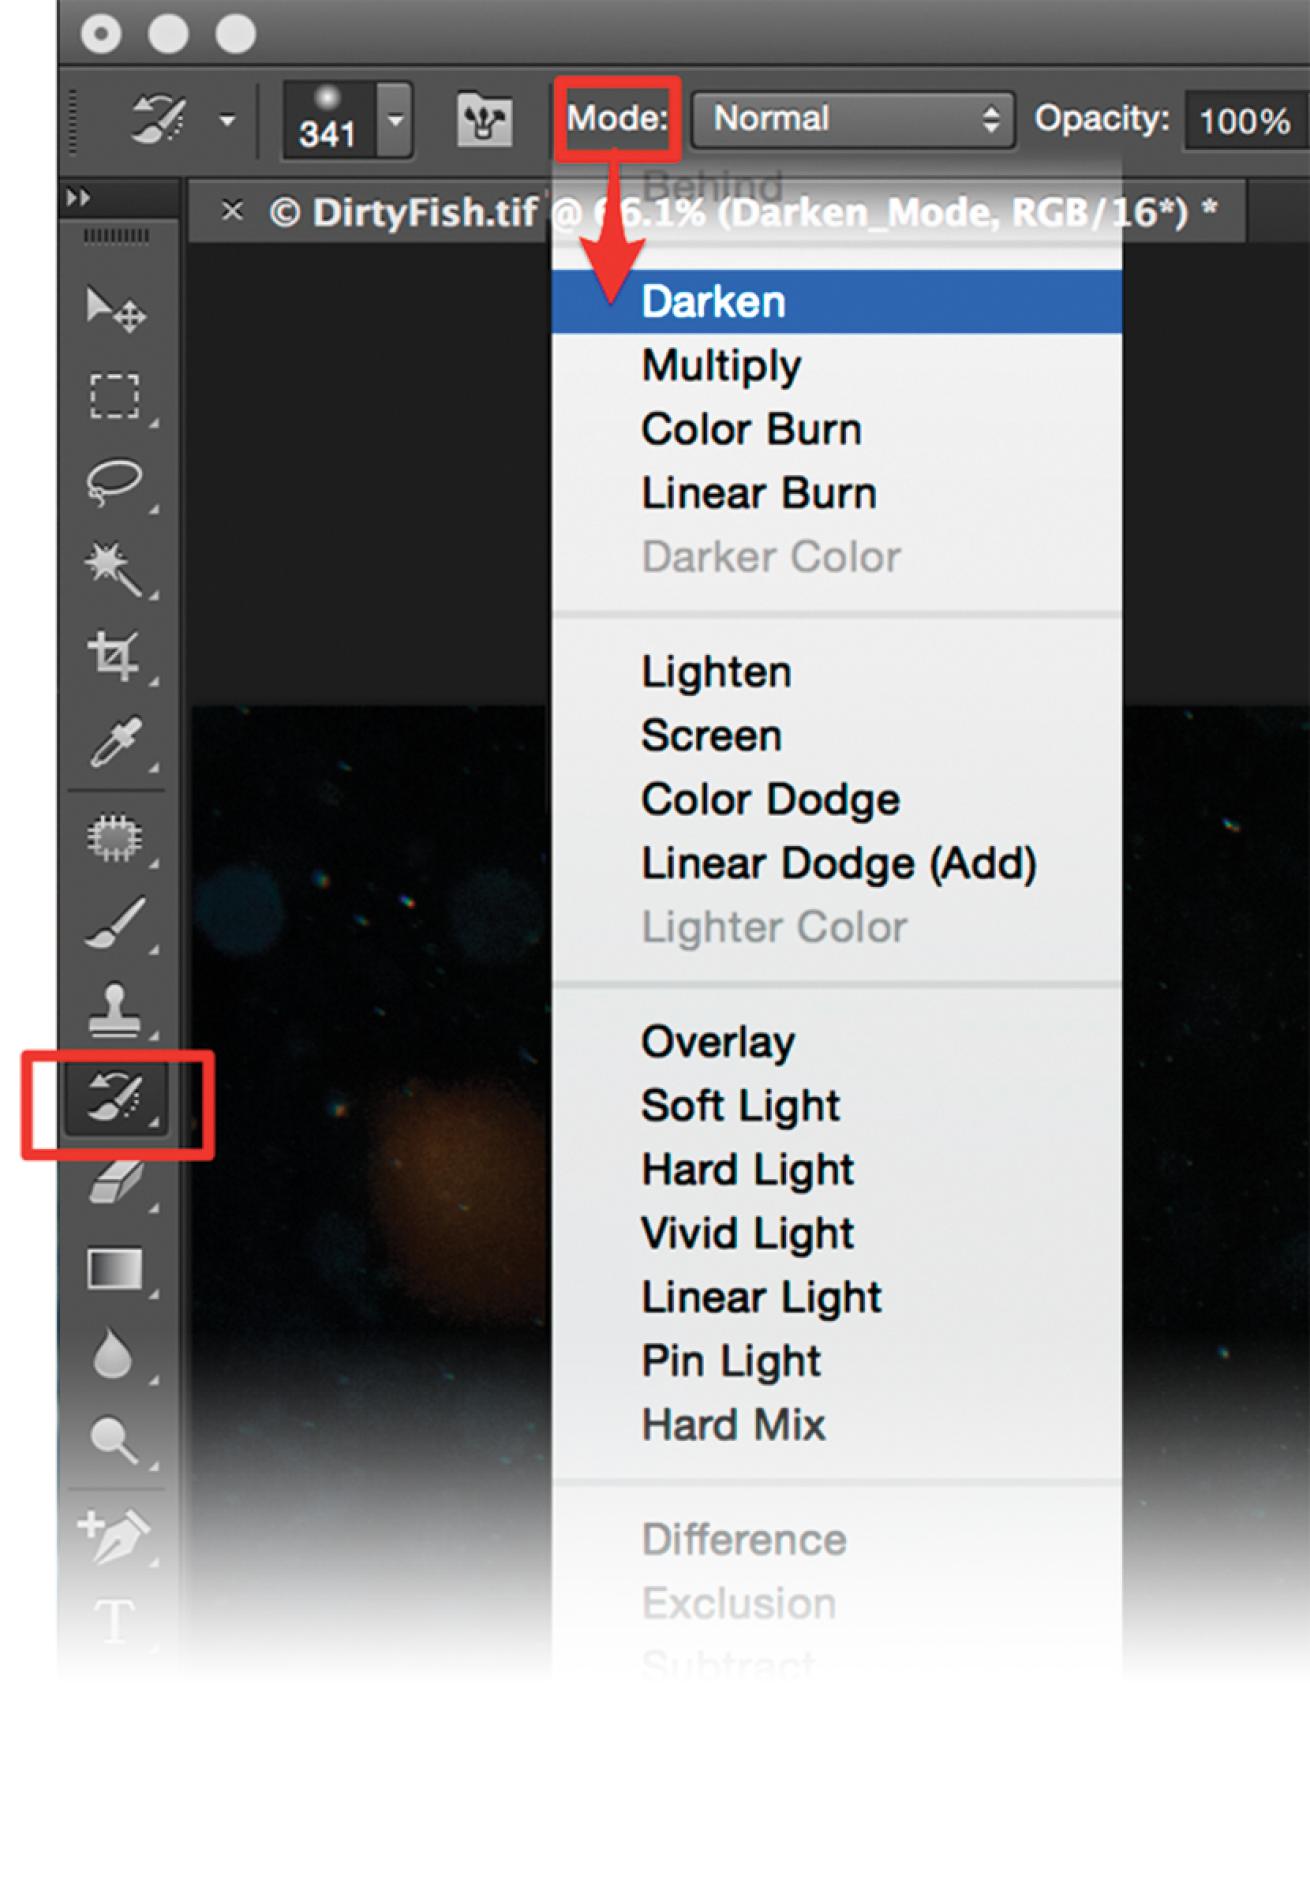
Erin QuigleyArt History brush: Darken
STEP 8. Set the mode to Darken. Wherever you use it, the History Brush will revert your image to the Dust and Scratches state you selected in the History Panel.
STEP 9. Use a large, soft brush at 100 percent opacity to restore the effects of the Dust and Scratches filter, changing to a smaller, more precise brush as you get closer to areas of sharpness or detail. The right and left bracket keys make the brush bigger or smaller, and holding down the shift key while using them changes the hardness or softness of the edge. If you make a mistake, tap CMD-Z (Mac) or CTRL-Z (PC) to undo. You can also undo by selecting progressively earlier steps in the History Panel.
STEP 10. Check your image for stubborn spots and telltale signs of editing. When you remove lots of backscatter, you risk leaving flat spots without grain, or blurred edges that were painted over with the History Brush. Use the Spot Healing Brush, Clone Stamp and Patch Tool to finesse any boo-boos.
Erin Quigley is an Adobe ACE certified digital-imaging consultant and an award-winning shooter. GoAskErin.com provides custom tutorials and one-on-one instruction for the underwater photographic community.