Dive Better, Dive Safer: 101 Tips That Will Make You a Pro

Dive Better, Dive Safer
Hit the Pause Button 4 Times
Get in the habit of inserting pauses in your dive plan. It's a chance to take stock, collect yourself and relax a moment.
-
After you're geared up, pause a moment: Forget anything? Does everything feel right?
-
After you enter the water but before you submerge: Is your weight belt still in place? Is your buddy OK? Is there current?
-
After you reach max depth but before you move off: How do you feel? Check your equipment, check your gauges, check your buoyancy, check your buddy. Look around so you can recognize the scene when you return and are trying to find the anchor line.
-
After you finish your safety stop but before you surface: Hear any propellers? Check your buoyancy.
6 Tips for Better Buoyancy Control
-
Minimize your weighting. Extra air in your BC, to support extra lead on your belt, will change volume and buoyancy with depth, causing you to yo-yo and preventing you from maintaining neutral buoyancy.
-
Check it at the safety stop. It's at the end of your dive, not the beginning, that you should be weighted for neutral buoyancy at 15 feet. That means you'll be about five pounds heavy at the beginning of the dive. (That's the weight of the air you use.)
-
Suspend a weight bag. Hang a mesh bag with some one-pound and two-pound weights from the boat at about 15 feet. Start the dive with two pounds or so of your weight in a BC pocket. At the safety stop, next to the weight bag, you can transfer weights between pocket and bag to find your perfect weighting.
-
Relax. To find neutral buoyancy, go limp. Any sculling with hands or feet will create upward thrust.
-
Add and subtract air in small squirts. You must wait a minute for adjustments to take effect before adding or subtracting more. The effect is not instantaneous.
-
Use your lungs, not your BC. Make slight temporary changes to your buoyancy by holding more or less air in your lungs. That way you don't disturb the correct inflation of your BC. Hold air with your chest, not by closing your glottis, so pressure can escape.
17 Ways to Reduce Air Consumption
-
Streamline your equipment. Stash accessories in pockets or leave them behind. Reduce the lengths of your hoses where you can and route them close to your body. Clip in your console and your octopus. Choose a BC sized properly for your body and for the buoyancy you need; too much causes excess drag.
-
Drop weight. The less weight you carry, the less air you have to put into your BC to maintain buoyancy, so the less bulk you have to drag through the water. You use more air dragging more bulk around. Most divers can drop two pounds or so.
-
Get neutral. And get trimmed properly, so that when you're neutral, you're horizontal. That minimizes the size of the "hole" you have to make in the water when you swim.
-
Move slowly. Water resistance increases exponentially with speed. Swimming twice as fast requires four times as much energy. All your movements should be in slow motion.
-
Kick within your slipstream. Keep your fins within that "hole" in the water made by your body. Wider kicks increase drag.
-
Use efficient fins. Some deliver more thrust for a given effort than others, especially split fins. See ScubaLab tests in our Gear section for details.
-
Don't skim the bottom. Both the bottom and the surface cause turbulence that robs energy if you swim within a few feet of them.
-
Make long surface swims on your back. And breathe surface air: It's free.
-
Pause after inhaling. Under water, your breathing pattern should be inhale, pause, exhale, inhale, pause, exhale. The pause (held with your chest muscles, not by closing your throat) allows more gas transfer to take place in your lungs and less oxygen to be wasted.
-
Breathe slowly. Friction between the incoming air and your mouth, throat, lungs, etc. increases exponentially with speed. More friction means more energy expended for less air actually arriving in your lungs. Move the air slowly.
-
Breathe deeply. The more complete each breath is, the fewer of them you have to take. Breathe "from the diaphragm," trying to completely fill and completely empty your lungs.
-
Use a high-performance regulator. Better regulators minimize the work of breathing. They minimize the amount of air you burn just getting air.
-
Maintain your regulator. They lose performance and increase work of breathing with use and age, and need regular maintenance.
-
Readjust your regulator. On many regulators, the purpose of the adjustment knob is not merely to prevent free-flowing on the surface. It's also to minimize work of breathing at depth. Periodically during your dive, open the valve until the regulator just begins to bubble, then back up on the adjustment a bit.
-
Stop all leaks. Lots of little bubbles add up. Usual suspects: tank O-ring, BC inflators, console swivels.
-
Stay above. At five feet less depth than your buddy, you'll see almost everything he does, but you'll use substantially less air. (Though the difference is greatest at shallower depths.)
-
Manage currents wisely. Learn how to detect, avoid and cope efficiently with adverse currents.
4 Ways to Be a Better Buddy
-
Communicate. Dive planning means talking. Don't assume you both know what to do. Be explicit about depth and time limits, buddy separation procedure, etc.
-
Two-way gear check. The gear check isn't over when you've checked your buddy's gear. He or she must check yours too. That forces your buddy to put hands on the gear, to take responsibility for it being correct. Likewise, make sure gauge checks during the dive go both ways.
-
Take turns. During the dive, don't always be the one who leads, because that trains your buddy to be a follower. Make a point of trading off, so your buddy takes as much responsibility as you for setting the pace and direction.
-
Be humble. Admit you can be wrong. Don't dismiss your buddy's warning/correction/suggestion out of hand.
3 Tips for an Out-of-Air Ascent
-
Relax. Easier said than done, but many "out-of-air" emergencies are really cases of anxiety causing the diver to overbreathe the regulator. Slow your breathing, and you may find you have plenty of air after all.
-
Keep your reg in your mouth. You may be totally out of air at depth, but keep trying to breathe. As you ascend and ambient pressure falls, more air will probably become available from your tank.
-
Exhale slowly. The air in your lungs expands as you ascend, and it's not uncommon to exhale all the way up and reach the surface feeling you have more air in your lungs than when you began the ascent.
5 Tips for Mapping a Dive Site
-
Sketch the dive site on your slate. Actually drawing it is a memory aid. It helps even if you never look at it again.
-
Orient toward north. Draw the map so north is at the top. Under water, lining up your slate with your compass needle puts things in proper orientation. Mark the direction of the sun and the current, too.
-
Use navigational charts. Or other site sketches to get the overall shape.
-
Listen to the dive briefing. Ask questions about depths, trend of bottom and underwater topography.
-
Use your eyes. Above-ground profiles often extend under water; a cliff above is often a wall below.
9 Ways to Minimize Your DCS Risk
-
Ascend slowly. A slow ascent rate is a "rolling" decompression stop that allows nitrogen to offgas before it bubbles.
-
Make a safety stop. It's not called a decompression stop, but that's what it is. It allows more offgassing before you ascend through the final 15 feet, where pressure change per foot is greatest.
-
Don't exercise after diving. It seems to increase formation of bubbles. "Like shaking a can of soda," some people say.
-
End the dive shallow. When you are ascending, you're offgassing from the faster tissues, which are usually most critical for neurological DCS. Time spent shallow at the end of the dive helps unload the nitrogen taken on during the early, deeper parts.
-
Avoid sawtooth and bounce profiles. It's believed that repeated ascents and descents increase the chance of microbubbles passing to the arterial side of your circulation.
-
Wait 24 hours before flying. Flying soon after diving has the effect of making the dive deeper, and bubble formation is greater.
-
Stay warm. If you're cold, your circulation is restricted and nitrogen is passed off more slowly.
-
Stay hydrated. If you're dehydrated, your blood is thicker and moves more slowly, so offgassing is slower.
-
Don't use all the green. Computer algorithms are predictions, not guarantees. Back off a "click" or two for more safety.
5 Compass Tips
-
Practice on land. Try walking around a parking lot or a football field while looking mostly at the compass. When you can return to your starting point, you'll be better able to do the same under water.
-
Make sure the card rotates freely. If it hangs up, the reading will be wrong. Check by rotating the compass in your hand: The card should not move.
-
Fine-tune your buoyancy. Get in trim before taking a compass reading. If you are fighting to maintain your attitude, you will be more likely to get a false reading.
-
Use the bezel. Rotate it to mark your course. Checking your course requires only matching the north arrow to the bezel mark (or something equally simple, depending on the design of the compass).
-
Mount the compass on a slate. The slate helps you level the compass and is handy for marking bearings. Console mounts are often difficult to level because of the stiff hose.
15 Seasickness Tips
HOW TO AVOID IT:
-
Pop a pill. All the pills are about the same in effectiveness and side effects. But if one of them—Dramamine, Bonine, Marazine, etc.—seems to work better for you than the others, stick with it. The placebo effect is very strong with seasickness.
-
Start taking pills early. Pills are better prevention than treatment. After you feel queasy, it may be too late for pills to help, so start 12 to 24 hours before going to sea. This builds up a level of the drug in your body.
-
Try the patch ... Scopolamine patches do work better than pills and have fewer side effects for most people. They are available by doctor's prescription.
-
... Or the bands. Some people like "Sea Bands." They are bracelets with dots that purportedly touch acupressure points on your wrist. They have never been proven effective, but some people swear by them.
-
Bigger is better. Bigger, and especially wider, boats have a slower roll than smaller ones.
-
Stay on deck. It helps to be able to see the horizon, possibly because your eyes then agree with what your middle ears are saying—that your body is rocking and pitching. One theory is that nausea is caused by mixed messages when, below decks, your eyes report that all is stationary.
-
Don't try to read. Focusing your eyes on an apparently stationary target makes them even more convinced that your middle ears are wrong.
-
Close your eyes if you must go below. You may have to go below and lie down, in which case you should close your eyes so they aren't giving a no-motion message to your brain.
-
Be clean and sober. Even a mild hangover can easily degenerate into seasickness, besides increasing various diving risks. Likewise, fatigue predisposes you to seasickness.
-
Eat something. Opinions vary on this one, but most people feel better with a little bland food on their stomachs. Bread, bagels, pancakes, etc. are better than eggs and bacon. Coffee and orange juice are acidic and may irritate your stomach. Eat a little, not a lot.
-
Relax. Anxiety contributes to seasickness. Those who are frightened by the ocean and the movement of the boat, or anxious about the diving later in the day, are more likely to become seasick.
-
Watch for symptoms. Early signs include chills, headache and frequent burping. Now is the time to go on deck, or move to the lee rail if you're already there.
I'M SEASICK: NOW WHAT?
-
If you feel the urge, let it rip. You'll feel better almost immediately. Prolonging the inevitable only prolongs the pain.
-
Don't use a toilet. Or, God help us, a trash can. Go to the rail on the lee (downwind) side or use a bucket if one is designated. If you feel the urge coming, ask a crew member where to go. He or she will know the best place. Don't be embarrassed; you're not the first.
-
Get over it. After a few hours, most people feel better. For some it takes a day or two. Almost everyone gets over seasickness within three days.
6 Ways to Stay Warm
-
Wear a hood. It should be the first piece of thermal protection you consider, not the last. While near-surface blood vessels elsewhere in your body close down to minimize heat loss, those in your head continue at full flow.
-
Stop the leaks. The best wetsuit or dry suit is worthless if it lets in too much cold water. Repair broken zippers and split seams. The collar seal is especially important because as you swim forward it tends to scoop in water. Wear a hood if for no other reason than to seal the neck opening.
-
Cover up head to toe. Heat loss is huge where cold water flows over bare skin, so a thin full-length suit is warmer than a thicker shorty.
-
Stay shallow. Shallower depths mean the insulating neoprene of your wetsuit won't compress as much. And breathing air under less pressure chills you less.
-
Surface if you shiver. Uncontrollable shivering is a warning sign of hypothermia.
-
Break the wind. Between dives, a wet exposure suit becomes a swamp cooler. Many divers actually lose more heat between dives than when in the water. Wear a parka or a windbreaker, or take off the suit and dry off.
10 Ways to Avoid Nitrogen Narcosis
-
Take a course in deep diving from a qualified instructor. You'll learn warning signs of narcosis and skills in coping with it, and you'll gain confidence. Nitrogen narcosis can build on anxiety.
-
Be rested. Fatigue accentuates nitrogen narcosis.
-
Be clean and sober. A hangover, even the effects of over-the-counter drugs, can make narcosis worse.
-
Exhale thoroughly. You'll expel more carbon dioxide, which seems to accelerate the onset of narcosis.
-
Plan your dive, dive your plan. Decide depth, route, frequency of buddy checks, etc. and stick to it. Leave as few decisions as possible to be made "under the influence."
-
Watch yourself. Sure, it's supposed to be fun, but this much fun?
-
Watch your buddy. Does he seem uncoordinated? Silly? Acting odd?
-
Don't become fatigued. Don't try to do too much.
-
Watch your instruments. Believe them.
-
When in doubt, ascend. Often, an ascent of only 10 or 20 feet will clear your head.
8 Dive Boat Dos and Don'ts
 |
| Space is usually at a premium on dive boats, so secure your gear as neatly and compactly as possible. |
DO:
-
Be early to board, early to gear up. Rushing increases anxiety and stress.
-
Remember cash for tips.
-
Secure tanks and weights and all other gear as instructed by crew.
-
Dress completely at your gear station except for putting on fins. Walk fins-in-hand to the exit door.
DON'T:
-
Leave open drinks on the camera table.
-
Dip masks in the camera rinse tank.
-
Forget your C-card.
-
Invade dry areas in a wet exposure suit.
9 Ways to Never Get Lost
-
Descend feet-first. And try to remain facing in the same direction, so you can correlate what you see on the bottom with what you saw at the surface.
-
Stop before you go. When you reach bottom, stop for a moment. Use your compass to orient yourself to your map. Look around for landmarks that will help you identify the scene when you return.
-
Use bottom contours. If you know the anchor is at 60 feet, you can find it by following the bottom slope to 60 feet, then following that contour.
-
Plan your route. Like, "Up-current at the 80-foot contour for 1,200 psi, then return to the exit at the 60-foot contour." Following your nose in a random pattern is more confusing.
-
Look for landmarks. When crossing a flat bottom, look for memorable landmarks in sight of one another: a rock outcrop, a large sponge, a bit of litter. Make your transit of the bottom a series of legs, from A to B to C to D, and you can find your way back.
-
Look behind you. On an out-and-back route, look back from time to time. You'll be more likely to recognize the scene on your return. Landmarks often look different from the other side.
-
Note compass headings. If you need to make an underwater transit from the descent line or anchor to the reef or the top of the wall, note the compass heading and note the scene when you arrive. The reciprocal course will return you to the anchor.
-
Note the direction of the sun. You can usually see it from under water. If it's on your left when outbound, it should be on your right for the return.
-
Learn the names. When you can identify the different sponges, corals, etc. along your route, you are more likely to remember them.
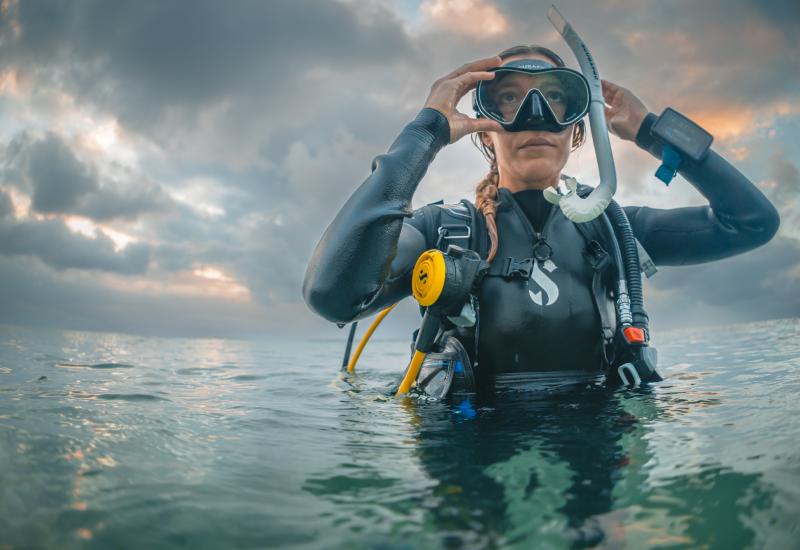
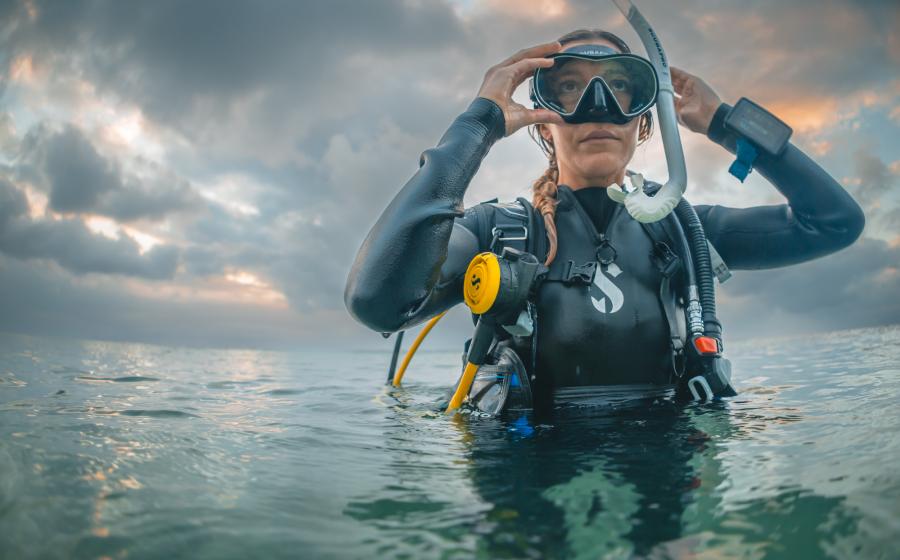
Divers photo by Shutterstock.com

Hit the Pause Button 4 Times
Get in the habit of inserting pauses in your dive plan. It's a chance to take stock, collect yourself and relax a moment.
After you're geared up, pause a moment: Forget anything? Does everything feel right?
After you enter the water but before you submerge: Is your weight belt still in place? Is your buddy OK? Is there current?
After you reach max depth but before you move off: How do you feel? Check your equipment, check your gauges, check your buoyancy, check your buddy. Look around so you can recognize the scene when you return and are trying to find the anchor line.
After you finish your safety stop but before you surface: Hear any propellers? Check your buoyancy.
6 Tips for Better Buoyancy Control
Minimize your weighting. Extra air in your BC, to support extra lead on your belt, will change volume and buoyancy with depth, causing you to yo-yo and preventing you from maintaining neutral buoyancy.
Check it at the safety stop. It's at the end of your dive, not the beginning, that you should be weighted for neutral buoyancy at 15 feet. That means you'll be about five pounds heavy at the beginning of the dive. (That's the weight of the air you use.)
Suspend a weight bag. Hang a mesh bag with some one-pound and two-pound weights from the boat at about 15 feet. Start the dive with two pounds or so of your weight in a BC pocket. At the safety stop, next to the weight bag, you can transfer weights between pocket and bag to find your perfect weighting.
Relax. To find neutral buoyancy, go limp. Any sculling with hands or feet will create upward thrust.
Add and subtract air in small squirts. You must wait a minute for adjustments to take effect before adding or subtracting more. The effect is not instantaneous.
Use your lungs, not your BC. Make slight temporary changes to your buoyancy by holding more or less air in your lungs. That way you don't disturb the correct inflation of your BC. Hold air with your chest, not by closing your glottis, so pressure can escape.
17 Ways to Reduce Air Consumption
Streamline your equipment. Stash accessories in pockets or leave them behind. Reduce the lengths of your hoses where you can and route them close to your body. Clip in your console and your octopus. Choose a BC sized properly for your body and for the buoyancy you need; too much causes excess drag.
Drop weight. The less weight you carry, the less air you have to put into your BC to maintain buoyancy, so the less bulk you have to drag through the water. You use more air dragging more bulk around. Most divers can drop two pounds or so.
Get neutral. And get trimmed properly, so that when you're neutral, you're horizontal. That minimizes the size of the "hole" you have to make in the water when you swim.
Move slowly. Water resistance increases exponentially with speed. Swimming twice as fast requires four times as much energy. All your movements should be in slow motion.
Kick within your slipstream. Keep your fins within that "hole" in the water made by your body. Wider kicks increase drag.
Use efficient fins. Some deliver more thrust for a given effort than others, especially split fins. See ScubaLab tests in our Gear section for details.
Don't skim the bottom. Both the bottom and the surface cause turbulence that robs energy if you swim within a few feet of them.
Make long surface swims on your back. And breathe surface air: It's free.
Pause after inhaling. Under water, your breathing pattern should be inhale, pause, exhale, inhale, pause, exhale. The pause (held with your chest muscles, not by closing your throat) allows more gas transfer to take place in your lungs and less oxygen to be wasted.
Breathe slowly. Friction between the incoming air and your mouth, throat, lungs, etc. increases exponentially with speed. More friction means more energy expended for less air actually arriving in your lungs. Move the air slowly.
Breathe deeply. The more complete each breath is, the fewer of them you have to take. Breathe "from the diaphragm," trying to completely fill and completely empty your lungs.
Use a high-performance regulator. Better regulators minimize the work of breathing. They minimize the amount of air you burn just getting air.
Maintain your regulator. They lose performance and increase work of breathing with use and age, and need regular maintenance.
Readjust your regulator. On many regulators, the purpose of the adjustment knob is not merely to prevent free-flowing on the surface. It's also to minimize work of breathing at depth. Periodically during your dive, open the valve until the regulator just begins to bubble, then back up on the adjustment a bit.
Stop all leaks. Lots of little bubbles add up. Usual suspects: tank O-ring, BC inflators, console swivels.
Stay above. At five feet less depth than your buddy, you'll see almost everything he does, but you'll use substantially less air. (Though the difference is greatest at shallower depths.)
Manage currents wisely. Learn how to detect, avoid and cope efficiently with adverse currents.
4 Ways to Be a Better Buddy
Communicate. Dive planning means talking. Don't assume you both know what to do. Be explicit about depth and time limits, buddy separation procedure, etc.
Two-way gear check. The gear check isn't over when you've checked your buddy's gear. He or she must check yours too. That forces your buddy to put hands on the gear, to take responsibility for it being correct. Likewise, make sure gauge checks during the dive go both ways.
Take turns. During the dive, don't always be the one who leads, because that trains your buddy to be a follower. Make a point of trading off, so your buddy takes as much responsibility as you for setting the pace and direction.
Be humble. Admit you can be wrong. Don't dismiss your buddy's warning/correction/suggestion out of hand.
3 Tips for an Out-of-Air Ascent
Relax. Easier said than done, but many "out-of-air" emergencies are really cases of anxiety causing the diver to overbreathe the regulator. Slow your breathing, and you may find you have plenty of air after all.
Keep your reg in your mouth. You may be totally out of air at depth, but keep trying to breathe. As you ascend and ambient pressure falls, more air will probably become available from your tank.
Exhale slowly. The air in your lungs expands as you ascend, and it's not uncommon to exhale all the way up and reach the surface feeling you have more air in your lungs than when you began the ascent.
5 Tips for Mapping a Dive Site
Sketch the dive site on your slate. Actually drawing it is a memory aid. It helps even if you never look at it again.
Orient toward north. Draw the map so north is at the top. Under water, lining up your slate with your compass needle puts things in proper orientation. Mark the direction of the sun and the current, too.
Use navigational charts. Or other site sketches to get the overall shape.
Listen to the dive briefing. Ask questions about depths, trend of bottom and underwater topography.
Use your eyes. Above-ground profiles often extend under water; a cliff above is often a wall below.
9 Ways to Minimize Your DCS Risk
Ascend slowly. A slow ascent rate is a "rolling" decompression stop that allows nitrogen to offgas before it bubbles.
Make a safety stop. It's not called a decompression stop, but that's what it is. It allows more offgassing before you ascend through the final 15 feet, where pressure change per foot is greatest.
Don't exercise after diving. It seems to increase formation of bubbles. "Like shaking a can of soda," some people say.
End the dive shallow. When you are ascending, you're offgassing from the faster tissues, which are usually most critical for neurological DCS. Time spent shallow at the end of the dive helps unload the nitrogen taken on during the early, deeper parts.
Avoid sawtooth and bounce profiles. It's believed that repeated ascents and descents increase the chance of microbubbles passing to the arterial side of your circulation.
Wait 24 hours before flying. Flying soon after diving has the effect of making the dive deeper, and bubble formation is greater.
Stay warm. If you're cold, your circulation is restricted and nitrogen is passed off more slowly.
Stay hydrated. If you're dehydrated, your blood is thicker and moves more slowly, so offgassing is slower.
Don't use all the green. Computer algorithms are predictions, not guarantees. Back off a "click" or two for more safety.
5 Compass Tips
Practice on land. Try walking around a parking lot or a football field while looking mostly at the compass. When you can return to your starting point, you'll be better able to do the same under water.
Make sure the card rotates freely. If it hangs up, the reading will be wrong. Check by rotating the compass in your hand: The card should not move.
Fine-tune your buoyancy. Get in trim before taking a compass reading. If you are fighting to maintain your attitude, you will be more likely to get a false reading.
Use the bezel. Rotate it to mark your course. Checking your course requires only matching the north arrow to the bezel mark (or something equally simple, depending on the design of the compass).
Mount the compass on a slate. The slate helps you level the compass and is handy for marking bearings. Console mounts are often difficult to level because of the stiff hose.
15 Seasickness Tips
HOW TO AVOID IT:
Pop a pill. All the pills are about the same in effectiveness and side effects. But if one of them—Dramamine, Bonine, Marazine, etc.—seems to work better for you than the others, stick with it. The placebo effect is very strong with seasickness.
Start taking pills early. Pills are better prevention than treatment. After you feel queasy, it may be too late for pills to help, so start 12 to 24 hours before going to sea. This builds up a level of the drug in your body.
Try the patch ... Scopolamine patches do work better than pills and have fewer side effects for most people. They are available by doctor's prescription.
... Or the bands. Some people like "Sea Bands." They are bracelets with dots that purportedly touch acupressure points on your wrist. They have never been proven effective, but some people swear by them.
Bigger is better. Bigger, and especially wider, boats have a slower roll than smaller ones.
Stay on deck. It helps to be able to see the horizon, possibly because your eyes then agree with what your middle ears are saying—that your body is rocking and pitching. One theory is that nausea is caused by mixed messages when, below decks, your eyes report that all is stationary.
Don't try to read. Focusing your eyes on an apparently stationary target makes them even more convinced that your middle ears are wrong.
Close your eyes if you must go below. You may have to go below and lie down, in which case you should close your eyes so they aren't giving a no-motion message to your brain.
Be clean and sober. Even a mild hangover can easily degenerate into seasickness, besides increasing various diving risks. Likewise, fatigue predisposes you to seasickness.
Eat something. Opinions vary on this one, but most people feel better with a little bland food on their stomachs. Bread, bagels, pancakes, etc. are better than eggs and bacon. Coffee and orange juice are acidic and may irritate your stomach. Eat a little, not a lot.
Relax. Anxiety contributes to seasickness. Those who are frightened by the ocean and the movement of the boat, or anxious about the diving later in the day, are more likely to become seasick.
Watch for symptoms. Early signs include chills, headache and frequent burping. Now is the time to go on deck, or move to the lee rail if you're already there.
I'M SEASICK: NOW WHAT?
If you feel the urge, let it rip. You'll feel better almost immediately. Prolonging the inevitable only prolongs the pain.
Don't use a toilet. Or, God help us, a trash can. Go to the rail on the lee (downwind) side or use a bucket if one is designated. If you feel the urge coming, ask a crew member where to go. He or she will know the best place. Don't be embarrassed; you're not the first.
Get over it. After a few hours, most people feel better. For some it takes a day or two. Almost everyone gets over seasickness within three days.
6 Ways to Stay Warm
Wear a hood. It should be the first piece of thermal protection you consider, not the last. While near-surface blood vessels elsewhere in your body close down to minimize heat loss, those in your head continue at full flow.
Stop the leaks. The best wetsuit or dry suit is worthless if it lets in too much cold water. Repair broken zippers and split seams. The collar seal is especially important because as you swim forward it tends to scoop in water. Wear a hood if for no other reason than to seal the neck opening.
Cover up head to toe. Heat loss is huge where cold water flows over bare skin, so a thin full-length suit is warmer than a thicker shorty.
Stay shallow. Shallower depths mean the insulating neoprene of your wetsuit won't compress as much. And breathing air under less pressure chills you less.
Surface if you shiver. Uncontrollable shivering is a warning sign of hypothermia.
Break the wind. Between dives, a wet exposure suit becomes a swamp cooler. Many divers actually lose more heat between dives than when in the water. Wear a parka or a windbreaker, or take off the suit and dry off.
10 Ways to Avoid Nitrogen Narcosis
Take a course in deep diving from a qualified instructor. You'll learn warning signs of narcosis and skills in coping with it, and you'll gain confidence. Nitrogen narcosis can build on anxiety.
Be rested. Fatigue accentuates nitrogen narcosis.
Be clean and sober. A hangover, even the effects of over-the-counter drugs, can make narcosis worse.
Exhale thoroughly. You'll expel more carbon dioxide, which seems to accelerate the onset of narcosis.
Plan your dive, dive your plan. Decide depth, route, frequency of buddy checks, etc. and stick to it. Leave as few decisions as possible to be made "under the influence."
Watch yourself. Sure, it's supposed to be fun, but this much fun?
Watch your buddy. Does he seem uncoordinated? Silly? Acting odd?
Don't become fatigued. Don't try to do too much.
Watch your instruments. Believe them.
When in doubt, ascend. Often, an ascent of only 10 or 20 feet will clear your head.
8 Dive Boat Dos and Don'ts
|| |---|
|
| |Space is usually at a premium on dive boats, so secure your gear as neatly and compactly as possible.|
DO:
Be early to board, early to gear up. Rushing increases anxiety and stress.
Remember cash for tips.
Secure tanks and weights and all other gear as instructed by crew.
Dress completely at your gear station except for putting on fins. Walk fins-in-hand to the exit door.
DON'T:
Leave open drinks on the camera table.
Dip masks in the camera rinse tank.
Forget your C-card.
Invade dry areas in a wet exposure suit.
9 Ways to Never Get Lost
Descend feet-first. And try to remain facing in the same direction, so you can correlate what you see on the bottom with what you saw at the surface.
Stop before you go. When you reach bottom, stop for a moment. Use your compass to orient yourself to your map. Look around for landmarks that will help you identify the scene when you return.
Use bottom contours. If you know the anchor is at 60 feet, you can find it by following the bottom slope to 60 feet, then following that contour.
Plan your route. Like, "Up-current at the 80-foot contour for 1,200 psi, then return to the exit at the 60-foot contour." Following your nose in a random pattern is more confusing.
Look for landmarks. When crossing a flat bottom, look for memorable landmarks in sight of one another: a rock outcrop, a large sponge, a bit of litter. Make your transit of the bottom a series of legs, from A to B to C to D, and you can find your way back.
Look behind you. On an out-and-back route, look back from time to time. You'll be more likely to recognize the scene on your return. Landmarks often look different from the other side.
Note compass headings. If you need to make an underwater transit from the descent line or anchor to the reef or the top of the wall, note the compass heading and note the scene when you arrive. The reciprocal course will return you to the anchor.
Note the direction of the sun. You can usually see it from under water. If it's on your left when outbound, it should be on your right for the return.
Learn the names. When you can identify the different sponges, corals, etc. along your route, you are more likely to remember them.
Divers photo by Shutterstock.com