Dive Gear Maintenance Made Easy

Gear Maintenance Made Easy
Shutterstock
If you are a serious diver, odds are you've invested significant money in your dive gear. So it goes without saying you want to take care of that gear, right? Not only will proper maintenance greatly prolong the life of your gear, but it's also one of the best insurance policies for staying safe while diving. Regular user maintenance requires that you visually inspect, clean and properly handle all the pieces of your setup using specific steps for both pre- and postdive care. So, before your next dive trip, follow the pre-dive steps in this guide to make sure your gear is safe and ready-to-dive. And at the end of your trip, or once you get home, follow the postdive steps to keep everything in top-notch condition until next time.
Masks, Fins, Snorkels
Predive Stretch out all the straps to look for fine cracks in the rubber; these are especially common in the heavy rubber straps on open-heel fins, and they're clear signs of impending failure. If you do find any, immediately replace the straps. If you use a "strap wrapper" to cover your rubber mask strap, either slide the cover to the side or remove it so that the strap underneath can be fully inspected. Next, examine the silicone of your mask skirt, the flexible hose of your snorkel and the snorkel's mouthpiece for any tears. The most common failure area on a mask is the feather-edged seal on the skirt. This can become imperfect or irregular in shape with time and heavy use, and that irregularity can create leaks. Finally, check all the buckles, which can crack, split or become clogged with debris that can interfere with how they function, and check the frame of your mask for cracking, chips or other obvious signs of wear, especially in the areas immediately adjacent to the glass lens.
Postdive To avoid mildew growth, rinse your mask, fins and snorkel in warm, fresh water and allow them to drip dry completely before packing them away. And pack these items loosely so nothing bends the fin blades, crushes the foot pockets or distorts the mask skirt. Leaving these items squashed into a weird position for a long period of time will cause them to take on an unnatural shape.
Regulators/Gauges
Predive It's a good idea to connect your regulator to a tank when preparing your gear for a dive trip. Take a few breaths from the regulator, a few breaths from the octopus and check the SPG for an accurate reading. Visually inspect all regulator hoses to ensure there are no cracks, make sure there are no holes or tears in the mouthpieces and check the metal fittings for corrosion. If you use hose protectors, slide them away from the first stage to check beneath them. At the same time, look for corrosion on the metal first stage. Cracks in the hoses or obvious corrosion on any of the regulator's components require professional service from a qualified technician. Next, disconnect the regulator from the tank, replace the dust cover, inhale on each regulator forcefully and hold a vacuum. Each regulator should let in either a very tiny trickle of air or no air at all. Also check each second-stage housing for cracks, and if you have analog, oil-filled gauges, make sure they aren't leaking any fluid. Most divers now use computers, and although these devices rarely fail, a dead battery can cut a dive day short. So check the battery indicator on your computer and follow the manufacturer's instructions for when and how to replace these batteries. If you have an analog compass, rotate the housing to ensure that the compass card moves freely.
Postdive When rinsing your regulator, make sure the purge valves on the second stages don't get depressed and the first stage dust cover is firmly in place. After dunking the entire octopus, rinse your second stages by running warm water through the regulator mouthpiece and out the exhaust diaphragm. Rinse the fitting that connects to your low-pressure inflator by working the slip coupling back and forth while holding it under warm running water.
BCs
Predive Check your BC inflator by connecting it to a regulator that's hooked to a tank. Shoot a few bursts of air into the BC, then release the inflate button and listen for air leaking into the BC that would indicate a stuck inflator. A technician must repair any leaks before you get in the water. Next, inflate your BC until the pressure-relief valve pops off and let the BC stand for about 20 minutes to see if it holds air pressure. While the BC is inflated, check the cummerbund, waist strap, shoulder straps, tank band and all the buckles for excessive wear. If your BC has metal buckles, check them for corrosion, which will weaken the metal structure and eventually cause the buckle to fail. A buildup of a white chalky substance or green powder in addition to rust are all indications of corrosion. Minor corrosion can generally be cleaned with a stiff brush and a little white vinegar--be sure to rinse the item afterward so the vinegar is thoroughly removed--and a quick spray of food-grade silicone will help prevent future corrosion if routinely applied after your equipment is clean and completely dry.
Postdive Rinse your BC in fresh, warm water. Even better, add a small amount of unscented shampoo or a dive-gear wash solution to the rinse water. Take all the air out of your BC, place it in the bottom of the rinse tank, hold it down with your weights and let it soak for about 30 minutes. Then, drain the tank, rinse the equipment to remove most of the soap, refill the tank with fresh water and allow the equipment to soak a few more minutes to remove any soap residue. To rinse the inside, depress the manual-inflate button and hold the mouthpiece under running water until the BC is 60 to 70 percent full of water. Shake the BC to agitate the water and then drain it through each of the dump valves and the inflator hose. You should use each of the dumps, including the pull dump on the BC inflator hose, to remove salt crystals and sand from each of these important valves. Once you drain the water, fully inflate the BC, allow the remaining water in the BC to settle for a minute or two, and then drain it again. Finally, inflate the BC to about 50 percent of its volume and let it air-dry away from direct sunlight.
Tanks
Predive If you have your own scuba tanks, check the numbers stamped into the metal on the top of each tank, near the valve, for the hydrostatic test date--it expires on the last day of the month five years after the last date of inspection--and check the VIP sticker for the visual inspection date--it expires on the last day of the month one year from the date of inspection. If a tank is out of inspection, it must be inspected again before any dive shop will fill it. Next, check the tank valve for any impact damage or corrosion. Corrosion around the burst disc or the hand wheel can be an early indication that these items will fail. Burst disc failure will cause you to lose all of the air in your cylinder very rapidly, and if the thin brass stem that holds the hand wheel gets too weak, it can break off. Also look at the front of the valve and check the O-rings. If they appear fuzzy or you see obvious nicks or cuts in them, replace them.
Postdive Never store your tanks completely full or completely empty. Without some pressure, empty tanks can take on contaminants and moisture that can lead to corrosion. Full tanks, especially aluminum cylinders, can crack if stored for long periods of time. So, it's best to store these cylinders with between 300 and 500 psi, and of course, store them where they won't be knocked over or subjected to any other impacts.
Exposure Suits
Predive Examine wetsuits for tears, cuts or significant fraying around the cuffs, neck and the seams of the suit. Significant areas of missing or "pulled" stitching can lead to split seams, especially in high-stretch suits in which the seams recieve a lot of stress. Make sure the zippers pull smoothly and lubricate them with a thin application of paraffin-based wax where necessary. Drysuits require a more detailed inspection of the cuff and neck seals as well as the dry zipper. Any imperfections, cracks or cuts can cause the seals to leak. Inspect the dry zipper for missing or bent teeth or advanced wear in the fabric that holds the zipper in place. Unlike wetsuits, it is generally cost effective to repair drysuit seals and zippers. Only a qualified service technician should perform these repairs. You must also check the operation of the valves on the suit. Like the low-pressure inflator on a BC, check the drysuit's inflate valve by attaching it to a tank and operating the valve a few times; it should allow air into the suit easily without sticking or inflating after releasing the button. Checking the suit's vent valves can be more difficult. Do this by putting the suit on and inflating it completely, wait to see if the suit holds air, then activate each deflate valve several times to make sure they vent properly and reseal as they're supposed to. If you notice leaks in the suit's material, patch them according to the manufacturer's recommendations or return the suit to your dealer for service. Patched leaks may need to cure for 24 hours or more, so it's best to check your drysuit at least a few days before you plan to use it.
Postdive Exposure suits can be hand washed in a tub of warm water. It is best to use a wetsuit shampoo available from any retail dive facility to help prevent the suit from fading or breaking down the integrity of the rubber. Wetsuits can also be washed in a machine with a hand wash cycle. Take it out before the spin cycle and allow it to drip dry.
Surface Interval For Gear
Always let your equipment dry thoroughly inside and out before packing it away. If you have the room, it is best to hang BCs, exposure suits and regulators in a cool, dry closet. The garage may not be the best place to store your gear, especially if you live in a hot, humid climate. However, many divers lack the space to do this. With the exception of your exposure suit, equipment can be stored in a good-quality piece of dive luggage without damage, but make sure the bag is large enough that the gear doesn't fold or crimp in unnatural ways. Store your BC about 20 percent full of air to keep the internal sides of the bladder from sticking together. To further protect against age-related damage, apply a light coat of food-grade silicone to all rubber and metal components. Don't spray the silicone directly on the components. Instead, spray a light coating on a soft cloth and rub it onto your regulator hoses, rubber fin straps and metal buckles. You can also preserve the life of the zippers on your gear bags and exposure suits by applying a dry-suit zipper wax. Simply pull the wax stick along the exterior of the zipper on each side, and then work the zipper back and forth a few times to distribute the wax. Store your mask in a rigid box to protect it from impact. You can add your computer and compass to the box as well. As a final note, before storing your equipment, look for items that need to be replaced or otherwise repaired. It is best to repair these items immediately so that your stored equipment is ready to dive when you are.
Gear Check
Certain components of your equipment require annual inspection and service by a qualified technician. It's a mistake to assume that if you haven't used your equipment it doesn't require service. In fact, most technicians agree that rarely used equipment needs regular service more than equipment that sees more frequent use. Both your regulator and your BC should be checked in accordance with the manufacturer's recommendations, usually once a year.
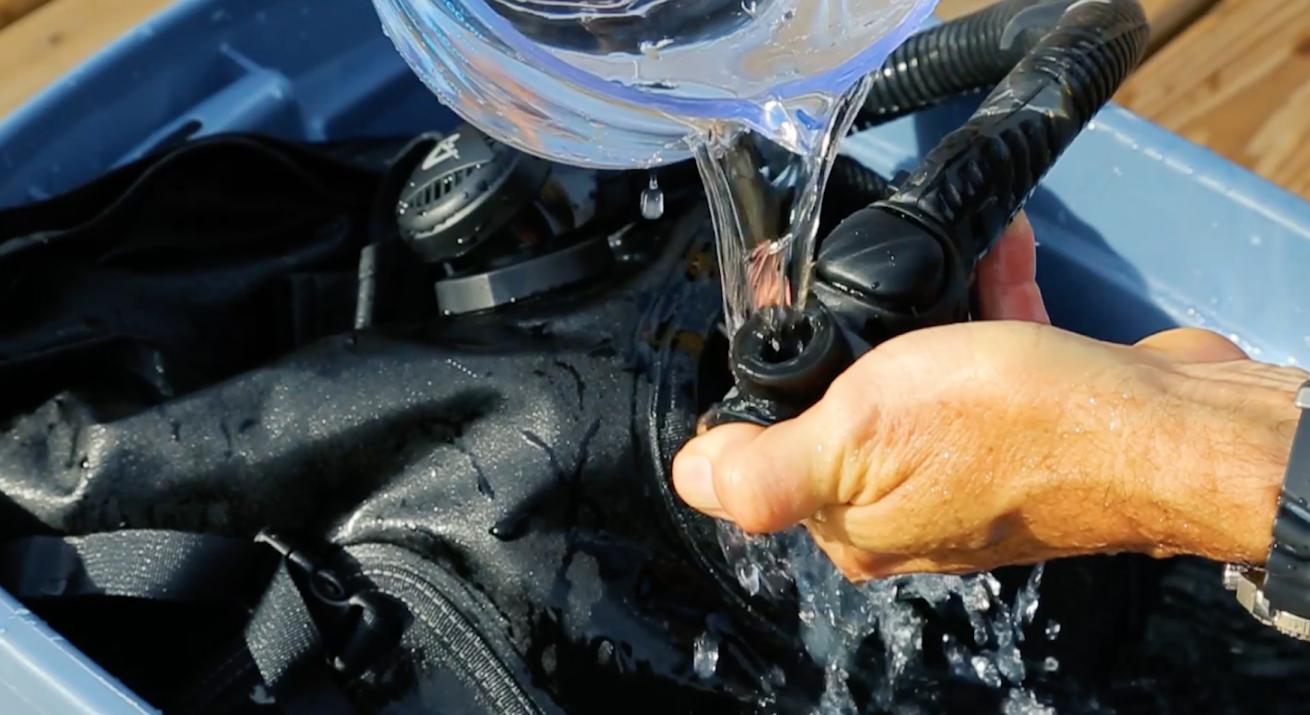
Chris BaloghA plastic tub works well as a rinse tank for your gear at home
If you are a serious diver, odds are you've invested significant money in your scuba gear. So it goes without saying you want to take care of that gear, right? Not only will proper maintenance greatly prolong the life of your gear, but it's also one of the best insurance policies for staying safe while diving. Regular user maintenance requires that you visually inspect, clean and properly handle all the pieces of your setup using specific steps for both pre- and postdive care. So, before your next dive trip, follow the pre-dive steps in this guide to make sure your gear is safe and ready-to-dive. And at the end of your trip, or once you get home, follow the postdive steps to keep everything in top-notch condition until next time.
Masks, Fins, Snorkels
Predive Stretch out all the straps to look for fine cracks in the rubber; these are especially common in the heavy rubber straps on open-heel fins, and they're clear signs of impending failure. If you do find any, immediately replace the straps. If you use a "strap wrapper" to cover your rubber mask strap, either slide the cover to the side or remove it so that the strap underneath can be fully inspected. Next, examine the silicone of your mask skirt, the flexible hose of your snorkel and the snorkel's mouthpiece for any tears. The most common failure area on a mask is the feather-edged seal on the skirt. This can become imperfect or irregular in shape with time and heavy use, and that irregularity can create leaks. Finally, check all the buckles, which can crack, split or become clogged with debris that can interfere with how they function, and check the frame of your mask for cracking, chips or other obvious signs of wear, especially in the areas immediately adjacent to the glass lens.
Postdive To avoid mildew growth, rinse your mask, fins and snorkel in warm, fresh water and allow them to drip dry completely before packing them away. And pack these items loosely so nothing bends the fin blades, crushes the foot pockets or distorts the mask skirt. Leaving these items squashed into a weird position for a long period of time will cause them to take on an unnatural shape.
Regulators/Gauges
Predive It's a good idea to connect your regulator to a tank when preparing your gear for a dive trip. Take a few breaths from the regulator, a few breaths from the octopus and check the SPG for an accurate reading. Visually inspect all regulator hoses to ensure there are no cracks, make sure there are no holes or tears in the mouthpieces and check the metal fittings for corrosion. If you use hose protectors, slide them away from the first stage to check beneath them. At the same time, look for corrosion on the metal first stage. Cracks in the hoses or obvious corrosion on any of the regulator's components require professional service from a qualified technician. Next, disconnect the regulator from the tank, replace the dust cover, inhale on each regulator forcefully and hold a vacuum. Each regulator should let in either a very tiny trickle of air or no air at all. Also check each second-stage housing for cracks, and if you have analog, oil-filled gauges, make sure they aren't leaking any fluid. Most divers now use computers, and although these devices rarely fail, a dead battery can cut a dive day short. So check the battery indicator on your computer and follow the manufacturer's instructions for when and how to replace these batteries. If you have an analog compass, rotate the housing to ensure that the compass card moves freely.
Postdive When rinsing your regulator, make sure the purge valves on the second stages don't get depressed and the first stage dust cover is firmly in place. After dunking the entire octopus, rinse your second stages by running warm water through the regulator mouthpiece and out the exhaust diaphragm. Rinse the fitting that connects to your low-pressure inflator by working the slip coupling back and forth while holding it under warm running water.
BCs
Predive Check your BC inflator by connecting it to a regulator that's hooked to a tank. Shoot a few bursts of air into the BC, then release the inflate button and listen for air leaking into the BC that would indicate a stuck inflator. A technician must repair any leaks before you get in the water. Next, inflate your BC until the pressure-relief valve pops off and let the BC stand for about 20 minutes to see if it holds air pressure. While the BC is inflated, check the cummerbund, waist strap, shoulder straps, tank band and all the buckles for excessive wear. If your BC has metal buckles, check them for corrosion, which will weaken the metal structure and eventually cause the buckle to fail. A buildup of a white chalky substance or green powder in addition to rust are all indications of corrosion. Minor corrosion can generally be cleaned with a stiff brush and a little white vinegar--be sure to rinse the item afterward so the vinegar is thoroughly removed--and a quick spray of food-grade silicone will help prevent future corrosion if routinely applied after your equipment is clean and completely dry.
Postdive Rinse your BC in fresh, warm water. Even better, add a small amount of unscented shampoo or a dive-gear wash solution to the rinse water. Take all the air out of your BC, place it in the bottom of the rinse tank, hold it down with your weights and let it soak for about 30 minutes. Then, drain the tank, rinse the equipment to remove most of the soap, refill the tank with fresh water and allow the equipment to soak a few more minutes to remove any soap residue. To rinse the inside, depress the manual-inflate button and hold the mouthpiece under running water until the BC is 60 to 70 percent full of water. Shake the BC to agitate the water and then drain it through each of the dump valves and the inflator hose. You should use each of the dumps, including the pull dump on the BC inflator hose, to remove salt crystals and sand from each of these important valves. Once you drain the water, fully inflate the BC, allow the remaining water in the BC to settle for a minute or two, and then drain it again. Finally, inflate the BC to about 50 percent of its volume and let it air-dry away from direct sunlight.
Tanks
Predive If you have your own scuba tanks, check the numbers stamped into the metal on the top of each tank, near the valve, for the hydrostatic test date--it expires on the last day of the month five years after the last date of inspection--and check the VIP sticker for the visual inspection date--it expires on the last day of the month one year from the date of inspection. If a tank is out of inspection, it must be inspected again before any dive shop will fill it. Next, check the tank valve for any impact damage or corrosion. Corrosion around the burst disc or the hand wheel can be an early indication that these items will fail. Burst disc failure will cause you to lose all of the air in your cylinder very rapidly, and if the thin brass stem that holds the hand wheel gets too weak, it can break off. Also look at the front of the valve and check the O-rings. If they appear fuzzy or you see obvious nicks or cuts in them, replace them.
Postdive Never store your tanks completely full or completely empty. Without some pressure, empty tanks can take on contaminants and moisture that can lead to corrosion. Full tanks, especially aluminum cylinders, can crack if stored for long periods of time. So, it's best to store these cylinders with between 300 and 500 psi, and of course, store them where they won't be knocked over or subjected to any other impacts.
Wetsuits and Drysuits
Predive Examine wetsuits for tears, cuts or significant fraying around the cuffs, neck and the seams of the suit. Significant areas of missing or "pulled" stitching can lead to split seams, especially in high-stretch suits in which the seams recieve a lot of stress. Make sure the zippers pull smoothly and lubricate them with a thin application of paraffin-based wax where necessary. Drysuits require a more detailed inspection of the cuff and neck seals as well as the dry zipper. Any imperfections, cracks or cuts can cause the seals to leak. Inspect the dry zipper for missing or bent teeth or advanced wear in the fabric that holds the zipper in place. Unlike wetsuits, it is generally cost effective to repair drysuit seals and zippers. Only a qualified service technician should perform these repairs. You must also check the operation of the valves on the suit. Like the low-pressure inflator on a BC, check the drysuit's inflate valve by attaching it to a tank and operating the valve a few times; it should allow air into the suit easily without sticking or inflating after releasing the button. Checking the suit's vent valves can be more difficult. Do this by putting the suit on and inflating it completely, wait to see if the suit holds air, then activate each deflate valve several times to make sure they vent properly and reseal as they're supposed to. If you notice leaks in the suit's material, patch them according to the manufacturer's recommendations or return the suit to your dealer for service. Patched leaks may need to cure for 24 hours or more, so it's best to check your drysuit at least a few days before you plan to use it.
Postdive Exposure suits can be hand washed in a tub of warm water. It is best to use a wetsuit shampoo available from any retail dive facility to help prevent the suit from fading or breaking down the integrity of the rubber. Wetsuits can also be washed in a machine with a hand wash cycle. Take it out before the spin cycle and allow it to drip dry.
Surface Interval For Gear
Always let your equipment dry thoroughly inside and out before packing it away. If you have the room, it is best to hang BCs, exposure suits and regulators in a cool, dry closet. The garage may not be the best place to store your gear, especially if you live in a hot, humid climate. However, many divers lack the space to do this. With the exception of your exposure suit, equipment can be stored in a good-quality piece of dive luggage without damage, but make sure the bag is large enough that the gear doesn't fold or crimp in unnatural ways. Store your BC about 20 percent full of air to keep the internal sides of the bladder from sticking together. To further protect against age-related damage, apply a light coat of food-grade silicone to all rubber and metal components. Don't spray the silicone directly on the components. Instead, spray a light coating on a soft cloth and rub it onto your regulator hoses, rubber fin straps and metal buckles. You can also preserve the life of the zippers on your gear bags and exposure suits by applying a dry-suit zipper wax. Simply pull the wax stick along the exterior of the zipper on each side, and then work the zipper back and forth a few times to distribute the wax. Store your mask in a rigid box to protect it from impact. You can add your computer and compass to the box as well. As a final note, before storing your equipment, look for items that need to be replaced or otherwise repaired. It is best to repair these items immediately so that your stored equipment is ready to dive when you are.
Gear Check
Certain components of your equipment require annual inspection and service by a qualified technician. It's a mistake to assume that if you haven't used your equipment it doesn't require service. In fact, most technicians agree that rarely used equipment needs regular service more than equipment that sees more frequent use. Both your regulator and your BC should be checked in accordance with the manufacturer's recommendations, usually once a year.