Your First Set of Scuba Gear: A Buyer's Guide
For a new diver, buying gear is the final step, the act that says "I'm committed to really enjoying diving." But if you're newly certified, how are you supposed to know what to buy?
Relax. Between our advice and your instructor's help, we'll have you outfitted in no time. It's helpful to think of buying gear in two phases: first, the basic stuff you need for class; second, the major pieces of life support--regulator, BC and dive computer--that you're allowed to purchase once you've got a C-card. Let's start with the basics.
Phase One: The Basics

Your First Set of Gear: Mask
John Whittle
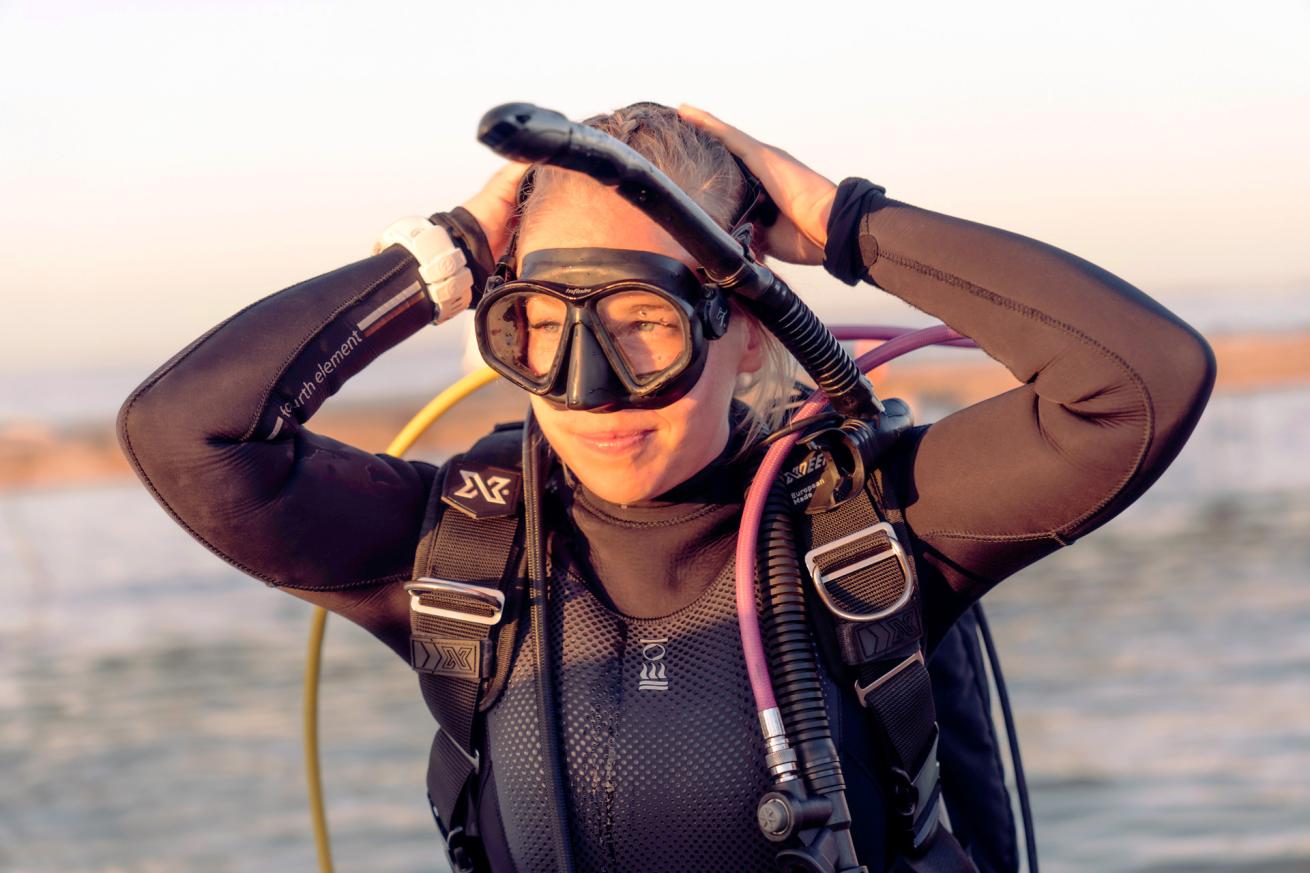
Mask
The one-pane oval mask of "Sea Hunt" and those old Bond films is practically a relic. In its place is a variety of styles for a world of faces. Your job: Choose the one right for yours.
What it Does - The mask creates an air space in front of your eyes that allows them to focus under water. The nose pocket allows you to equalize the air pressure in your mask as you go deeper.
What to Look For - A good watertight fit. Our Scuba Lab experts have come up with this six-step plan for foolproof mask fitting:
1. Look up at the ceiling and place the mask on your face without using the strap. It should rest
evenly with no gaps.
2. Place a regulator or snorkel mouthpiece in your mouth. Does the mask still feel comfortable? Any gaps yet?
3. Look forward. Place the mask on your face without using the strap and gently inhale through your nose. The mask should seal easily on your face. Caution: A strong inhale will close minor leak areas and invalidate this test.
4. Repeat the sniff test with a mouthpiece in place.
5. If the mask is still in the running, adjust the strap and put it on your face. Make sure the
nose pocket doesn't touch your nose and that the skirt feels comfortable on your upper lip.
6. Put the regulator mouthpiece in one more time to make sure you can easily reach the nose pocket to equalize your ears.
Any mask that passes this test is a potential keeper. You'll find a whole range of options on masks, including side, top and bottom panes for a wider field of vision. Some also have purge valves for venting any water that leaks in, and others have quick strap adjustments. These options (and a range of color schemes) are a matter of personal preference--just make sure the mask you choose fits right.
Cost - From $25 to $150.
Our Advice - Clear or light-colored mask skirts let more light in and are generally more comfortable for new divers.

Your First Set of gear: Snorkel
John Whittle
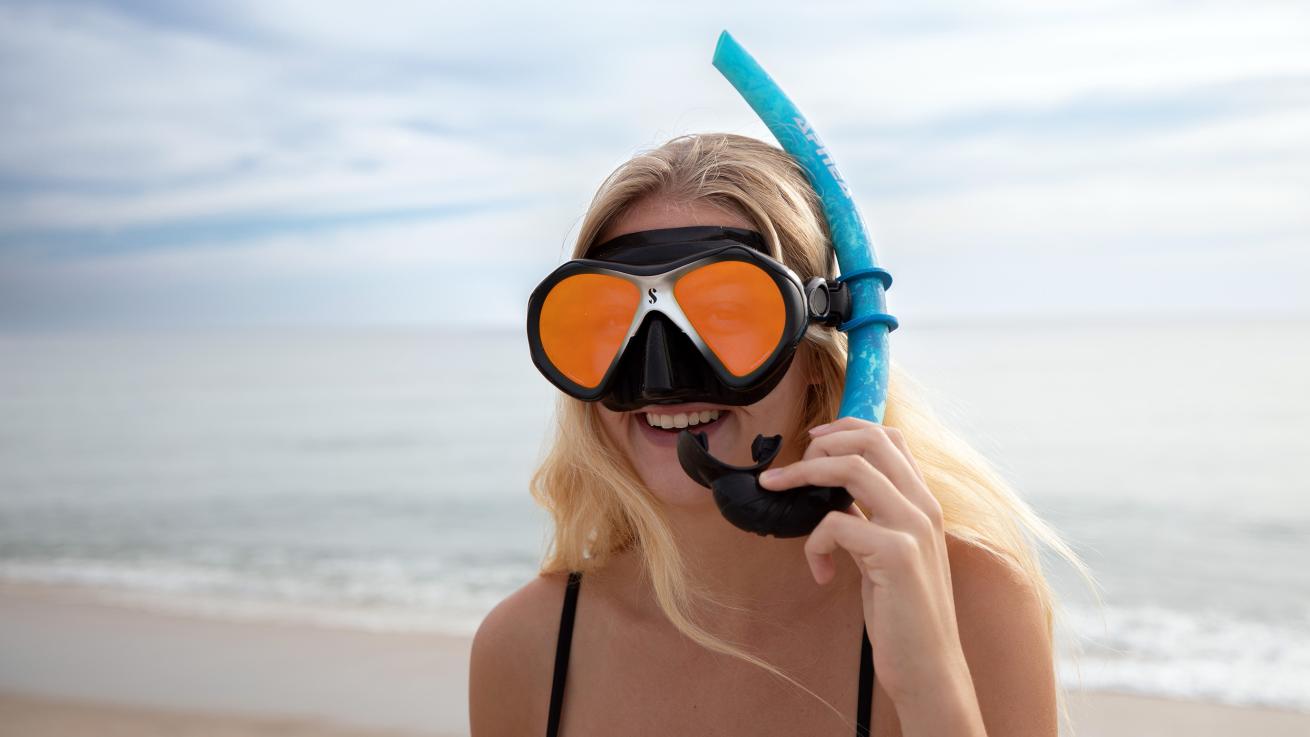
Snorkel
It seems simple enough: a curved tube that lets you breathe while floating face-down on the surface. Yet, as you look at the giant wall of snorkels at your local dive store, you'll see an array of options and features to choose from. Don't worry. Stay focused on the basics.
What It Does - As a diver, you primarily use a snorkel to conserve air in your tank when on the water's surface.
What to Look For - Comfort. You want a mouthpiece that feels good in your mouth and breathes dry and easy. The problem is, most attempts to keep snorkels dry also make them bulkier and harder to breathe through. The snorkel for you is one with a good compromise between ease of breathing and dry comfort. Remember, the bigger a snorkel is, the more drag it creates in the water. Also important: how the snorkel attaches to your mask. Look for a durable, yet simple and easy-to-operate attachment.
Cost - From $15 to $75.
Our Advice - If you don't plan on doing a lot of snorkeling, this is the one piece of gear you can skimp on. Get a simple, basic model and be done with it.

AERIS ACCEL
Katy Danca Galli
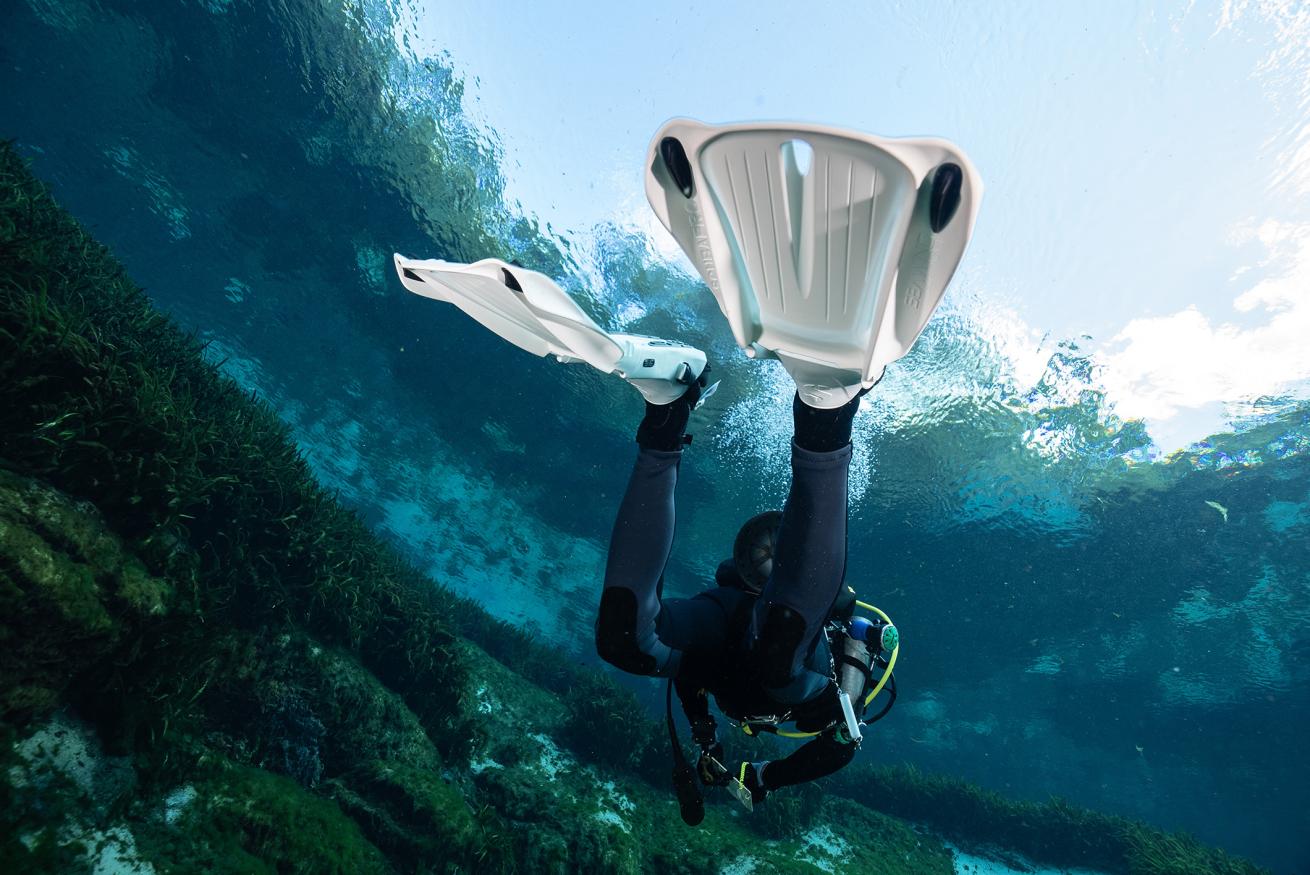
Fins
Fish don't have legs for the simple reason that fins are the best way to move through water. So if you're going to play in the fish's territory, you need a good set of flippers too.
What They Do - Fins translate power from the large leg muscles into efficient movement through water, which is 800 times denser than air.
What to Look For - Comfort and efficiency. When trying on fins, look for a snug fit that doesn't pinch your toes or bind the arches of your feet. If you can't wiggle your toes, the fins are too small.
Efficiency of fins is largely determined by their size, stiffness and design. Divers with strong leg and hip muscles can efficiently use a bigger, stiffer fin. Smaller divers or less conditioned divers will be more comfortable with smaller, more flexible fins. Finally, make sure buckles and straps are easy to use.
Cost - $65 to $200.
Our Advice - Don't skimp on fins. Choosing the right pair is important to prevent muscle fatigue and cramping. Good fins will enhance your enjoyment of diving; bad ones can ruin it. Full-Foot or Open-Heel Fins?
-
Full-foot fins don't require dive booties and are best suited mainly for warm waters.
-
The straps of open-heel fins can be adjusted for the different booties you may wear or for different family members and children as they grow.
-
Open-heel fins require less effort to put on, especially if a pull tab is added to the strap.
-
The dive booties required with open-heel fins also provide foot protection and comfort while diving and walking.

Jon Whittle
Exposure Protection Suits
Form-fitting exposure suits are usually made of foam neoprene rubber (wetsuits) or spandex-like materials (skins), sometimes with a fleece lining.
What They Do - Exposure suits insulate you against the cooling effect of water, which can rob your body of heat 25 times faster than air. The thickness and type of exposure protection you need depends on dive conditions. Simple Lycra suits provide little thermal insulation, but do help protect against scrapes and stings.
What to Look For - Fit and comfort. Exposure suits should fit snugly without restricting movement or breathing. Reject any suit that's too loose, however. Gaps at the arm, leg, crotch and neck allow water to circulate and defeat the suit's ability to prevent heat loss.
Cost - Wetsuits and skins range from $70 to $650. Dry suits can cost from $650 to $2,800.
Our Advice - As long as a wetsuit fits correctly, it will do the job. If you're going the budget route, your choices will usually be limited to basic models. Bright colors and graphics aren't necessary but do make you more visible to other divers.Exposure Suit Comfort Zones
Water Temp
75-85F - 1/16" (1.6mm) neoprene, Lycra, Polartec
70-85F - 1/8" (3mm) neoprene
65-75F - 3/16" (5mm) neoprene
50-70F - 1/4" (6.5mm) neoprene
35-65F - 3/8" (9.5mm) neoprene, dry suitOnce you're a newly minted diver, the anxiety you had about buying gear will likely be replaced with a rush of excitement--a desire to max out the plastic or convert the Roth IRA into a heap of the latest and greatest in scuba gear.
Fine. Having your own gear is essential to enjoy this sport fully and to maximize your comfort and safety. Just remember that your experience with equipment is limited. You've got to study the field and understand what you want--and need--out of each piece of gear.
Phase Two: Life-Support Equipment

CRESSI BACK JAC AN ALL-PURPOSE BACK BUOYANCY BC
Katy Danca Galli
BCs
The BC is the most complex piece of dive equipment you'll own and one of the most important. So choose carefully based on the style of diving you'll be doing most.
What It Does - What doesn't it do? It holds your gear in place, lets you carry a tank with minimal effort, floats you at the surface and allows you to achieve neutral buoyancy at any depth.
What to Look For - Correct size and fit. Before you try on BCs, slip into the exposure suit you'll wear most often. Look for a BC that fits snugly but doesn't squeeze you when inflated. The acid test: inflate the BC until the overflow valve vents. The BC should not restrict your breathing. While you've got the BC on, test all valves for accessibility and ease of use, then make sure the adjustments, straps and pockets are easy to reach and use.
Pay particular attention to the inflator hose. Is it easy to reach and extend over your head? Make sure there's a clear distinction between the inflate and deflate buttons and that you can operate them easily with one hand.
Cost - $300 to $750.
Our Advice - This is an important piece of equipment that you can expect to use for many years. Don't skimp; go for quality. Test as many different models as you can in real diving situations before buying. Rent them if you have to.How Much BC Lift Do you Need?
Tropical Diving (with little or no wetsuit protection) - 12 to 24 pounds
Recreational Diving (with a full wetsuit or dry suit) - 20 to 40 pounds
Technical Diving (or diving under other demanding conditions) - 40 to 80 pounds

SUBGEAR SG500
Katy Danca Galli
Regulators
The good news: Among major-label regulators--the kind sold in dive stores--there is no junk. Regulators have been perfected to the point that even budget regulators can offer high performance. However, you must do your homework before buying this vital piece of gear. We can help: RSD's Scuba Lab has tested more than 300 regulators in thousands of breathing machine tests.
What It Does - Converts the high-pressure air in your tank to ambient pressure so you can breathe it. A regulator must also deliver air to other places, such as your BC inflator and alternate second stage.
What to Look For - High performance. The best regulators can deliver a high volume of air at depth, under heavy exertion even at low tank pressures. Some regulators also have diver-controlled knobs and switches to aid this process, so it's important to understand the controls and how they work.
Comfort. Look for a comfortable mouthpiece and have your local dive store select hoses of the
right length for you.
Try as many regulators as you can in real-world diving situations. Breathing on a regulator in a dive store tells you nothing about how it will perform under water.
Cost - From $225 to $1,600.
Our Advice - You've got to do your homework to find the best regulator available for your budget. Talk to dive store personnel, experienced divers and most of all, read Scuba Lab's objective, scientific tests and ratings. {mospagebreak}
Computers

Suunto D6I
Katy Danca Galli
Nobody enjoys working the dive tables, but they're an invaluable tool for safe diving. Dive computers are an even better tool for the same reason a laptop is better than a slide rule.
What They Do - By constantly monitoring depth and bottom time, dive computers automatically recalculate your no-decompression status, giving you longer dive times while still keeping you within a safe envelope of no-decompression time. Computers can also monitor your ascent rate and tank pressure, tell you when it's safe to fly, log your dives and much more. That's why dive computers are almost as common as depth gauges these days.
What to Look For - User-friendliness. The most feature-packed dive computer does you no good if you can't easily and quickly access the basic information you need during a dive: depth, time, decompression status and tank pressure. Some models have both numeric and graphic displays for at-a-glance information.
Mounting options are an important feature to consider and let you position computers on your wrist, gauge console, hoses or attach them to BCs.
Some computers are conservative in their calculations, automatically building in safety margins; others take you to the edge of decompression and trust you to build in your own safety margins. Only RSD publishes a chart ranking the relative conservatism of dive computers on the market today.
Before you buy, ask to see the owner's manual and check it out. Complete and easy-to-understand instructions are important, especially on feature-packed machines.
Cost - $300 to $1,300.
Our Advice - Begin with an honest evaluation of your diving needs--do you plan to use mixed gases someday to do decompression diving? Study the features of different computers and choose the one that offers the mix of features you need at the best price.
Where Should You Buy Gear?
Scuba equipment can be purchased in dive stores, at other retail outlets, by mail order or as used equipment from private parties. There are distinct advantages and disadvantages to each.
Private party. Buying used gear from a private party may be the cheapest possible way to go, but provides absolutely no guarantees. Unless you are extremely knowledgeable or an equipment technician, you will not know if a regulator, for example, can even be serviced. You will also not have any performance data. The seller's statement that the regulator "breathes fine" and your breathing on it out of the water are both meaningless. We recommend not buying used life-support equipment from private parties.
Nondive store retail outlets. Sporting goods and discount stores may have scuba gear for sale. Some of these stores actually have scuba departments and should be considered dive stores. However, most are simply retail outlets and cannot provide the service, support and expertise that a dive store can. Other than price, there is no reason to buy at these nondive store outlets. And even price may not be an advantage since name-brand gear can often be purchased at dive stores at discount prices.
Mail order. Catalog buying is a popular and useful way to shop, particularly when some products are not available locally or may be purchased through a catalog for significantly less money (including shipping and handling charges).
But buying scuba gear through the mail is not like buying a sweater from a clothing catalog. In particular, our concerns are these:
Diver life-support products should not be sold to unqualified buyers.
Dive gear should not be sold when operating incorrectly.
Gear should not be sold to a diver without regard to proper fit and function.
Little service or support is available by mail order, and gear that is not purchased locally may not be able to be serviced locally and may have no warranty.
If cost is your compelling selection criterion, we suggest consulting RSD's "Best Buy" lists for those products that offer the best performance for the price. The least expensive is not necessarily the best buy.
Dive Stores. Retail dive stores have been the focal point of local dive support since recreational diving became popular. Your local dive store can provide instruction, dive travel, local dives, inspection and repair services, compressed air, rental equipment, equipment advice and the opportunity to look at, feel, compare and test equipment before purchase. In addition, the store can back up products immediately if necessary. Personal contact is also an important part of a dive store's value. In short, a dive store is in a better position than a mail-order dealer to provide the service and support you need and should expect.
How A Wetsuit Works
A wetsuit keeps you warm in two ways:
Keeping Water Out. Any water that gets inside the suit is going to leak out again. When the water is inside, it absorbs some of your body heat. When it leaves, it takes that heat with it. So the first thing a wetsuit has to do is keep the cold ocean from flushing through it. A good fit, one that feels equally snug everywhere, is critical, so the space the ocean wants to use to flow along your skin is as small as possible.
Providing Insulation Against Heat Loss. A little science here: Solids and liquids conduct heat well; gases do not. Air, for example, is about 20 times less conductive than water. As a practical matter, good insulation--above or below water--is all about trapping air. That's why neoprene foam works so well. Gas bubbles are permanently trapped inside the "closed cells" of the wetsuit material.
Our tests have shown that other "innovations"--such as metal foils and fleece linings in suits--do nothing to enhance insulation. However, some features can help the suit do its job. They include: wrist, collar and ankle seals; sealing flaps behind zippers; pre-bent arms and legs; and smooth inner coatings to minimize water flow inside the suit.
So What's This Going To Cost Me?
No doubt about it: scuba is a gear-intensive activity. But scuba gear is also built to last. When properly cared for and regularly maintained, your first set of gear could conceivably be your last.
Gear Buying Tips
Go Local. We believe in supporting your local dive store for reasons of diver safety. However, not every store carries every brand of gear. If you decide on a brand or model that your favorite store doesn't have, ask them if they can order it for you. Don't feel obligated to buy what a store carries in stock unless you're certain the substitution meets all your criteria for a piece of gear.
Invest Wisely. Yes, owning your own gear requires a considerable investment. But you can expect quality gear to last, literally, for years. You aren't buying running shoes or roller blades that eventually wear out and have to be replaced. When properly cared for and maintained, your gear should last as long as you want it to. Now that's a bargain.
When You Get It, Take Care of It
Scuba gear is designed to be rugged and durable. Most items will last you many years--if you take care of them properly. Some top tips from old pros:
• Immerse your gear in fresh, clean water after use. Do not spray.
• Partially fill your BC with fresh water, slosh it around, then drain.
• Allow each item to dry thoroughly before storing in a cool, dry and clean area.
• Avoid prolonged exposure to sunlight, heat and chlorinated water.
• Do not allow contact with petroleum products or other solvents.
• Protect your gear from physical shock when transporting it, especially on airlines.
• At least once per year (more if you dive frequently) have your BC, reg and computer serviced by your dive store. The leading cause of equipment failure is lack of maintenance.
• Do not allow moisture into the air intake of your regulator's first stage, and do not depress the purge on your second stage unless the unit is pressurized.
• Inspect each item of gear well before a planned dive trip so there is time for repairs. Do not dive if your equipment is less than 100 percent reliable.
Dive Speak -- Gear
aluminum-80 The most common scuba cylinder, so named because it is supposed to hold 80 cubic feet of air. In actuality, it usually holds about 77.4 cubic feet.
annual The required yearly visual inspection for scuba tanks. Also, a similar checkup for regulators.
BC Buoyancy compensator. Also known as a BCD, or buoyancy control device.
Boot Protective covering on the bottom of a tank.
Booties Footwear for divers.
Bottle Another word for scuba tank.
console A unit attached to a hose from the regulator first stage for holding and displaying instruments, including dive computer, depth gauge and compass.
doubles Two tanks linked together for use on a single dive.
DPV Diver propulsion vehicle, an underwater scooter.
dump A valve used to deflate a BC.
farmer john Wetsuit pants that extend over the upper body and shoulders (similar to overalls).
first stage The part of the regulator that attaches to the tank and reduces the pressure of the air in the tank to an intermediate pressure.
free flow An unwanted loss of air from a regulator.
glow stick A chemical light stick usually attached to the tank valve during a night dive so a diver can be seen in the dark by his buddy and other divers. Also called a cyalume stick.
hydro Short for "hydrostatic test." A pressure test for scuba tanks, performed in water. Required for every scuba cylinder in the U.S. every five years.
lead The weights worn to offset a diver's positive buoyancy.
mil Short for millimeter, usually used in reference to wetsuit thickness (i.e., a three-mil suit).
octopus A backup or secondary regulator second stage.
o-ring A pliable ring that forms a high-pressure seal on tank valves. Also used on underwater cameras and other equipment to provide a waterproof seal.
port An opening in the regulator first stage for hose attachment.
Primary The main regulator second stage, as opposed to the backup or octopus second stage.
quick disconnect Any one of several different types of fittings that can be used to remove a hose or strap quickly with one hand.
rebreather An underwater breathing unit that recycles a breathing gas, removing carbon dioxide and adding oxygen.
second stage The part of the regulator at the end of the hose that includes the mouthpiece. The second stage reduces the pressure in the hose to a breathable pressure.
shorty A one-piece wetsuit with short legs and short sleeves.
spg Submersible pressure gauge.
tube Snorkel.
Buying new gear is exciting, make sure to maintain your gear before and after your dives!
For a new diver, buying scuba gear is the final step, the act that says "I'm committed and really enjoying diving." But if you're newly certified, how are you supposed to know what scuba gear to buy?
Relax. Between our advice and your instructor's help, we'll have you outfitted in no time. It's helpful to think of buying scuba gear in two phases: first, the basic stuff that won’t break the bank; second, the major pieces of life support that are a real investment in the sport. Let's start with these scuba gear basics.
Phase One: The Basics
Scuba Mask
The one-pane oval mask of Sea Hunt and those old Bond films is practically a relic. In its place is a variety of styles for a world of faces. Your job: Choose the one right for you.
What It Does - The mask creates an air space in front of your eyes that allows them to focus underwater. The nose pocket allows you to equalize the air pressure in your mask as you go deeper, and to add air to the space to clear it when needed.
What to Look For - A good watertight fit. Our Scuba Lab experts have come up with this six-step plan for foolproof mask fitting:
1. Look up at the ceiling and place the mask on your face without using the strap. It should rest evenly with no gaps.
2. Place a regulator or snorkel mouthpiece in your mouth. Does the mask still feel comfortable? Any gaps yet?
3. Look forward. Place the mask on your face without using the strap and gently inhale through your nose. The mask should seal easily on your face. Caution: A strong inhale will close minor leak areas and invalidate this test.
4. Repeat the sniff test with a mouthpiece in place.
5. If the mask is still in the running, adjust the strap and put it on your face. Make sure the nose pocket doesn't touch your nose and that the skirt feels comfortable on your upper lip.
6. Put the regulator mouthpiece in one more time to make sure you can easily reach the nose pocket to equalize your ears.
Any mask that passes this test is a potential keeper, but there’s only one way to find out—you need to try them on! We recommend that you don’t buy a scuba diving mask online unless you know exactly which model fits you best. Head to your local dive store for a try-on session.
Here you'll find a whole range of options on masks, including side, top and bottom panes for a wider field of vision. Some have special lenses that protect your eyes against UV rays, and others are coated to minimize fogging. These options (and the huge range of color schemes available) are a matter of personal preference–just make sure the mask you choose fits right.
Cost - From $50 to $200.
Our Advice - Once you’ve picked your perfect mask, make sure you also treat the lens to stop it from fogging. It’s best to ask your local dive store staff how to do this, as the procedure will vary depending on the coatings on the glass.
Need to buy a new mask? Read our latest ScubaLab scuba diving mask review.
Snorkel
It seems simple enough: a curved tube that lets you breathe while floating face-down on the surface. Yet, as you look at the giant wall of snorkels at your local dive store, you'll see an array of options and features to choose from. Don't worry. Stay focused on the basics.
What It Does - As a diver, you primarily use a snorkel to conserve air in your tank when on the water's surface.
What to Look For - Comfort. You want a mouthpiece that feels good in your mouth and breathes dry and easy. The problem is, most attempts to keep snorkels dry also make them bulkier and harder to breathe through. The snorkel for you is one with a good compromise between ease of breathing and dry comfort. Remember, the bigger a snorkel is, the more drag it creates in the water. Also important: how the snorkel attaches to your mask. Look for a durable, yet simple and easy-to-operate attachment.
Cost - From $30 to $90.
Our Advice - If you don't plan on doing a lot of snorkeling, this is the one piece of gear you can skimp on. Get a simple, basic model and be done with it.
Scuba Fins
Fish don't have legs for the simple reason that fins are the best way to move through water. So if you're going to play in the fish's territory, you need a good set of fins too.
What They Do - Fins translate power from the large leg muscles into efficient movement through water, which is 800 times denser than air.
What to Look For - Comfort and efficiency. When trying on fins, look for a snug fit that doesn't pinch your toes or bind the arches of your feet. If you can't wiggle your toes, the fins are too small.
The efficiency of fins is largely determined by their size, stiffness, and design. Divers with strong leg and hip muscles can efficiently use a bigger, stiffer fin. Smaller divers or less conditioned divers will be more comfortable with smaller, more flexible fins. Finally, make sure buckles and straps are easy to use.
Cost - $75 to $250.
Our Advice - Choosing the right pair is important to prevent muscle fatigue and cramping. Good fins will enhance your enjoyment of diving; bad ones can ruin it.
What type is right for you? Here's a look at some considerations to keep in mind when choosing a pair.
Full-Foot or Open-Heel Fins?
Full-foot fins don't require dive booties and are best suited mainly for warm waters.
The straps of open-heel fins can be adjusted for the different booties you may wear or for different family members and children as they grow.
Open-heel fins require less effort to put on, especially if a pull tab is added to the strap.
The dive booties required with open-heel fins also provide foot protection and comfort while diving and walking.
Need to buy new scuba fins? Read our latest ScubaLab scuba fin review.
Wetsuit
Form-fitting exposure suits are usually made of foam neoprene rubber (wetsuits) or spandex-like materials (skins), sometimes with a fleece lining.
What They Do - Exposure suits insulate you against the cooling effect of water, which can rob your body of heat 25 times faster than air. The thickness and type of exposure protection you need depends on dive conditions. Simple Lycra suits provide little thermal insulation, but do help protect against scrapes and stings.
A wetsuit keeps you warm in two ways:
Keeping Water Out. Any water that gets inside the suit is going to leak out again. When the water is inside, it absorbs some of your body heat. When it leaves, it takes that heat with it. So the first thing a wetsuit has to do is keep the cold ocean from flushing through it. A good fit, one that feels equally snug everywhere, is critical, so the space the ocean wants to use to flow along your skin is as small as possible.
Providing Insulation Against Heat Loss. A little science here: Solids and liquids conduct heat well; gases do not. Air, for example, is about 20 times less conductive than water. As a practical matter, good insulation — above or below water — is all about trapping air. That's why neoprene foam works so well. Gas bubbles are permanently trapped inside the "closed cells" of the wetsuit material.
Some features can help the suit do its job. They include: wrist, collar and ankle seals; sealing flaps behind zippers; pre-bent arms and legs; and smooth inner coatings to minimize water flow inside the suit.
What to Look For - Fit and comfort. Exposure suits should fit snugly without restricting movement or breathing. Reject any suit that's too loose, however. Gaps at the arm, leg, crotch and neck allow water to circulate and defeat the suit's ability to prevent heat loss.
Cost - Wetsuits and skins range from $70 to $650. Drysuits can cost from $850 to more than $2,500.
Our Advice - As long as a wetsuit fits correctly, it will do the job. If you're going the budget route, your choices will usually be limited to basic models. Bright colors and graphics aren't necessary but do make you more visible to other divers.
Here's a guide to choosing the right weight for the conditions you dive in.
Exposure Suit Comfort Zones
Water Temp
75-85F - 1/16" (1.6mm) neoprene, Lycra, Polartec
70-85F - 1/8" (3mm) neoprene
65-75F - 3/16" (5mm) neoprene
50-70F - 1/4" (6.5mm) neoprene
35-65F - 3/8" (9.5mm) neoprene, dry suit
Once you're a newly minted diver, the anxiety you had about buying gear will likely be replaced with a rush of excitement — a desire to max out the plastic or convert the Roth IRA into a heap of the latest and greatest in scuba gear.
Fine. Having your own gear is essential to enjoy this sport fully and to maximize your comfort and safety. Just remember that your experience with equipment is limited. You've got to study the field and understand what you want — and need — out of each piece of gear.
We'll show you how to pick the perfect wetsuit for cold and warm weather diving conditions.
Phase Two: Life-Support Equipment
Scuba BCDs
Buying your first buoyancy compensator device—also called a BCD or BC—can be an absolute minefield. There are so many to choose from and the evolution of designs in the last decade has been incredible. From lightweight, travel-friendly models to more techy backplate and wing systems (which are becoming increasingly popular in the recreational market) there is bound to be the perfect BC out there for you.
What It Does - What doesn't it do? It holds your gear in place, lets you carry a tank with minimal effort, floats you at the surface and allows you to achieve neutral buoyancy at any depth. Plus with some manufacturers offering customization of colors and even embroidery—it’s a fashion statement too.
What to Look For - Comfort and correct size and fit. There are two main styles of BCs, jacket-style and backplate and wing, with the jacket-style being one unit, and a backplate and wing being a modular design. At the end of the day, this is a personal preference on what makes you feel the most comfortable and confident in the water.
Before you try on BCDs, slip into the exposure suit you'll wear most often. Look for a BCD that fits snugly but doesn't squeeze you when inflated. The acid test: inflate the BCD until the overflow valve vents. The BCD should not restrict your breathing. While you've got the BCD on, test all valves for accessibility and ease of use, then make sure the adjustments, straps and pockets are easy to reach and use.
If you’re going down the backplate and wing route, the good news is that the harness can be adjusted to the perfect fit. Some models come with breakaway buckles or a cinch system to make getting in and out of your BC easier, but if you fancy a strict continuous harness, make sure you have the shoulder flexibility to wriggle out of the webbing. Considering getting into tec diving later on? Go with a backplate and wing.
Weight belts are fast becoming a thing of the past with the majority of modern BCs moving towards integrated weight systems. When trying on your BC, check that you can easily ditch weights and make yourself familiar with the mechanism that secures them in place.
Pay particular attention to the inflator hose. Is it easy to reach and extend over your head? Make sure there's a clear distinction between the inflate and deflate buttons and that you can operate them easily with one hand.
Cost - $350 to more than $1,000.
Our Advice - This is an important piece of equipment that you can expect to use for many years. Don't skimp; go for quality. Test as many different models as you can in real diving situations before buying. Rent them if you have to.
How Much BCD Lift Do you Need?
Tropical Diving (with little or no wetsuit protection, with single AL80) - 12 to 24 pounds
Recreational Diving (with a full wetsuit or dry suit, with single AL80) - 20 to 40 pounds
Technical Diving (with double AL80s) - 40 to 80 pounds
Need to buy a new BCD? Read our latest ScubaLab scuba BCD review.
Scuba Regulators
Just like with BCDs, choosing a regulator can be overwhelming. There are so many options. But don’t worry, we can help: ScubaLab has testedhundreds of regulators in thousands of breathing machine tests.
What It Does - Your regulator converts the high-pressure air in your tank to ambient pressure so you can breathe it. A regulator must also deliver air to other places, such as your BC inflator and alternate second stage.
What to Look For - High performance. The best regulators can deliver a high volume of air at depth, under heavy exertion even at low tank pressures.
You’ll need to consider where you do the majority of your diving. If you’re primarily a cold water diver, you should invest in a scuba regulator that is rated for cold water. These models are usually environmentally sealed which prevents any of the cold water from entering the first stage, or the parts feature a special coating that stops ice crystals from forming. This helps the reg to withstand colder temperatures and still perform perfectly without freezing up and free-flowing.
Look for a comfortable mouthpiece (although you can always change this later) and ensure that the second stage isn’t too heavy for you—you’ll notice your jaw aching on long dives if not.
Cost - From $225 to more than $1,600.
Our Advice - You've got to do your homework to find the best regulator available for your budget. Talk to dive store personnel, experienced divers and read ScubaLab's objective tests and reviews.
Learn how to pick the right scuba regulator.
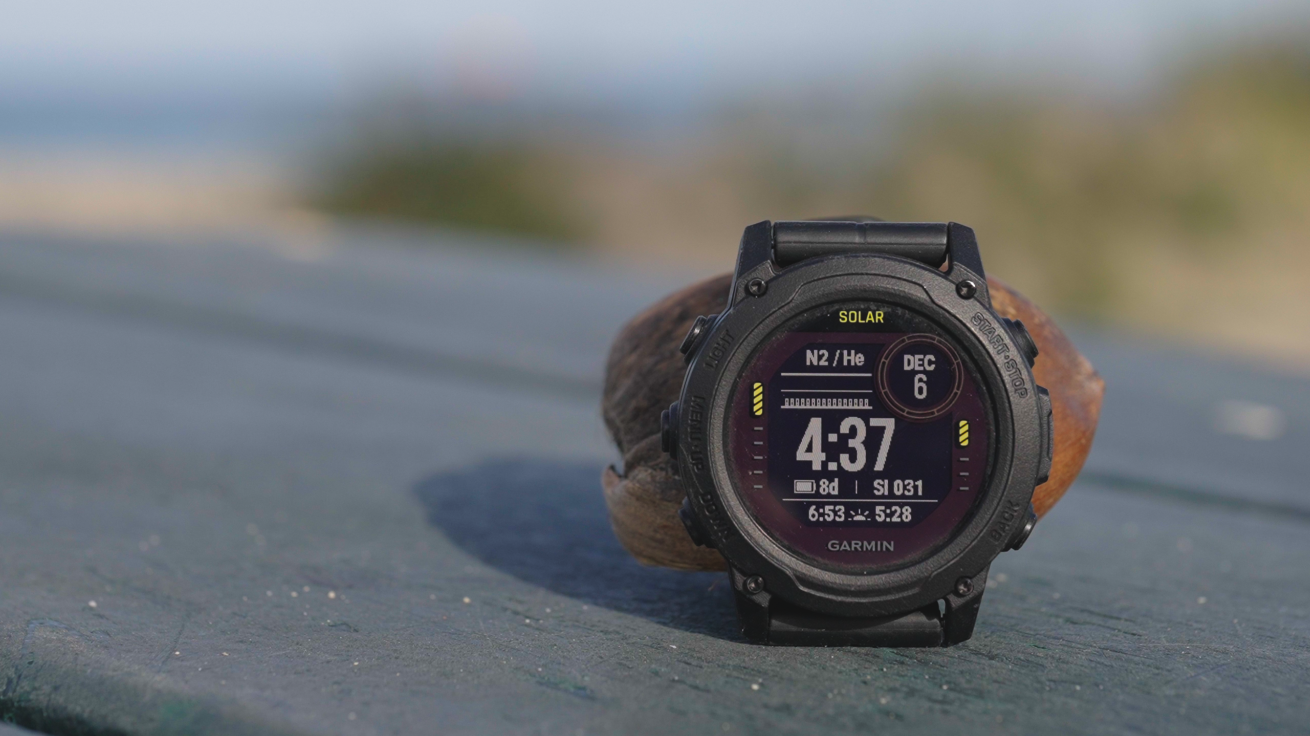
Dive Computers
Dive computers are your underwater guardian angel. Most divers feel lost without theirs and with the technology that’s available right now, manufacturers are offering some incredible features in their dive computers—did you know you can track your location by GPS and even communicate with your buddy?
What They Do - Dive computers constantly monitor depth and bottom time, to automatically track your no-decompression status. You’ll know exactly how long you’re able to stay at any given depth keeping you safe and informed. Computers can also monitor your ascent rate and tank pressure, tell you when it's safe to fly, help plan your dives, log your dives via bluetooth, switch gases and much more.
What to Look For - User-friendliness. The most feature-packed dive computer does you no good if you can't easily and quickly access the basic information you need during a dive: depth, time, decompression status and tank pressure. Some computers also include a freedive mode for those days you leave your cylinder at home. Many recent models boast large, colorful screens helping you easily read information underwater.
Mounting options are an important feature to consider and let you position computers on your wrist or gauge console. Some computers are designed with daily function and style in mind- they’re more like a smartwatch that looks good on a night out too.
Check out the battery life of the dive computer, and how it will be charged. Some budget models will need the battery replaced every so often and this is usually done by a qualified service technician in your local dive store. However, there are now a number of computers that are USB rechargeable, even solar chargeable.
Cost - $300 to more than $1,300.
Our Advice - Begin with an honest evaluation of your diving needs—where do you see your diving adventures and training taking you in the future? If you plan on extending your depth limits to beyond 130 feet, and dipping your toe into more technical diving, it might make sense to invest in a computer that will grow with you as you advance. Study the features of different computers and choose the one that is going to grow with you.
Read the latest ScubaLab dive computer review.
Other Factors to Consider For Your First Set of Scuba Gear
Where Should You Buy Gear?
Scuba equipment can be purchased in dive stores, online, at other retail outlets, or as used equipment from private parties. There are distinct advantages and disadvantages to each.
Dive Store: Your local dive store is the heart and soul of this incredible sport. They can provide instruction, dive travel, local dives, inspection and repair services, compressed air, rental equipment, equipment advice and the opportunity to look at, feel, compare and test equipment before purchase. They are full of experts eager to help and you might even get a cup of tea!
Private party: Buying used gear from a private party may be the cheapest possible way to go, but provides absolutely no guarantees. Unless you are extremely knowledgeable or an equipment technician, you will not know if a regulator, for example, can even be serviced. You will also not have any performance data. The seller's statement that the regulator "breathes fine" and your breathing on it out of the water are both meaningless. We recommend not buying used life-support equipment from private parties.
Nondive store retail outlets: Sporting goods and discount stores may have scuba gear for sale. Some of these stores have scuba departments and should be considered dive stores. However, most are simply retail outlets and cannot provide the service, support and expertise that a dive store can. Other than price, there is no reason to buy at these nondive store outlets.
Online: In today's digital age, many local dive centers have embraced the convenience of online shopping, offering scuba gear through well-stocked, user-friendly websites. You can browse and purchase a wide range of scuba gear online, often with the added benefits of customer reviews, detailed product descriptions, and video tutorials.
If you know exactly what you want, buying gear from an online store is a dream. However, if you’re not certain if the fit or features of a product are going to be right for you, it might be worth a trip to your local dive center… or at least check the website’s return policy. But remember, buying from a local store (online or in person) is the best way to support local businesses.
Dive Stores. Retail dive stores have been the focal point of local dive support since recreational diving became popular. Your local dive store can provide instruction, dive travel, local dives, inspection and repair services, compressed air, rental equipment, equipment advice and the opportunity to look at, feel, compare and test equipment before purchase. In addition, the store can back up products immediately if necessary. Personal contact is also an important part of a dive store's value. In short, a dive store is in a better position than a mail-order dealer to provide the service and support you need and should expect.
How much does scuba gear cost?
There’s no doubt about it, scuba is a gear-intensive activity. But scuba gear is also built to last. When properly cared for and regularly maintained, your first set of gear can last a long time.
A full set-up will most likely cost more than $1,500. Of course, you don’t have to fork out all at once. Most new divers will buy their basics and rent items like regs and BCDs for a while. This way you can slowly and more affordably build up to a full set of gear.
How do I clean and maintain scuba gear?
Proper maintenance is crucial to extend the life of your scuba gear and ensure your safety underwater. Scuba equipment is built to withstand the harsh marine environment, but its longevity heavily depends on regular care and maintenance. Follow these tips from seasoned divers to keep your gear in top condition:
• Rinse Thoroughly After Use: Always rinse your gear in fresh water after each dive to remove salt, chlorine, and other contaminants. Ensure all equipment, including your wetsuit, BCD, mask, fins, and snorkel, is fully submerged and agitated to dislodge any debris.
• Clean Your BCD Internally: Partially fill your BCD with fresh water. Inflate it, gently shake it to clean the bladder, then drain through one of the dump valves. This process helps prevent the buildup of salt and minerals inside the BCD.
• Dry Gear Properly: After rinsing, allow your gear to dry completely in a shaded, well-ventilated area before storage. Avoid direct sunlight as UV rays can degrade the materials over time. Ensure that items like your wetsuit are hung on wide hangers to prevent stretching or deformation.
• Store Correctly: Keep your gear in a cool, dry place away from direct sunlight and heat sources. Use proper storage solutions, such as gear bags or hangers designed for dive equipment, to protect from dust and physical damage.
• Avoid Harmful Substances: Ensure your gear does not come into contact with petroleum-based products, harsh chemicals, or solvents, which can damage rubber and plastic components.
• Transport With Care: When travelling, especially by air, pack your gear in padded bags to protect it from impacts and compression. Consider carrying your regulator and dive computer in your carry-on luggage to prevent damage and loss.
• Prevent Moisture Entry: Avoid allowing water to enter the first stage of your regulator. Always replace the dust cap when the regulator is not connected to a tank, and ensure it's dry before doing so. Never press the purge button on your second stage unless it's pressurized to avoid drawing moisture into the mechanism.
• Conduct Pre-Dive Inspections: Before any dive trip, inspect your gear thoroughly for signs of wear, damage, or malfunction. Pay special attention to hoses, o-rings, and seals. Address any issues well in advance to ensure your equipment is safe and dive-ready.
• Eco-Friendly Practices: Opt for biodegradable cleaning products when possible to minimize your environmental impact.
• Regular Servicing: Have your regulator, BCD, and dive computer professionally serviced at least once a year or according to the manufacturer's recommendations. Frequent divers should consider more regular check-ups. This service includes thorough cleaning, inspection, and replacement of worn parts, ensuring your gear performs reliably.
• Regular care keeps you safe and extends the life of your equipment, allowing you to enjoy the underwater world for many years to come.

Dive Speak — Dive Gear
Here's a glossary to commonly used dive terms.
Aluminum 80 The most common scuba cylinder, so named because it is supposed to hold 80 cubic feet of air. In actuality, it usually holds about 77.4 cubic feet.
Annual The required yearly visual inspection for scuba tanks. Also, a similar checkup for regulators.
BC Buoyancy compensator. Also known as a BCD, or buoyancy control device.
Boot Protective covering on the bottom of a tank.
Booties Footwear for divers.
Bottle Another word for scuba tank.
Console A unit attached to a hose from the regulator first stage for holding and displaying instruments, including dive computer, depth gauge and compass.
Doubles or Twin Set Two cylinders linked together for use on a single dive.
DPV Diver propulsion vehicle, an underwater scooter.
Dump A valve used to deflate a BC.
Farmer John Wetsuit pants that extend over the upper body and shoulders (similar to overalls).
First stage The part of the regulator that attaches to the tank and reduces the pressure of the air in the tank to an intermediate pressure.
Free flow An unwanted loss of air from a regulator.
Glow stick A chemical light stick usually attached to the tank valve during a night dive so a diver can be seen in the dark by his buddy and other divers. Also called a cyalume stick.
Hydro Short for "hydrostatic test." A pressure test for scuba tanks, performed in water. Required for every scuba cylinder in the U.S. every five years.
Lead The weights worn to offset a diver's positive buoyancy.
Mil Short for millimeter, usually used in reference to wetsuit thickness (i.e., a three-mil suit).
Octopus A backup or secondary regulator second stage.
O-ring A pliable ring that forms a high-pressure seal on tank valves. Also used on underwater cameras and other equipment to provide a waterproof seal.
Port An opening in the regulator first stage for hose attachment.
Primary The main regulator second stage, as opposed to the backup or octopus second stage.
Quick disconnect Any one of several different types of fittings that can be used to remove a hose or strap quickly with one hand.
Rebreather An underwater breathing unit that recycles a breathing gas, removing carbon dioxide and adding oxygen.
Second stage The part of the regulator at the end of the hose that includes the mouthpiece. The second stage reduces the pressure in the hose to a breathable pressure.
Shorty A one-piece wetsuit with short legs and short sleeves.
SPG Submersible pressure gauge.