

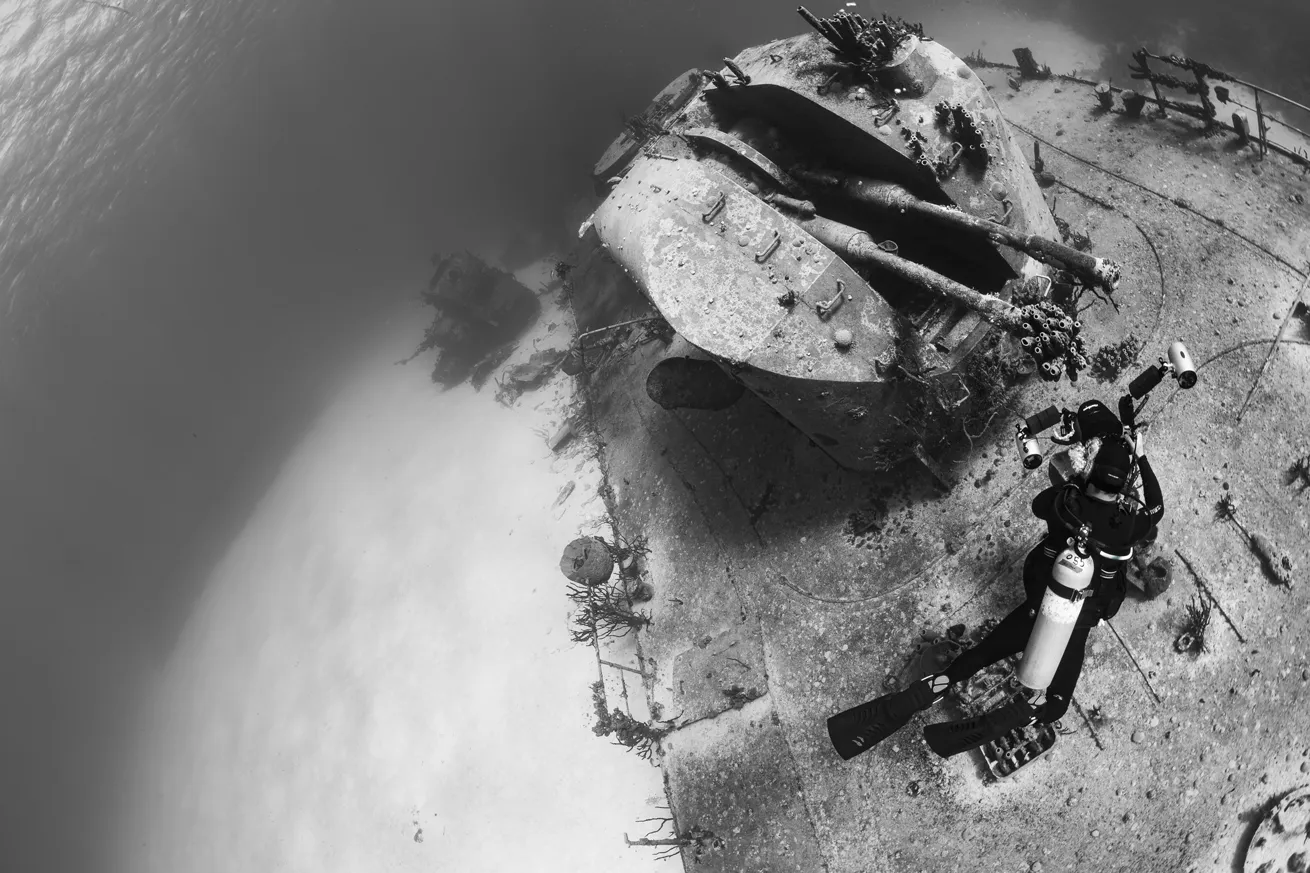
Thomas AndersonThis image was captured with a Canon EOS R3 and an 8–15mm fisheye lens using natural light.
Other than sharks and coral reefs, deep, mysterious shipwrecks are what most people conjure up when they think of underwater exploration. Not only are many wrecks historically and culturally significant, but they’re relics of human ingenuity and, often, human loss. Wrecks also serve as the perfect subject for stunning images. With the right gear, settings and techniques, you can save yourself a lot of time and hassle while capturing them, especially during deeper, more fleeting dives. Let’s get into shooting wrecks and provide some inspiration for your next dive on a majestic hulk.
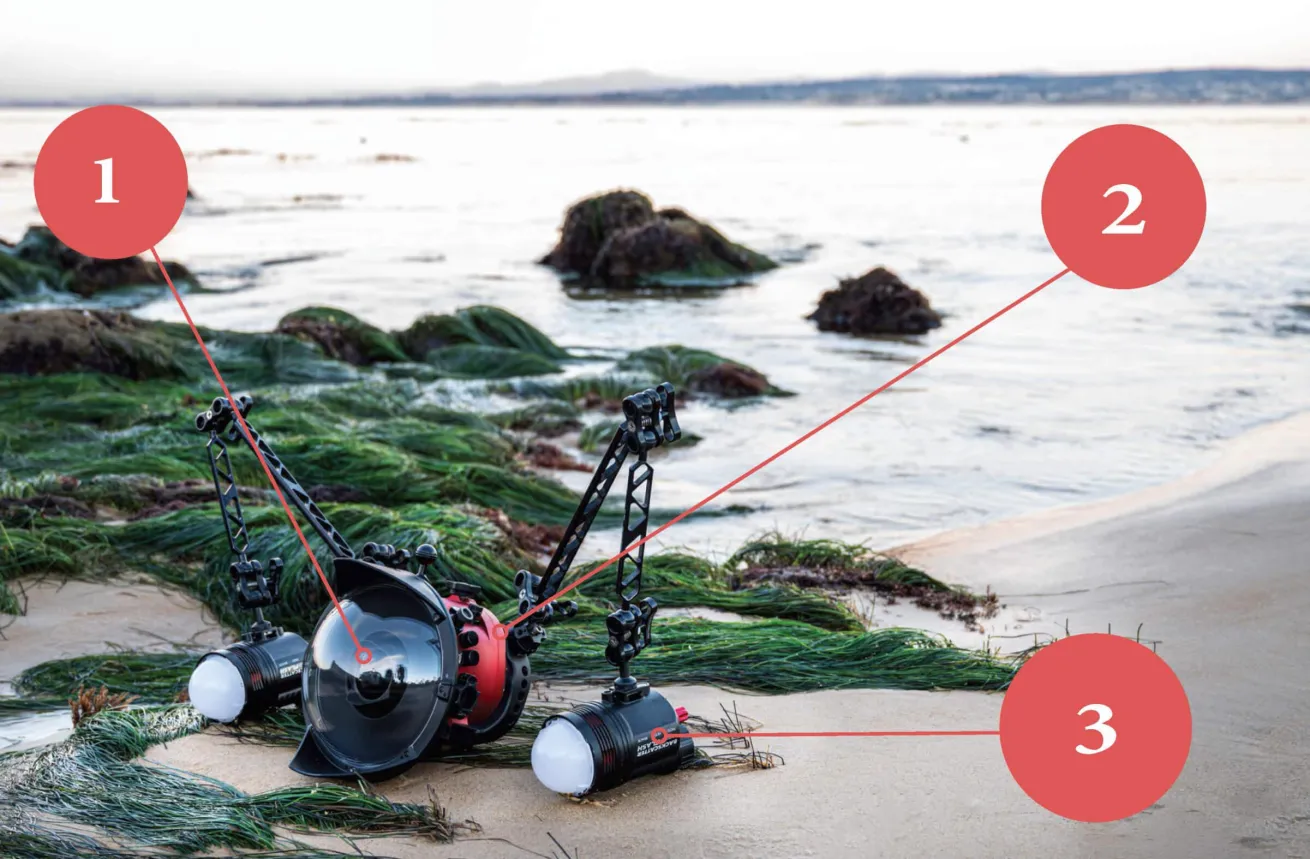
Thomas Anderson
- Sigma 15mm Fisheye Lens
- Nikon D780 with 10-inch Dome
- Backscatter Hybrid Flashes with Dome Diffusers
Best Gear for Shipwreck Photography
Lenses
First, let’s talk lenses. Fisheyes are the widest option, tack-sharp and compact, but they have a few drawbacks. Edge distortion created by fisheyes will curve straight lines, which can make human-made objects like railings, guns or propellers look bowed. The fisheye look is so ubiquitous in underwater photography that the distortion is essentially a stylistic choice. Keep in mind that fisheyes require you to get very close, or the wreck may look small in the frame.
Domes and Ports
Larger domes are often the best choice, as they allow you to open up your aperture more than mini domes do. This lets more light reach the sensor in dark conditions.
Wet wide-angle lenses and wide-angle conversion ports are also a fantastic choice. Most of these lenses are around 130 degrees and have minimal to no distortion. Wide-angle conversion ports like the Nauticam WACP-1B are especially prized among wreck photographers, as they are razor-sharp and allow you to open up your aperture to let in more light. This is invaluable if you’re capturing images using natural light.
A traditional wide-angle lens (such as a 16–35mm or equivalent) with a dome is only a good choice if that is your only option. These lenses are not as sharp or as wide as fisheyes or wide-angle correction optics, so it will be harder to capture a large object like a shipwreck.
Lighting
For lighting, you’ll want powerful, wide and even strobes because you are lighting large areas. Diffusers are a must, as they help spread light even further.
Related Reading: How to Photograph Camouflaged Animals Underwater
Recommended Settings for Shipwreck Photography
Settings are highly dependent on your scene and what you are trying to capture.
Aperture
The right aperture will depend on how close you are to your subject. For wreck images that are not close-focus wide-angle, f/8 to f/11 is a good starting point. If you are using a large dome with a fisheye lens, f/8 will be plenty sharp in the corners. For smaller domes, start at f/11 to f/16. If you’re using a quality wide-angle conversion port, you can open up under f/8 or even to f/5.6 or f/4. This works well if you are shooting from farther away using natural light and helps avoid having to use very slow shutter speeds or extremely high ISOs.
Shutter Speed
Shutter speed should be set based on the look you want to achieve. Generally speaking, faster shutter speeds result in darker backgrounds, while slower shutter speeds create brighter ones. If you want your scene to feel darker and more mysterious, opt for a faster shutter speed. If you are aiming for more natural light, a more washed-out look, or black and white images, a slower shutter speed will be better.
ISO
For ISO, start low—around 200 to 400—if you are using strobes. When shooting with natural light, you will often need a higher ISO, sometimes over 1000. Newer cameras handle noise, or image grain, quite well at higher ISOs. That said, noise can also add a gritty, film-like look when used intentionally.
There is no single set of perfect settings. Get in the water, experiment, replicate looks you admire and practice executing a specific image you have in mind.
The Technique
This is where the rubber meets the road. Some wrecks are challenging to access or even downright dangerous. Many are deep and may be in various stages of decay, so plan accordingly. Never dive a location beyond your training and experience, and always rely on local expertise when diving a new site.
Start by planning your dive. Try to explore deeper sections first, then work your way shallower to conserve air and maximize shooting time. If there is a specific feature you want to capture, design your dive around it. When diving with other photographers, practice good etiquette and share access to key features like guns and props. Be mindful of your bubbles so they do not drift into someone else’s carefully composed background, and kick intentionally to avoid stirring up silt.
For larger scenes, spread your strobes wide and slightly above your port to light the biggest area possible. Keeping them closer together works for close-focus wide-angle shots, but it will not effectively light large portions of a wreck.
Related Reading: How to Shoot Models in Wide-Angle Underwater Photos
Natural light is an excellent option for sections of a wreck that are simply too large to light. In these situations, use your camera’s meter for both the background and foreground. Often, you will want to slightly overexpose the background to bring out detail in the foreground. Shoot with the sun at your back to prevent the background from blowing out. If you are shooting black and white, aim for true blacks and whites rather than flat, mid-tone grays. To check your exposure and contrast underwater, switch your camera to a black-and-white picture profile for review.
Conclusion
Overall, it’s important to treat any wreck with respect, regardless of its history. The more planned and intentional your approach is, the better your results will be. Using the right gear, settings and techniques will lead to more successful dives and help sharpen your skills even further.


