

Thomas Anderson
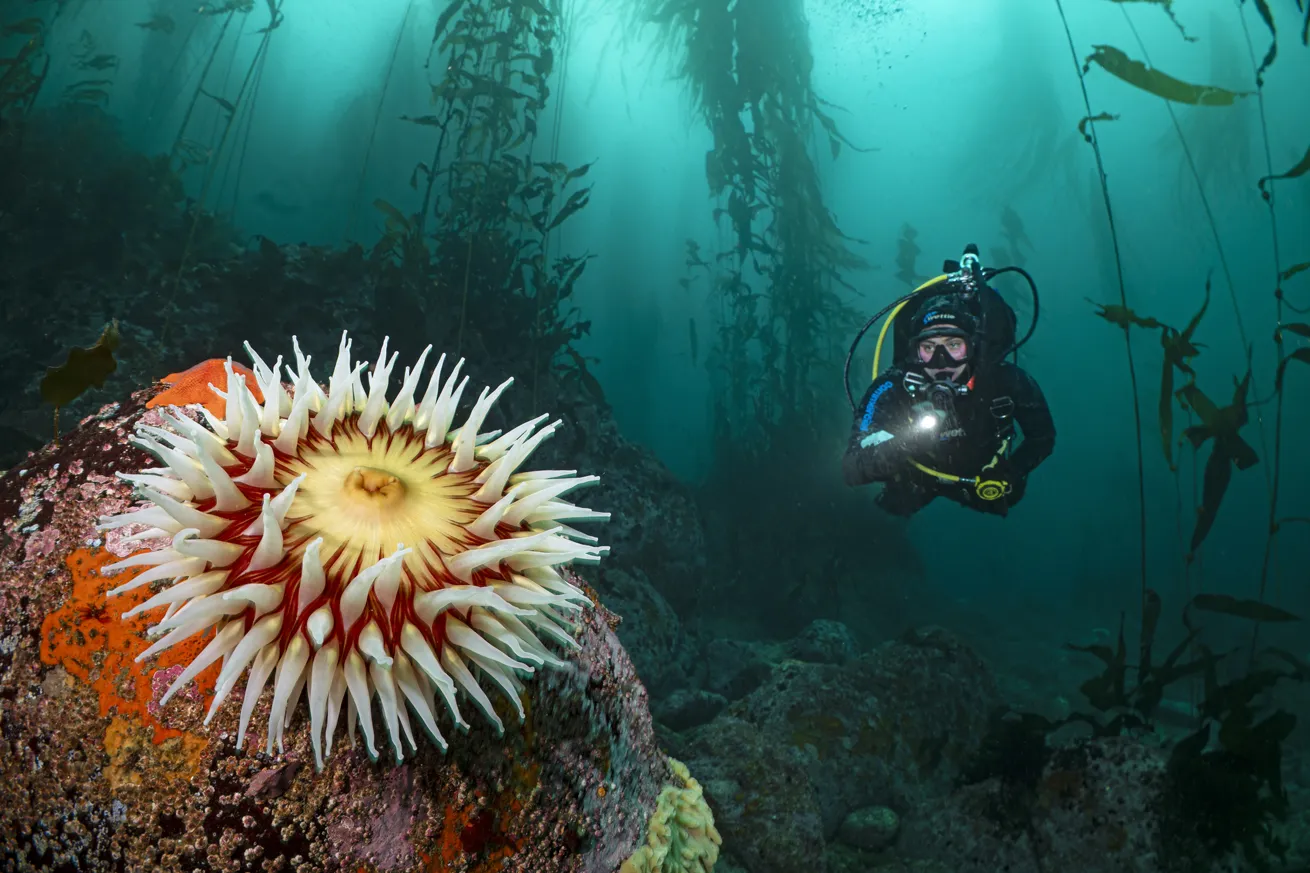
Capturing wide-angle scenes underwater is an incredible way to display the natural beauty of the ocean. But when you want to incorporate greater depth and a human touch into the image, add a model.
Using a model is a great way to include a midground or foreground subject while producing a sense of scale for large scenes and subjects like wrecks, whales and mantas. Adding a person also gives viewers a point of personal connection, inserting an element that’s instantly relatable. Let’s dive into shooting underwater with a model, going over tips to both inspire and set you up for success.
Related Reading: Best Destinations for Underwater Photography
Thomas Anderson
The Gear
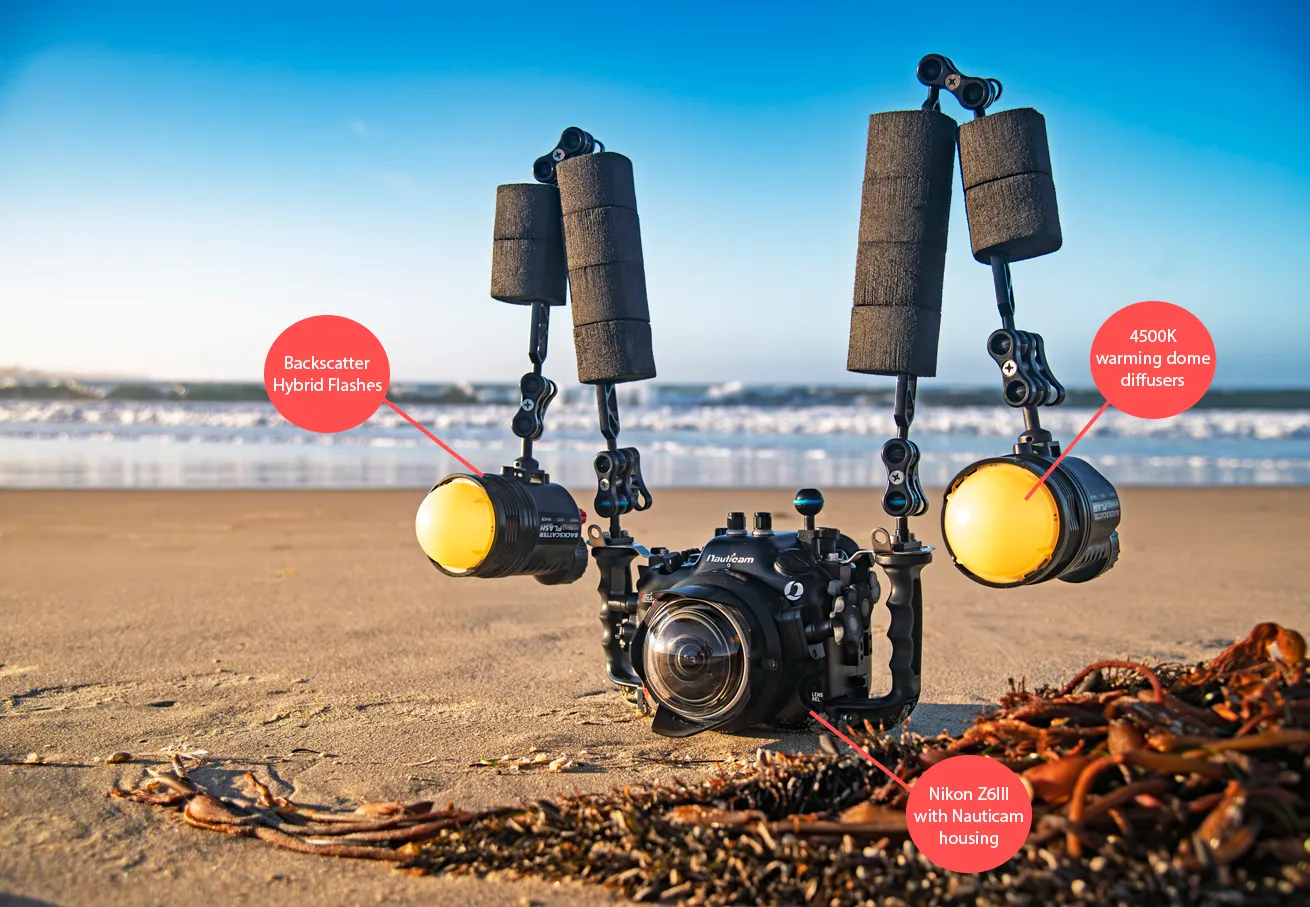
Before we think about capturing shots with a model, let’s gear up. First, you’ll need a wide-angle lens to fit all the elements into the frame. Lenses like fish-eyes, wide zoom lenses (like a 16–35mm or equivalent) and wet wide lenses are great choices. A set of powerful and wide strobes is the best choice for lighting—video lights just won’t cut it for shooting still photos in most situations.
In many shooting conditions, strobes with warmer light, either natively or with a warming diffuser, will enrich the model’s skin tone if they’re being directly lit. Your model can also use a dive torch, video light or even a remote off-camera flash to add a burst of light to the image, drawing the viewer’s eye.
When it comes to dive gear, check your model’s setup for danglies or extra pieces of equipment before you jump in. Removing excess gear will make them appear more streamlined and will better accentuate their form.
Settings for Photographing Underwater Models
As for camera settings, the best choice will be what works for the scene. If you’re shooting a general wide-angle scene, with the sun at your back, a good jumping off point is: aperture f/8–f/11, shutter speed 1/125, ISO 200–800. Adjust settings based on your conditions and make any tweaks for the exposure you want.
If you’re shooting a close-focus wide-angle scene, use a stopped-down aperture for greater depth of field, ensuring everything from your foreground to background is sharp. For sun balls, use the fastest shutter speed your strobes sync with, a smaller aperture, a low ISO and plenty of strobe power. You can even play with a slow shutter—just make sure your model is close enough to be lit, or else they may appear blurry in the image.
Be sure to explore various settings and capture different kinds of shots to make the most out of your shoot.
Related Reading: 23 Underwater Cameras, Lights and Accessories for Divers
The Technique: Communication is Key
Now let’s get to where the fins meet the water and talk technique.
The first and most important factor for shooting with a model is communication. Come up with a dive plan with your model and discuss hand signals for directing and positioning them (pointing them up, down, left, right, closer and farther). Making sure everybody is on the same page will ensure valuable time underwater is not wasted.
Your model will also need good buoyancy and the right amount of weight, as they’ll have to hover in the same position underwater while you shoot. Shooting with experienced divers who maintain neutral buoyancy and perform periodic weight checks makes the session easier.
Body positioning is also key. Instruct your model to keep their legs pinned together, as fins splayed out in different directions will not look good. We want a streamlined appearance, like they’re comfortable and at home in the water.
Related Reading: How to Take Stunning Fish Photos Underwater
Now with all the topside details taken care of, it’s time to jump in and shoot.
Locate an interesting scene and place your model thoughtfully. Remember, we’re not just inserting a random diver in the frame. Instead, you’ll want to carefully consider the composition and where they fit into the image. Decide whether you want your model in the foreground, filling more of the frame, or in the midground, adding depth. Check out the environment around you and look for opportunities to naturally frame your model. Rock formations, swim-throughs and structures like kelp all work beautifully.
Wrecks are also great opportunities for shooting models, as are larger subjects like whales or mantas. These provide a sense of scale for your scene and present an opportunity to tell a story.
Be sure to experiment with different backgrounds. As always, take plenty of shots to increase the odds of capturing that perfect moment.
Finally, remember to slow down and enjoy the experience. Communication is paramount, and with patience and practice, you and your model can create images that are both technically and visually compelling.


