

Alex Mustard
Alex Mustard
Alex Mustard
Our photo expert: Alex Mustard is a trained marine biologist who has been a full-time underwater photographer and author since 2004. After taking his first underwater shots at the age of 9, the U.K. native has become one of the world’s most creative underwater photographers, and a pioneer in digital imaging who enjoys sharing the techniques behind his shots. To view more of his work, visit amustard.com.
Wrecks are big and they don’t move. Surely they should be easy to photograph? In actuality, they are one of the most challenging subjects, but memorable shots are more likely if we follow a few simple rules.
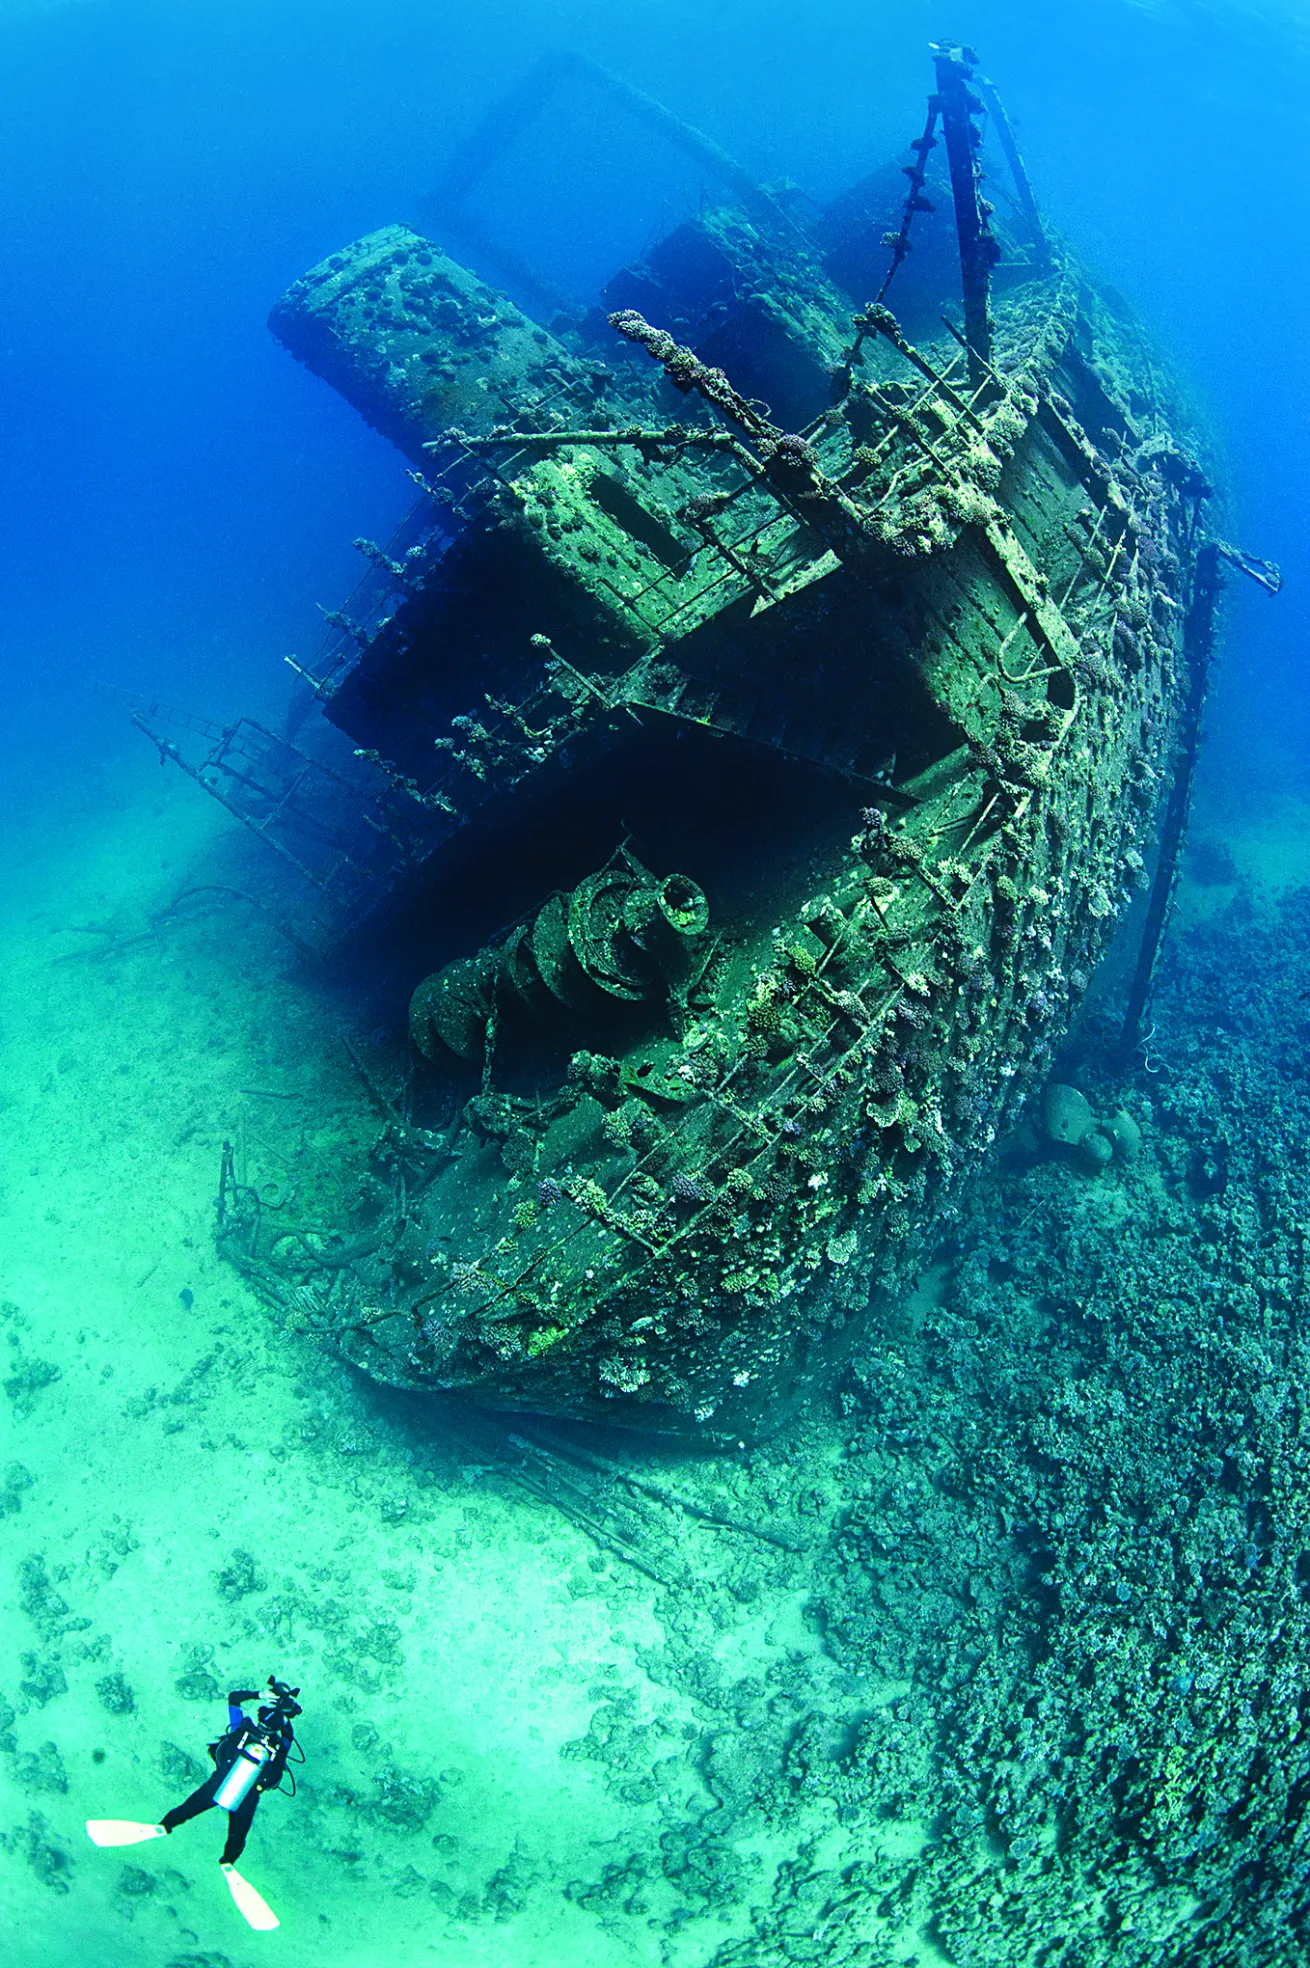
Size matters with wreck photography. Now is the time to pull out your widest lens and go for the big shots, showing as much recognizable ship structure as visibility allows. Nondivers always imagine wrecks as whole vessels sitting on the seabed, so photos in this style will be naturally appealing.
If the wreck is longer than the visibility, you can still shoot the entire thing; but most of the time you should focus your efforts on large, recognizable features, such as the bow, the stern, the bridge and the propeller. You might also include a diver in the frame to convey both a sense of exploration and scale.
Shooting such expanses of super-structure means your subject will be too large to illuminate with strobes, so leave them behind and utilize the ambient light. There are three options: Leave the images with a blue color cast for the maximum atmosphere, convert them to black-and-white for the most contrast, or use manual white balance and filters to bring out the colors of the wreckage. White balance alone will pull out the color of the wreckage, but it will also suck away the water color. Filters help us to hold a strong blue background.
When visibility is low, you’ll create the most impact by shooting into the sun, boosting the contrast and showing the wreckage as a silhouette. Black-and-white pictures often work best when shot across the light to create areas of shade and highlight. For the most detail and color, you should shoot with the sun coming over your shoulder and illuminating the wreck fully.
We can’t move a wreck— or the sun — so we need to know which of the wreck’s features will be illuminated at any given time of day. Experienced photographers use that knowledge to dive a wreck at certain times for certain angles.
Beginner Tips
Dive More than Once: Wrecks don’t move, but the sun does. On most wrecks, this means that the perfect light for a great bow shot will not happen on the same dive as the perfect light for the stern. To get the best photos of both, you should dive the wreck at different times of the day.
Intermediate Tips
Monochrome Mavels: Black-and-white photography suits wrecks; it’s also a great way to save a shot that is “too blue.” Convert your image to black-and-white, and increase the contrast until the wreck pops. The best black-and-white shots should include strong shapes, bright areas and deep shadows.
Advanced Tips
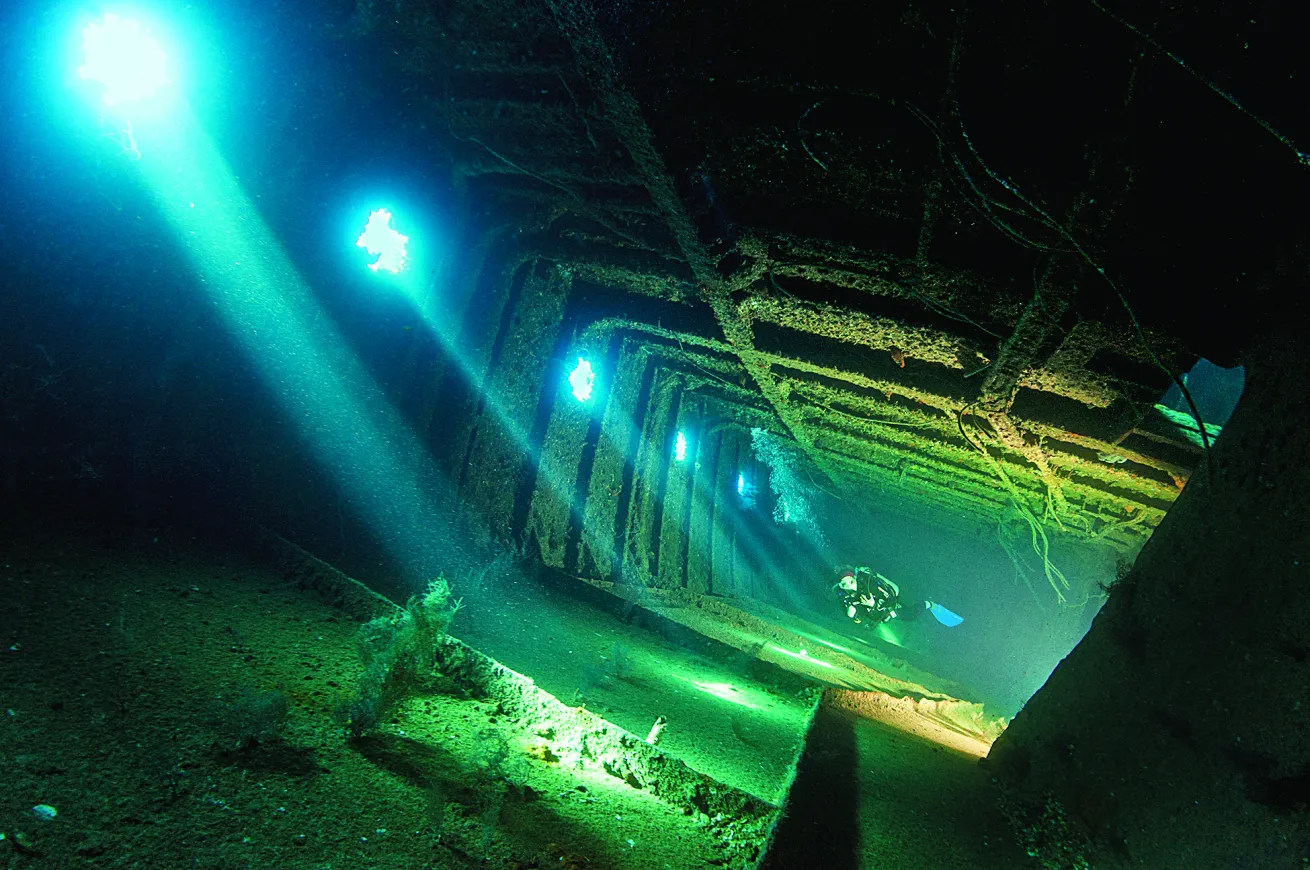
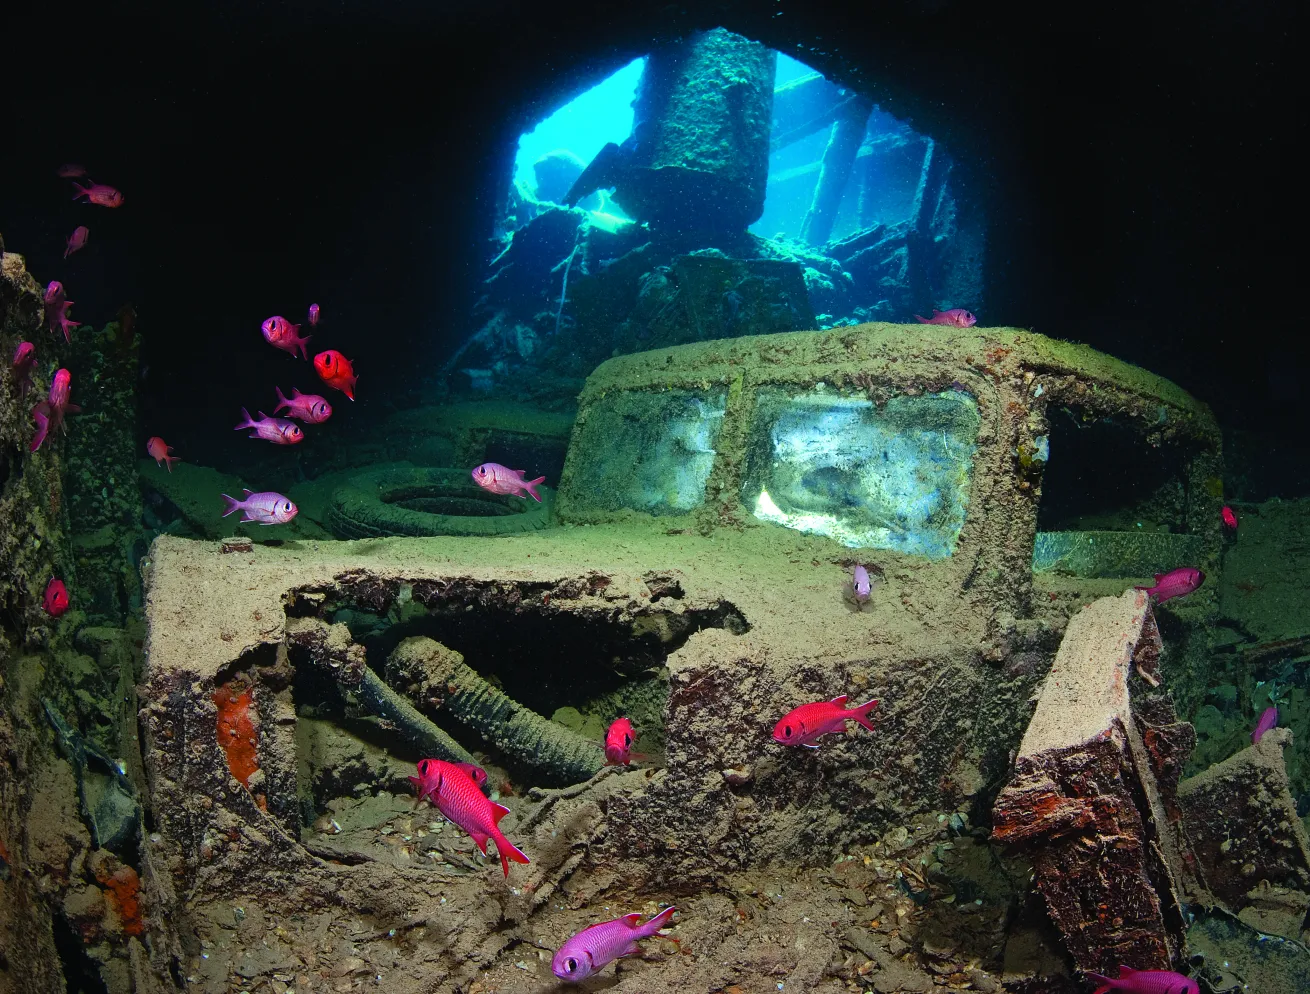
It’s What's on the Inside: On many wrecks, the best stories are inside. It is dark in there, so invariably you’ll need to use strobes. Lift them up above the housing into a rabbit-ears position, and aim them down at a 45-degree angle to create a pool of illumination on the subject in the blackness.


