

Erin QuigleyDon’t overlook one of Lightroom’s special superpowers
Many people get off on the wrong foot with Lightroom. They jump straight into editing, hoping to attain instant wizardry in the Develop module. They suffer through the drudgery of folder organization at the most superficial level possible, and only then because it’s required to reliably locate and manage images. But in giving the Library module short shrift, folks overlook some of the most powerful tools in Lightroom, the virtual superheroes of the digital asset management universe: collections.
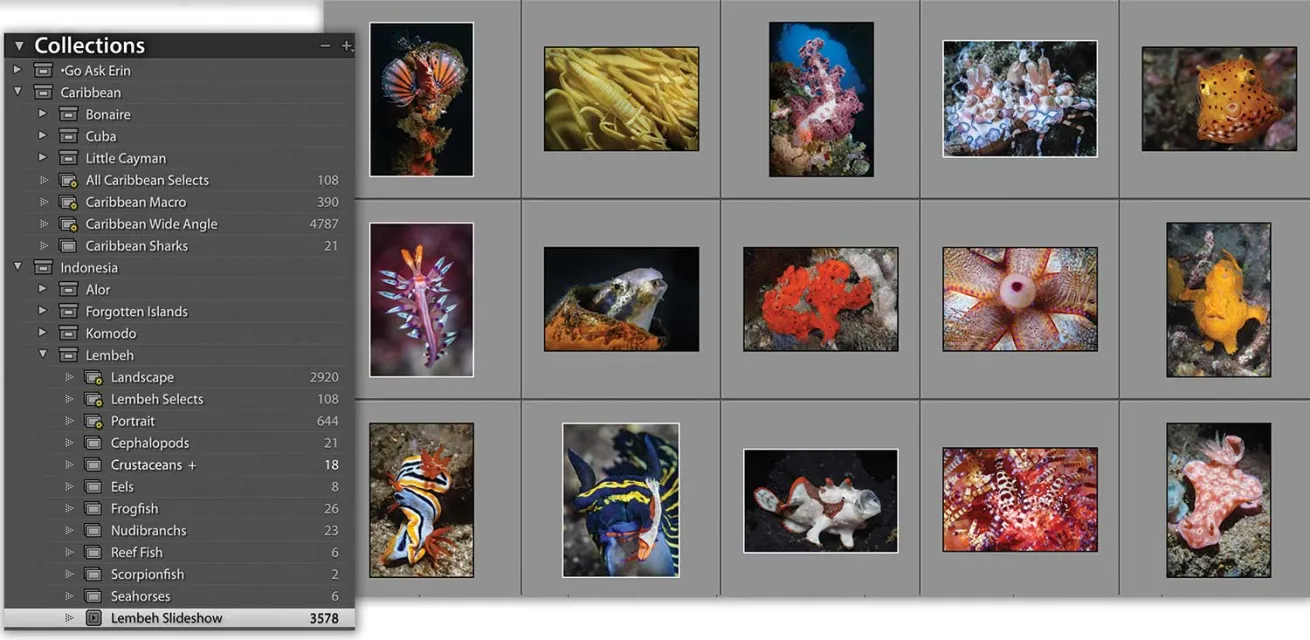
What Are Collections?
Erin QuigleyWhat are collections?
In many ways, collections are just like folders. They look like folders and act like folders but take up no space on your hard drive. The contents of collections are tracked by the Lightroom catalog database, and exist only as virtual references—not as physical files. There are three basic kinds of collections: standard Collections, Smart Collections and Collection Sets.
Each kind of collection functions a little bit differently from the rest, but they’re all in the business of grouping images. Each type of collection displays a unique identifier icon to the left of its name in the Collections Panel.
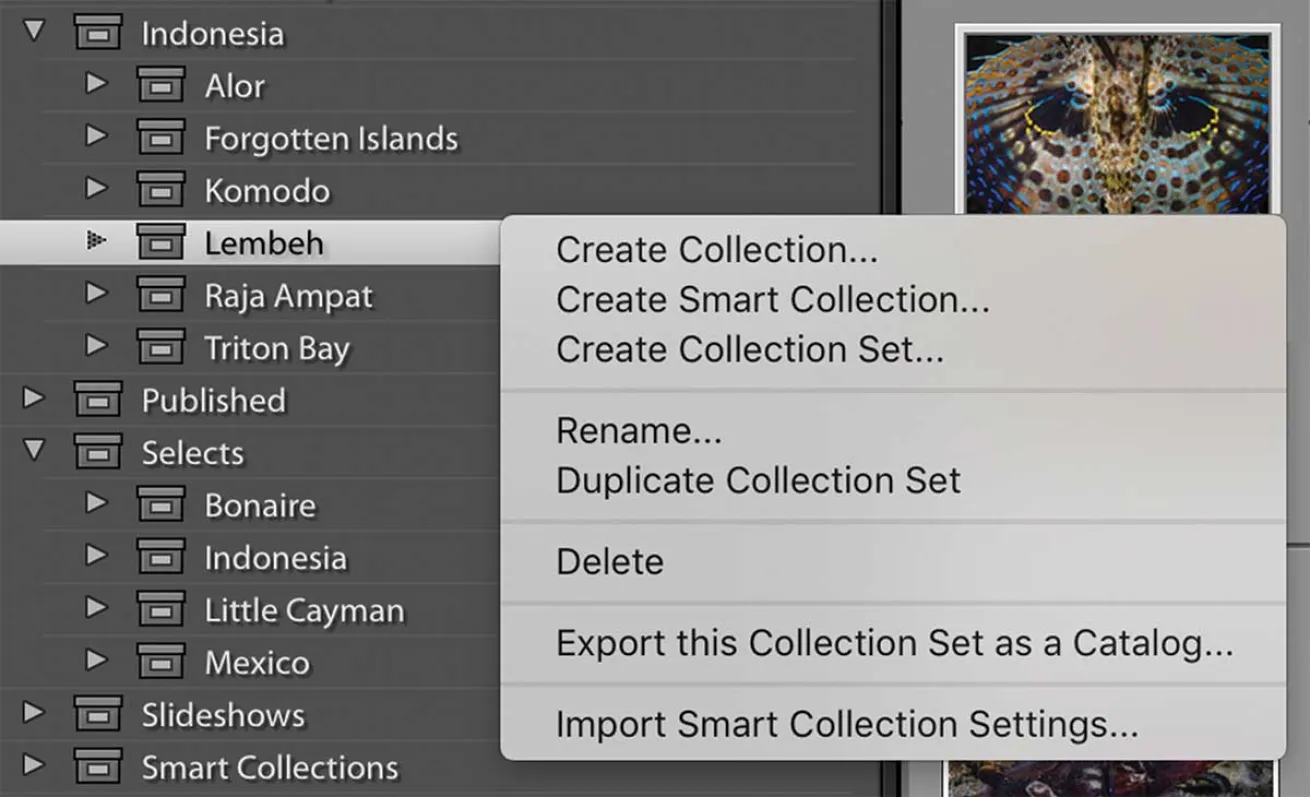
Collections can be renamed, duplicated, deleted, or exported as Catalogs. Control-click (Mac) or right-click (PC) on the collection’s name in the Collections Panel to choose an option from the ensuing contextual menu.
Erin QuigleyCreate a collection
Collections make it possible to use the same photo or video in multiple collections at once. In that sense, collections work the same way as playlists in iTunes—they collect and group like items based on user intent but never change the physical location of the original. They also make a great temporary workspace, whether you want to gather images for a specific project, or for organizational work like keywording.
Erin QuigleyOrganize your collection
Edits made to a photo in a collection are reflected in every other instance of that photo, wherever it exists in the Library. Deleting an image from a collection removes it from that collection alone. The image isn’t deleted from Lightroom, or from other collections.
Manual Vs. Automatic Collections
Collections are either manual or automatic. A manual collection can be added to or subtracted from via simple drag-and-drop functionality. An automatic collection groups images together based on predetermined criteria configured by the user.
The Quick Collection (in the Catalog Panel), standard Collections and Collection Sets are all manual collections. Smart Collections are automatic.
Standard Collections
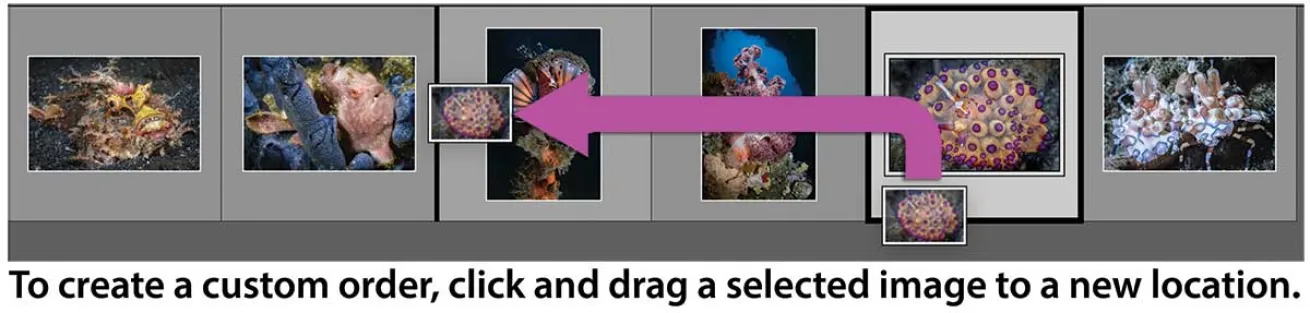
A standard Collection is the only kind of collection that you can drag individual images in or out of manually. It’s also the only kind of collection that supports custom order, which is useful for books and slideshows, or for exporting sequentially named sets of photos.
Erin QuigleyStandard Collections
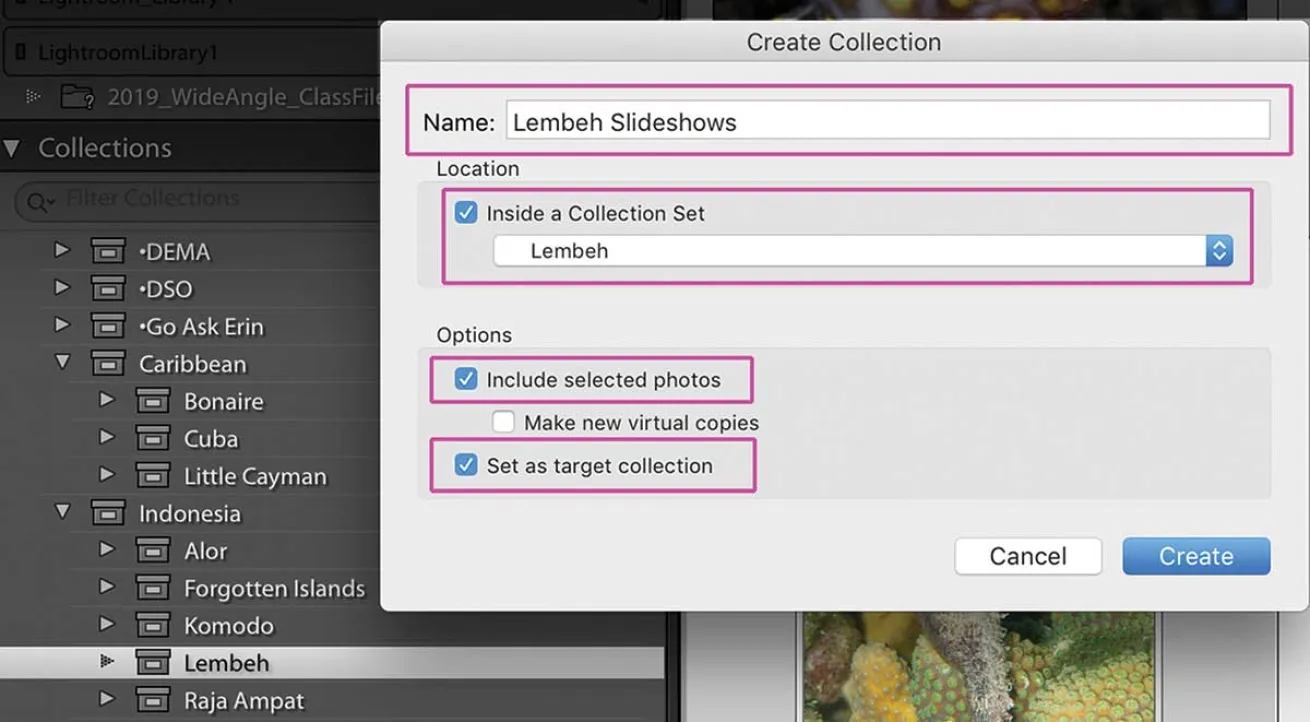
To create a standard Collection, click on the tiny plus sign in the top right of the Collections panel, and choose “Collection” from the menu. In the dialog box, name the collection, and choose from the available options. When you click “Create,” you’ll find the collection listed in the Collections Panel.
To move photos into a custom order, click and drag selected images into place. As you drag the photos, a solid black bar appears to indicate their new position.
Erin QuigleyStandard Collections
The Target Collection
Standard Collections and the Quick Collection can be designated as the Target Collection. To set the Target Collection, either click on the “Set As Target Collection” checkbox while creating a standard Collection, or control-click (Mac) or right-click (PC) on the collection’s name in the Collections Panel, and choose “Set as Target Collection” from the ensuing contextual menu. A small plus sign appears next to the Target Collection’s name.
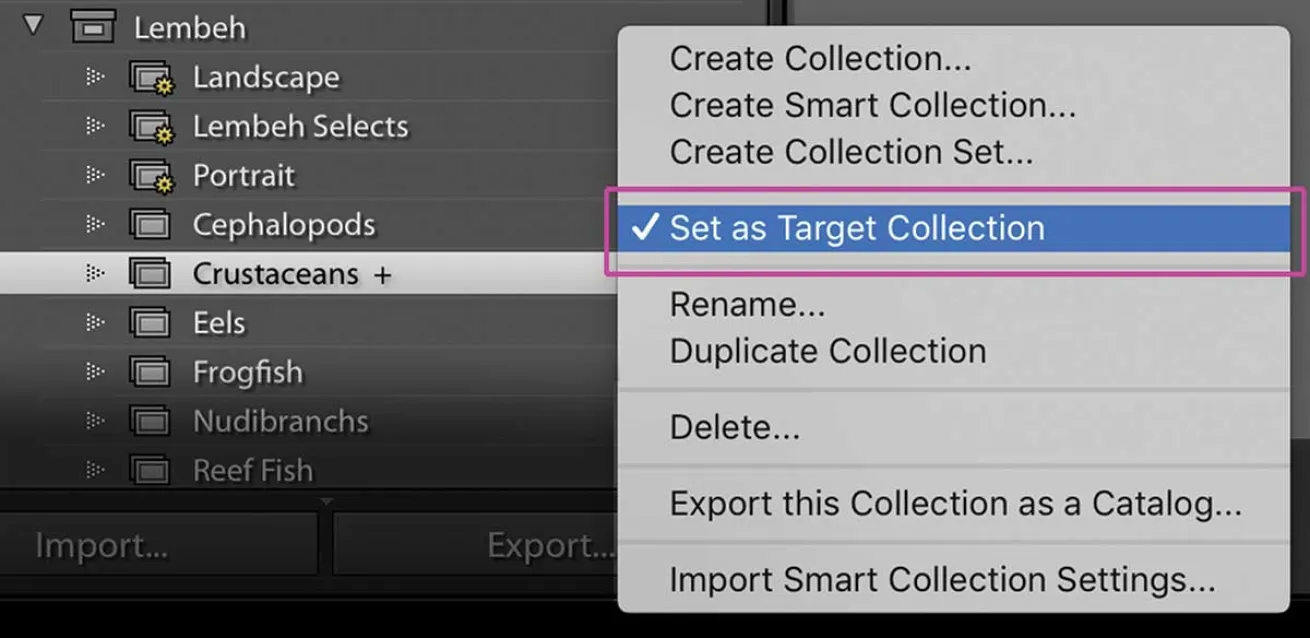
Erin QuigleyTarget Collections
Once a collection is selected as the Target Collection, tapping the letter “B” on the keyboard toggles selected images in and out of the collection. This makes it super easy to scroll quickly through the grid and add images to the Target Collection, without having to manually drag each one to the Collections Panel. There can be only one Target Collection at a time.
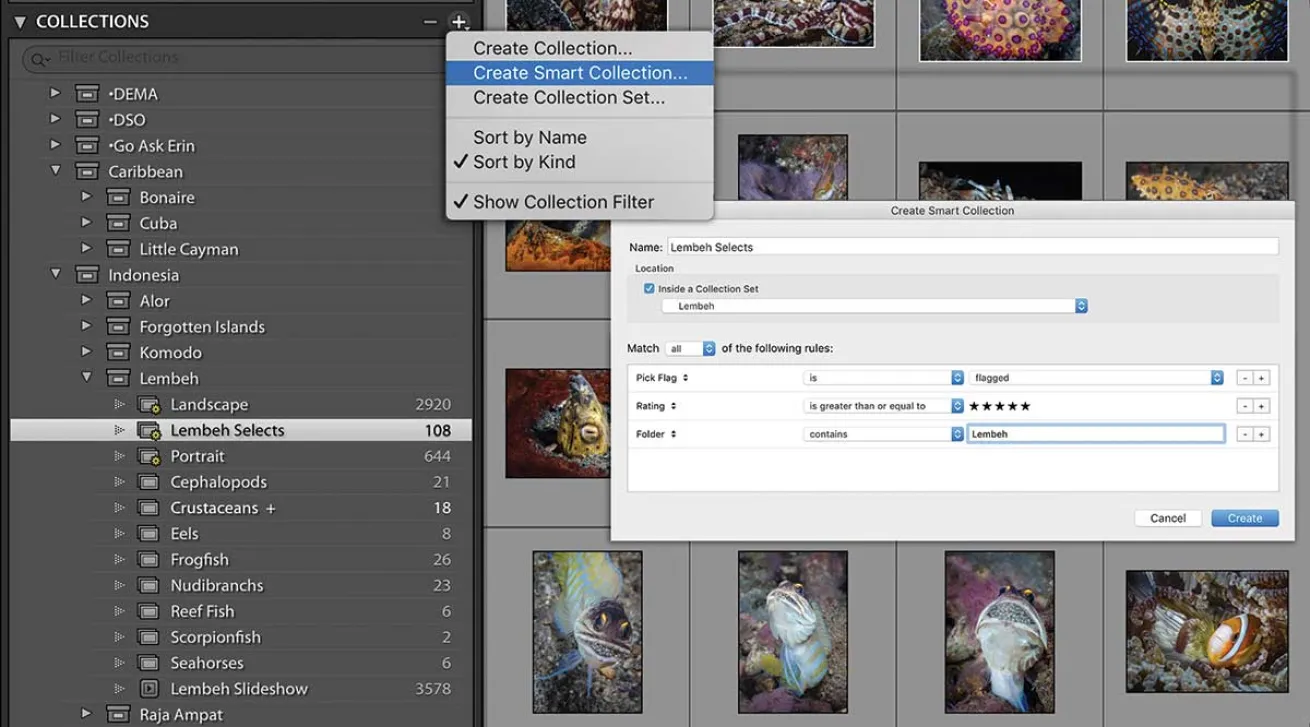
Smart Collections
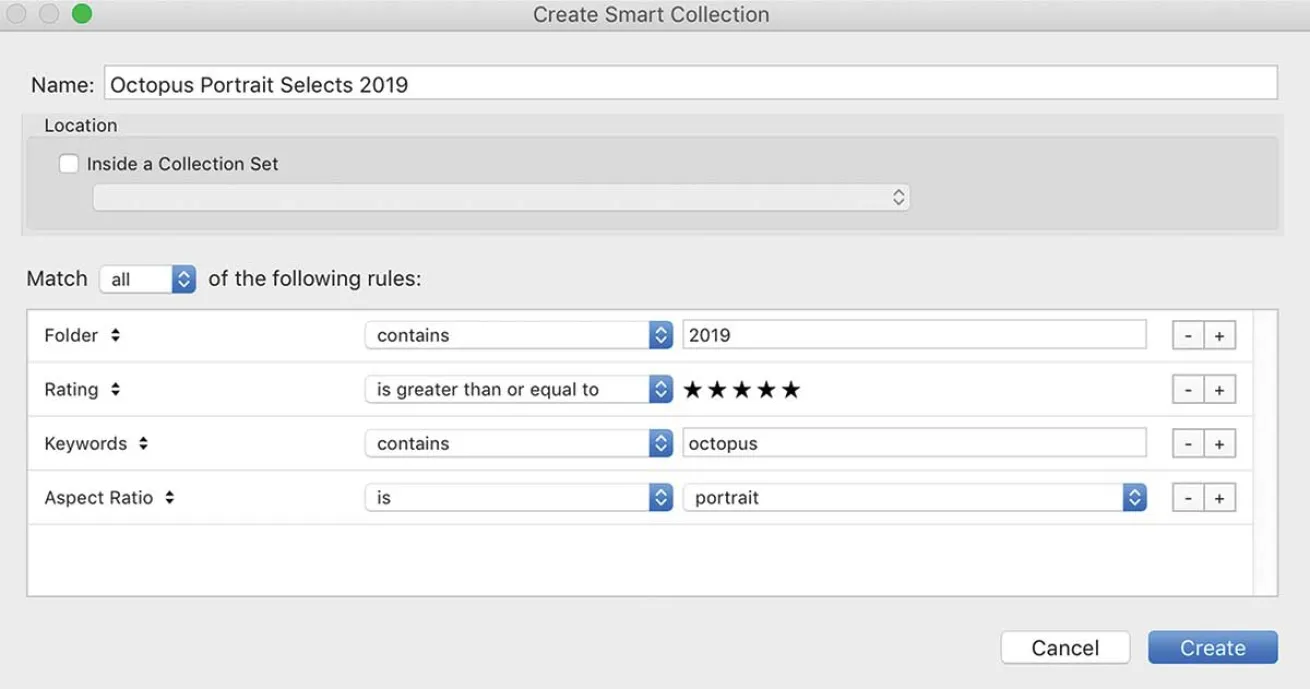
A Smart Collection automatically gathers images via a set of rules. If an image matches specific criteria, it will automatically be added to the corresponding Smart Collection. A Smart Collection’s rules are configured by the user during the process of creating the Smart Collection. In essence, a Smart Collection is a saved search.
Erin QuigleySmart Collections
To create a Smart Collection, click on the tiny plus sign in the top right of the Collections Panel, and choose “Smart Collection.” Name the collection, and add rules by choosing criteria from the many dropdown menus. You can add as many rules as you like by clicking one of the little plus signs on the right side of the Rules Panel. When you click “Create,” you’ll find the new Smart Collection listed in the Collections Panel, with any images that match the rules already inside. You can’t manually add or delete photos from a Smart Collection; it’s completely automatic based on the rules you set.
Collection Sets
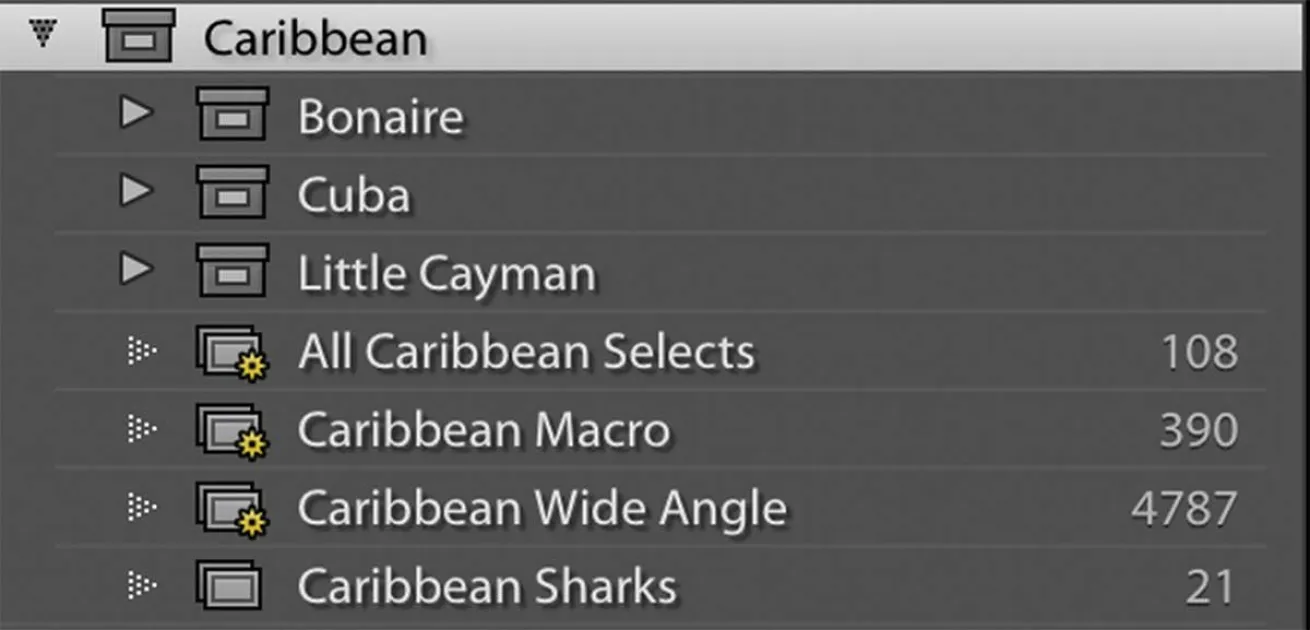
A Collection Set is simply a container for other collections. It can’t hold individual photos, but you can nest standard Collections, Smart Collections or other Collection Sets inside.
Erin QuigleyCollection Sets
To create a Collection Set, click on the tiny plus sign in the top right of the Collections Panel, and choose “Collection Set.” Name the collection and, if desired, choose to nest it in another Collection Set.
Pro Tip:
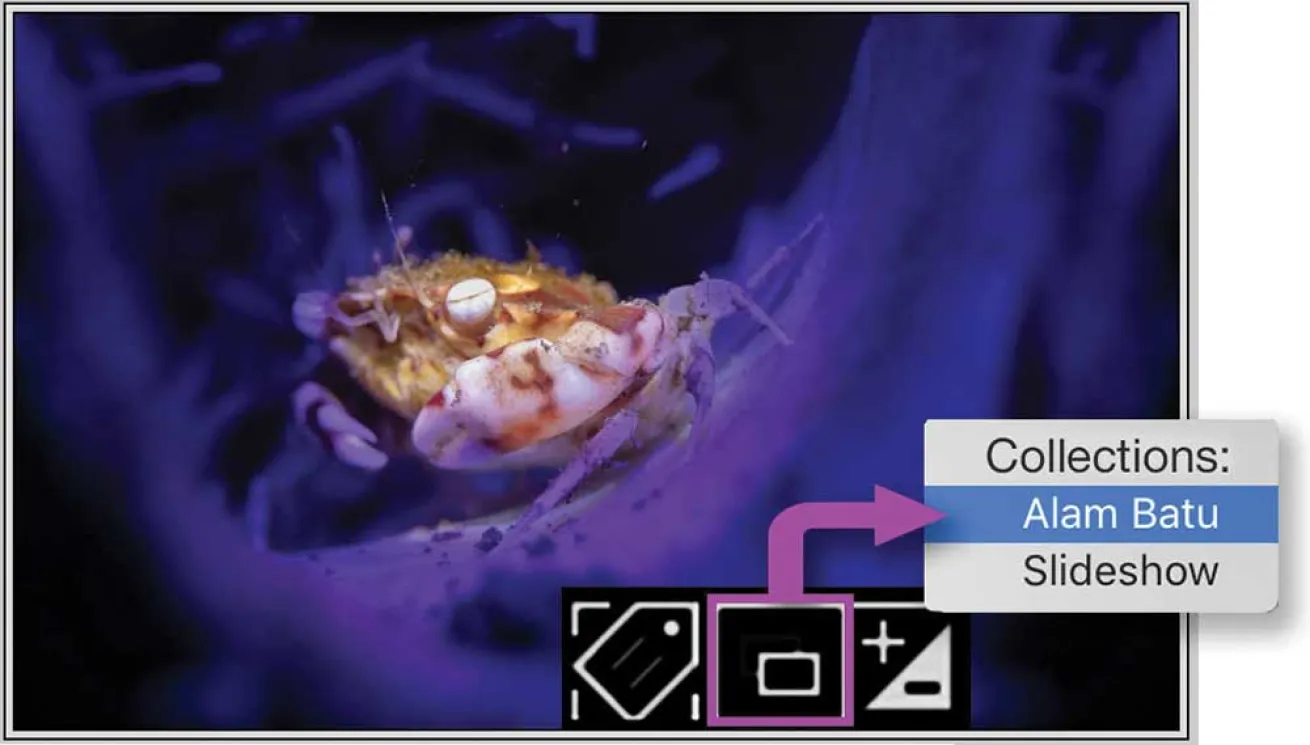
Thumbnails in the grid display tiny “badges” that represent various properties of each image. If the image belongs to a collection, clicking on the corresponding badge reveals the name of any standard Collection the image belongs to. Clicking on the name of the collection takes you to the collection.
Erin QuigleyPro Tip


