

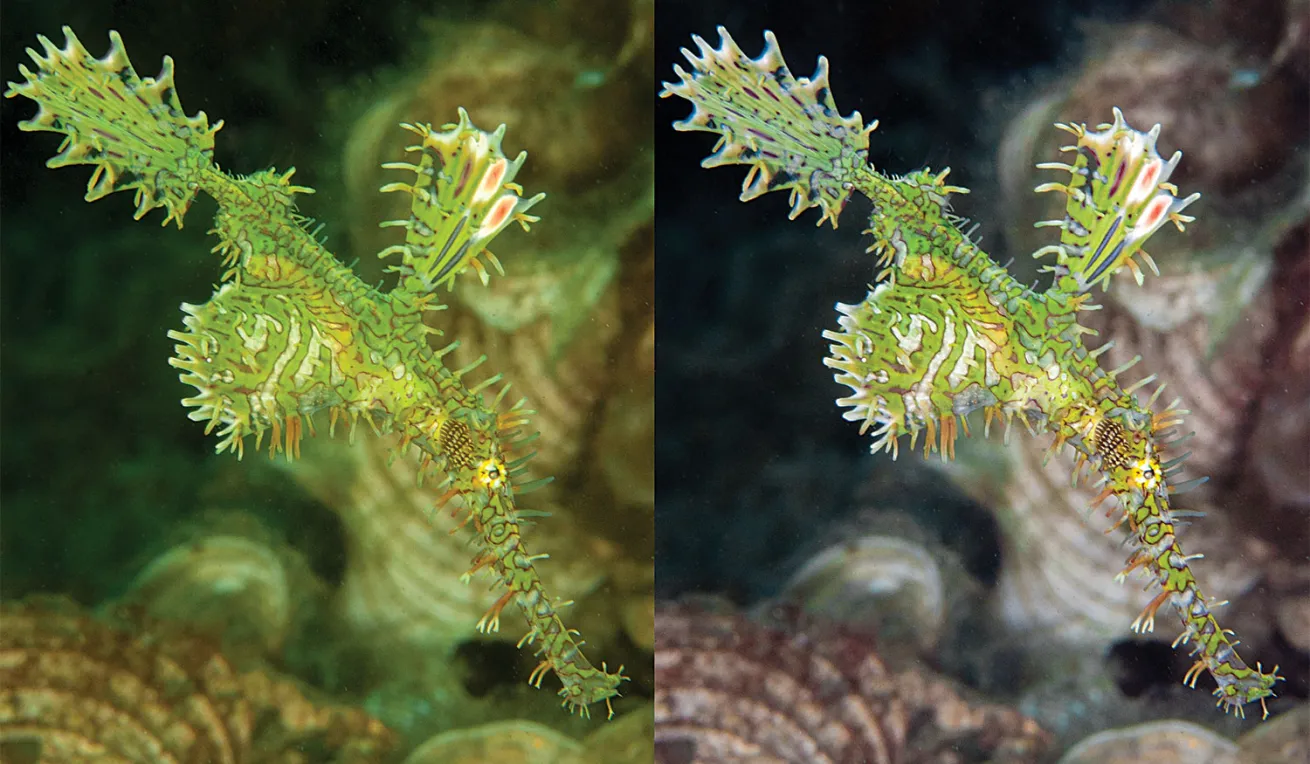
Erin QuigleyWith Color Cast on the left and without on the right.
There’s yin and yang involved with post-production in Lightroom.
Building an asset-management strategy in the Library Module often seems more like a chore than a creative endeavor, while editing in the Develop Module requires creativity and artistic vision.
Despite their differences, both sides of the Lightroom coin are essential to reach the ultimate goal of optimizing each image.
Workflow Mastery
Erin QuigleyFigure 1.
In the Library Module, mastery evolves from understanding the concept of Lightroom’s database, and, more important, from being able to troubleshoot any organizational kerfuffle.
In the Develop Module, mastery comes from knowing which tools are best suited to a particular task, and having as many as possible in your bag of tricks.
At first, the process can be frustrating. Developing an analytical eye takes time, and understanding the functionality of the Develop Module tools is easy compared with the more-advanced skill of diagnosing an image.
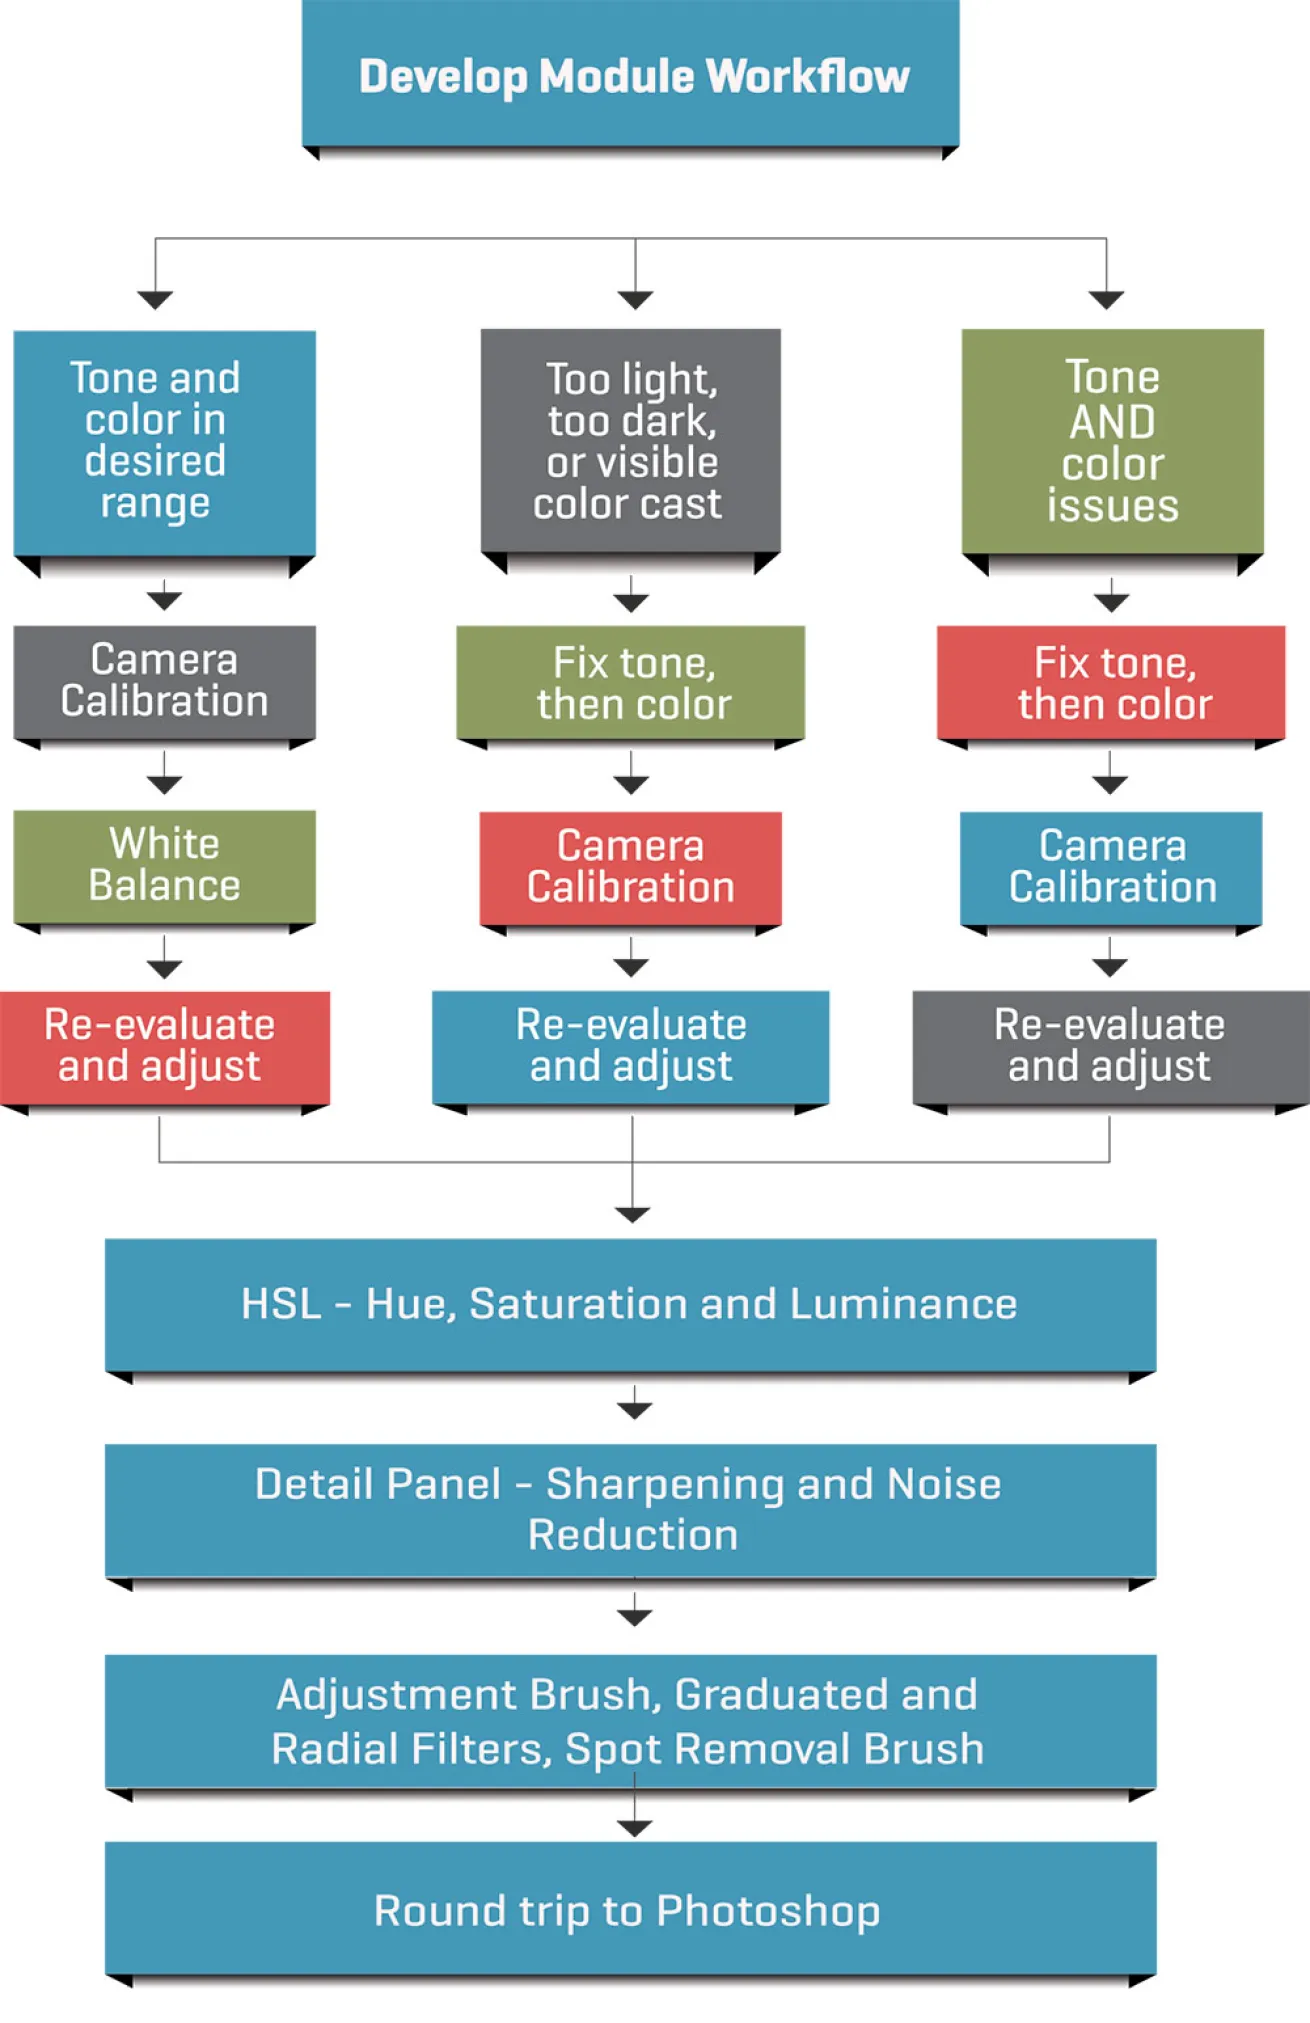
I’m often asked how I know where to start when I begin editing, and though sheer experience plays an enormous role, there are a few basic questions that help to determine the initial direction of any Develop Module workflow.
First Questions to Ask
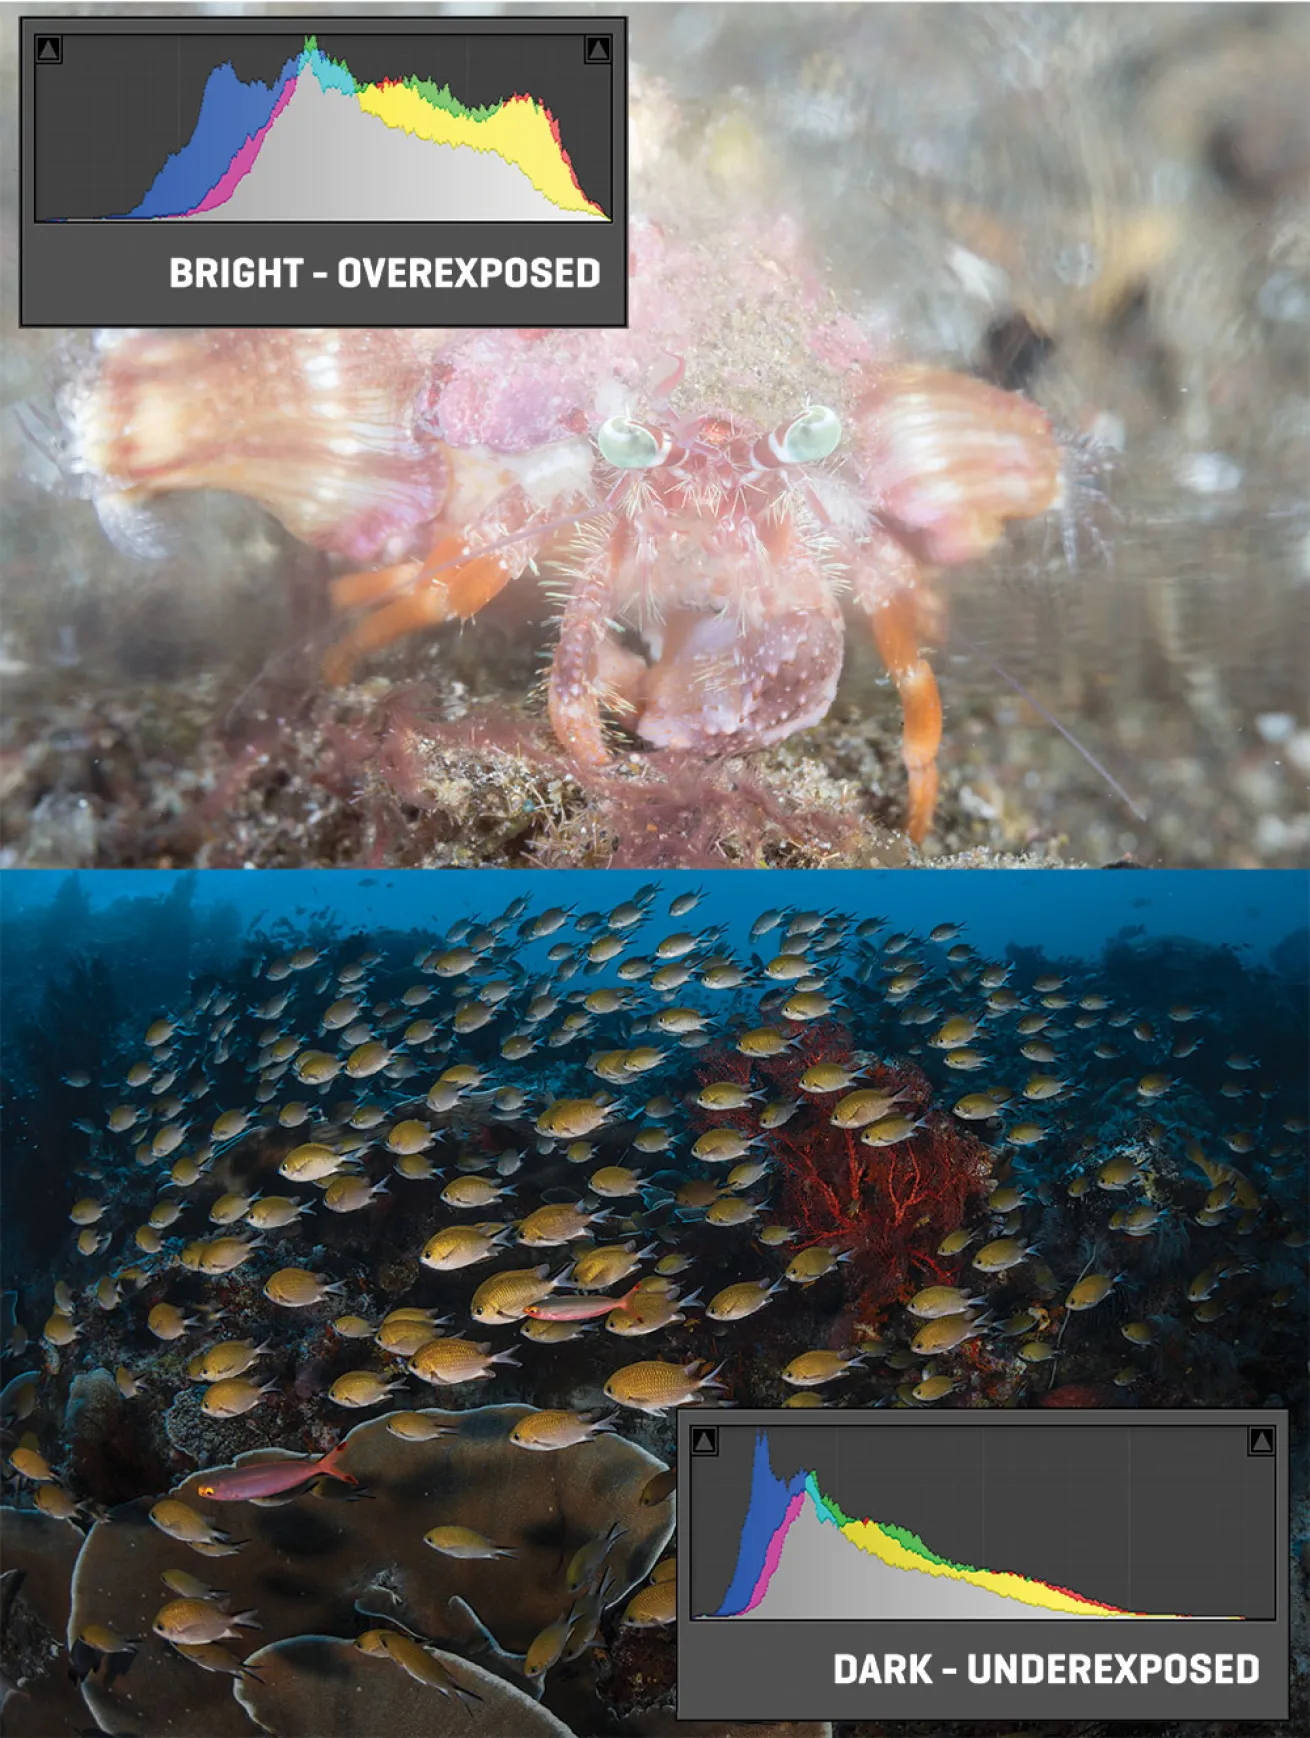
Erin QuigleyFigure 2.
Is the photo too light or too dark? This might seem rudimentary, but it’s surprising how many people try to correct color before being able to see it. The photo’s tonal range must be in the ballpark before you can accurately approach color. Always adjust tonal problems before any other editing.
Does the photo have a noticeable color cast? If you can see it, it’s strong enough to interfere with Camera Calibration (more on that later) and contrast corrections.
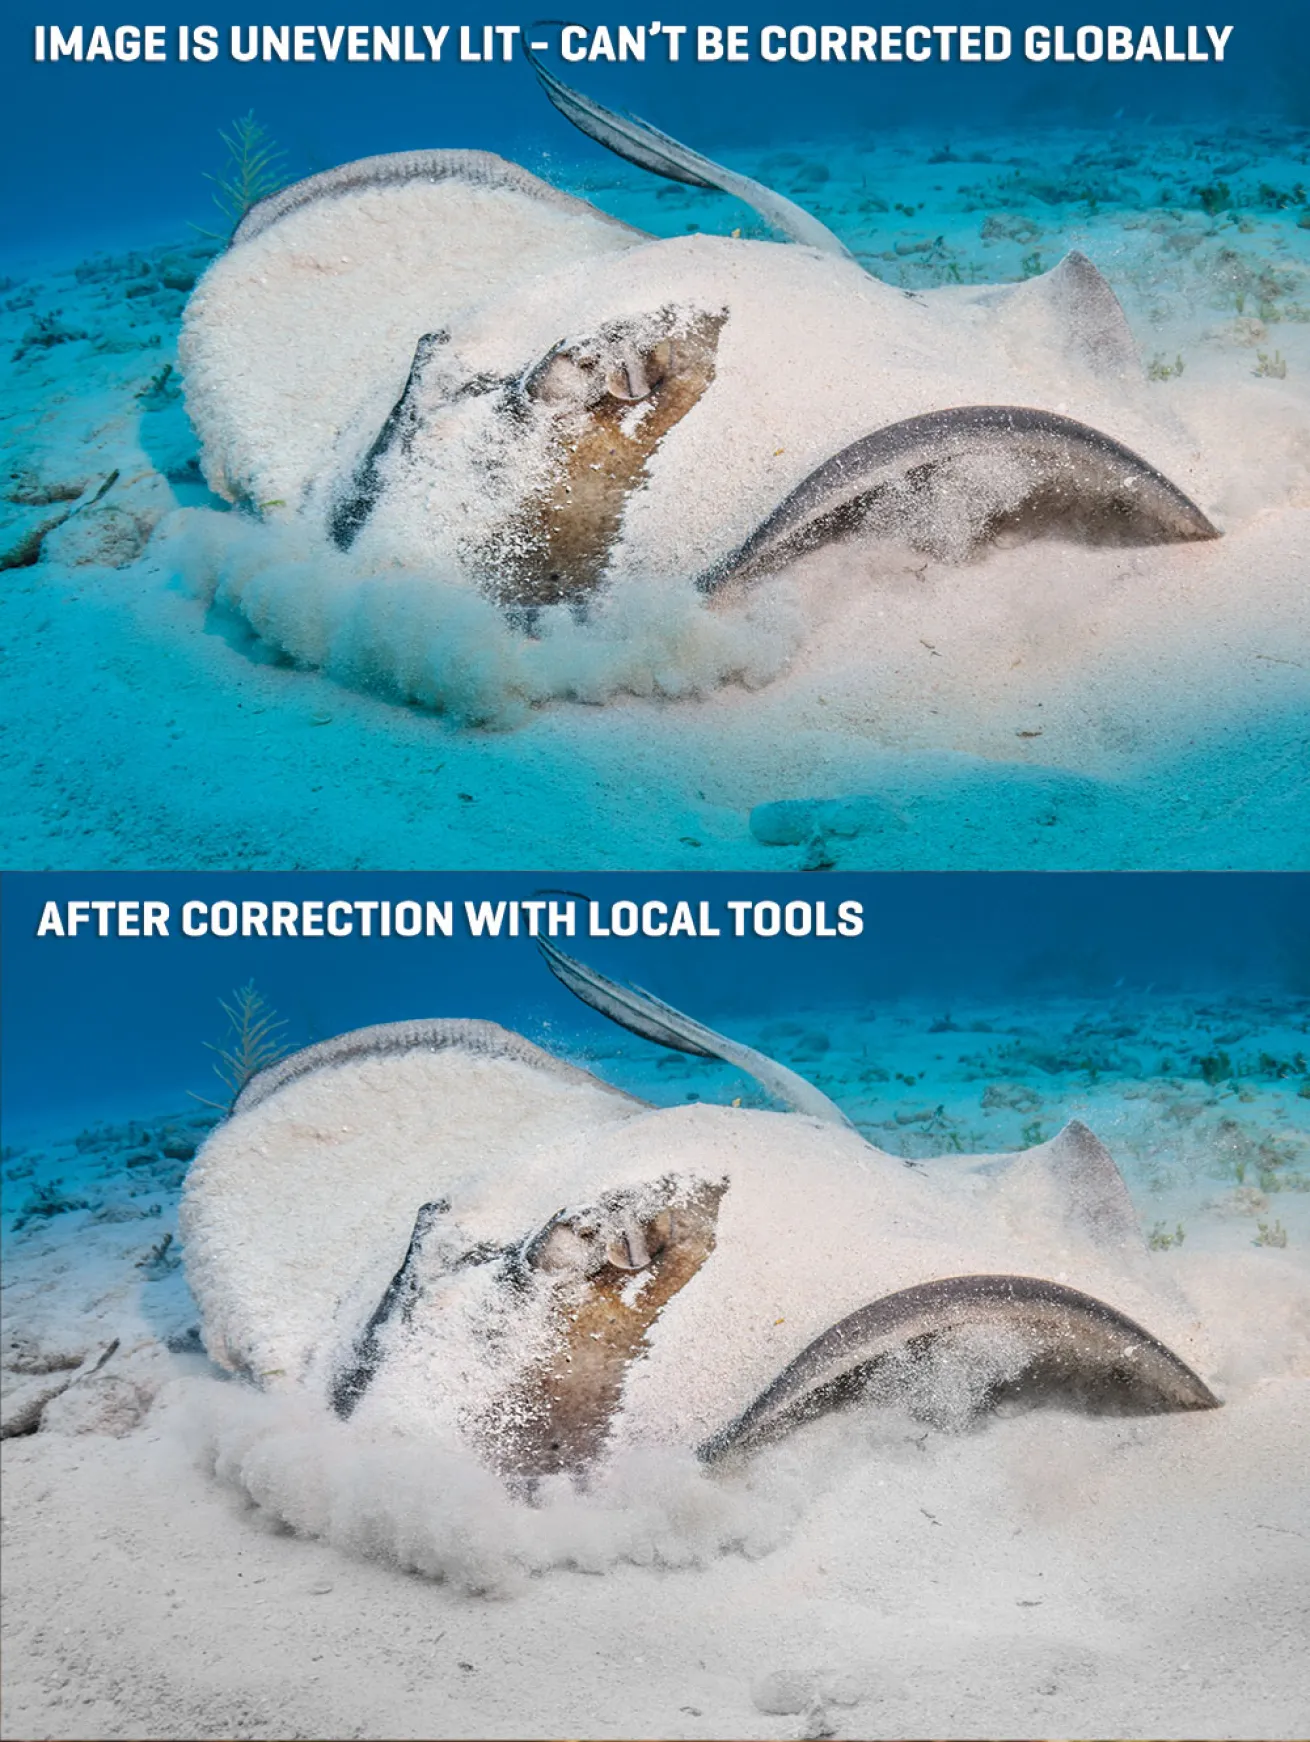
Are there specific parts of the picture that you want to change while others can remain as they are? If so, make global adjustments of white balance and tone to the subject first, knowing you’ll rely on the local tools to adjust the rest.
Will the image be going to Photoshop? This might influence when and if the picture gets cropped in Lightroom, and whether you attempt backscatter removal in Lightroom at all.
If I know an image is destined for Photoshop, especially if there’s compositing involved, I leave the photo uncropped because I want to have all pixels available for use.
If I’m going to have to do a significant amount of backscatter, bubble or object removal, then I don’t waste my time with Lightroom’s clumsy Spot Removal tool.
Camera Calibration
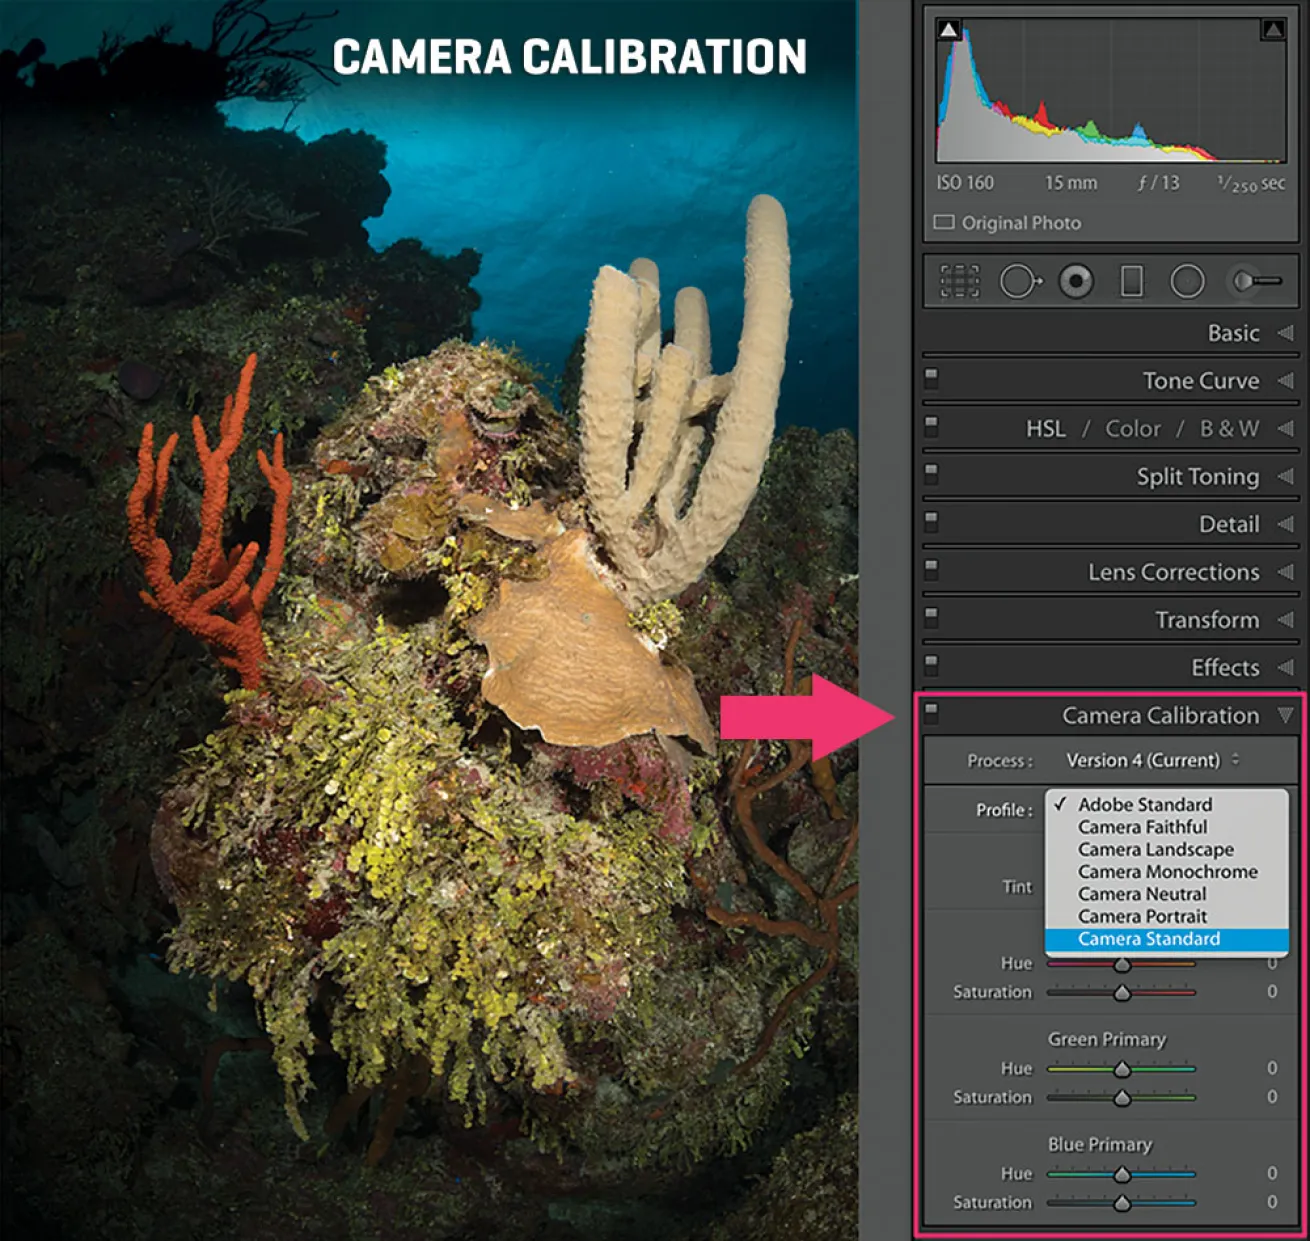
Erin QuigleyFigure 3.
Camera Calibration is often overlooked in the editing process, probably because of its position at the bottom of the panel stack and because its use is somewhat mysterious.
Nonetheless, it’s an important first step for every RAW file because it determines the contrast and color interpretation of the photo, which can greatly influence other decisions you make as you work on the file.
By default, the camera profile applied to RAW images as they’re imported is called Adobe Standard, a profile made by Adobe specifically for your camera based on extensive testing.
The idea is that the same scene photographed by different cameras will look the same once the Adobe Standard setting is applied (assuming that other color settings such as White Balance are also identical).
All of your camera’s color profiles should appear in the Profile menu. These profiles are created by Adobe to emulate the effect of selecting that color profile and using the JPEG format on your camera. Don’t worry about the color sliders below the profile menu — they’re meant for advanced users.
The Camera Calibration panel gives you the opportunity to apply a profile of your choice. If your image is a JPEG, PSD or TIFF, you can skip Camera Calibration since it works only with RAW files.
Basic Workflow
Erin QuigleyFigure 4.
Camera Calibration
Crop, unless Photoshop will be used
White Balance
Tonal Adjustments (skip Clarity, Vibrance and Saturation until the end)
HSL
Detail for import sharpening
Jump to the Adjustment Brush, Graduated Filter and Radial Filter to make local edits
Add Global Clarity, Vibrance and Dehaze as a finishing touch (only if needed!)
Round trip to Photoshop if needed
Deciding on an initial direction isn’t always easy, so here’s a flowchart at the bottom to help you get started.
Just remember: Fix the biggest problem first.
Pro Tip
Stay loose! Post–processing is fluid; it often requires jiggling settings that have already been adjusted on a first pass. Don’t be rigid about workflow, and remember to analyze each image separately for its specific needs.


