

Erin QuigleyErin Quigley is an Adobe ACE-certified consultant and award-winning shooter. Go Ask Erin provides tutorials and instruction for underwater photographers.
With the addition of Color and Luminance Range Masking to Lightroom Classic, Adobe has bestowed new superpowers to the Adjustment Brush, Graduated Filter and Radial Filter. Range-masking tools are a great way to bring professional-level -precision to your local adjustments, allowing you to build complex masks for detailed areas like reef edges or feathery critters, which in the past would have required a trip to Photoshop.
What is a Mask?
The global controls in Lightroom Classic’s Develop Module affect the color and tone of an entire photo, but often an edit that makes one area of a picture look perfect might simultaneously throw off values in the rest of the frame.
Lightroom’s local tools — the Adjustment Brush, Graduated Filter and Radial Filter — come to the rescue by applying corrections only where they’re needed, effectively “masking” off the rest of the photo. A mask lets you selectively apply an adjustment to just a specific part of your image.
How to Work with a Mask
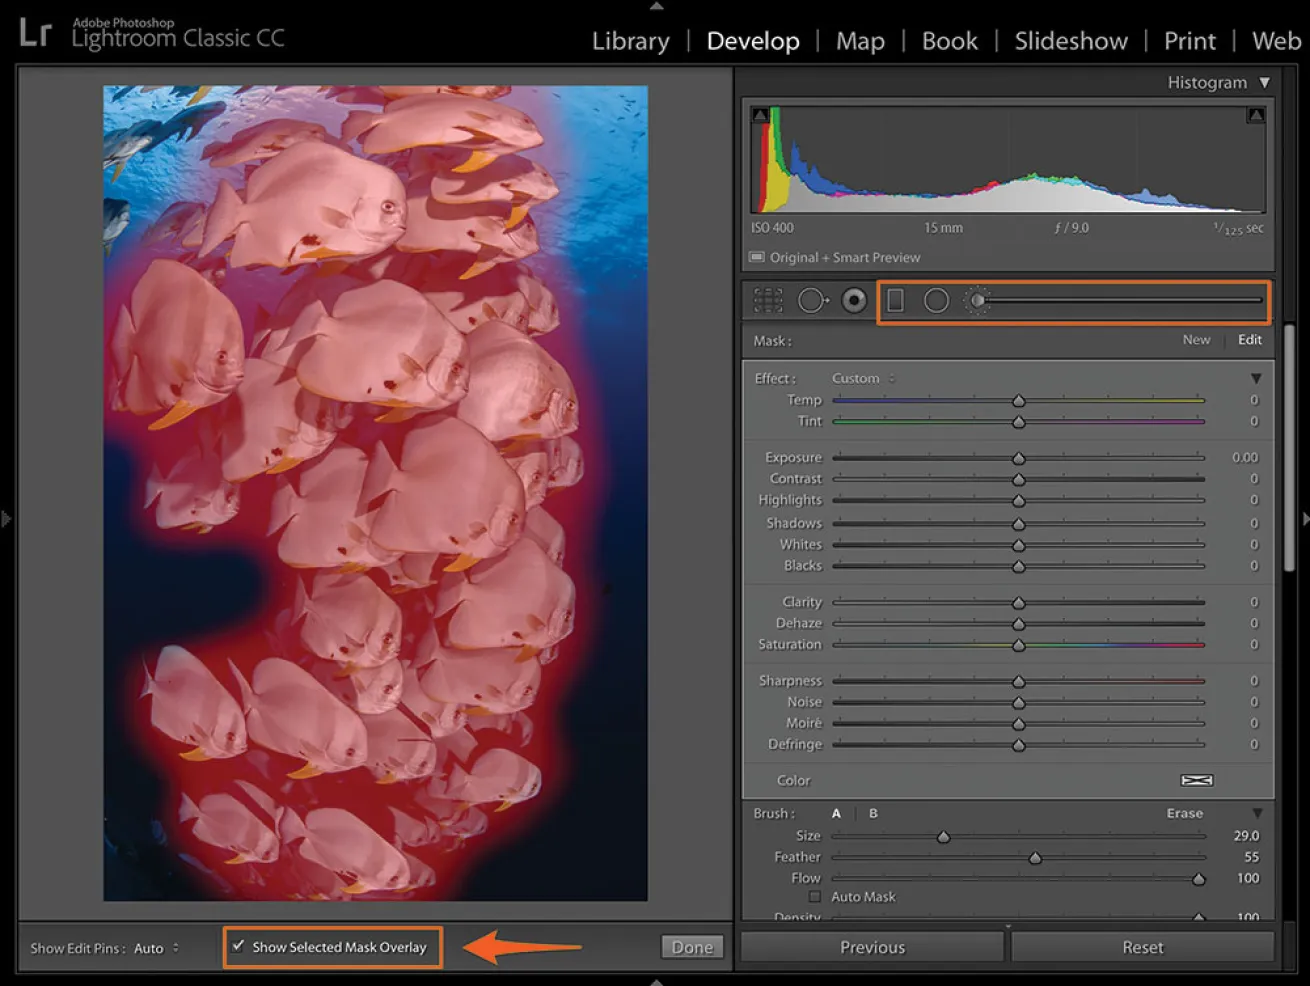
When using Lightroom’s local tools, typing the letter O or ticking the “Show Selected Mask Overlay” checkbox ON in the tool bar toggles a red overlay that represents the area where adjustments are being applied. Erasing away part of the selection helps to finesse the mask, but subjects with translucency or complicated outlines are tough to accurately select using just brushes and erasers.
The Range Masking controls in Lightroom Classic are powerful additions to the Develop Module’s local tools, making it possible to create impressively detailed masks based on color and/or brightness.
How to Use Color Range Masking
Erin QuigleyFigure 1
The Color Range Mask selects based on sampled colors. To activate, you must first add a brush or filter to your image.
1. Double-click on the word “Effect” at the top left of the control panel to reset all the sliders so you can start with a clean slate, and make sure Auto-Mask is ticked OFF.
2. Turn ON the Selected Mask Overlay so you’ll be able to see where you’re affecting the image, and add a gradient filter or brush stroke to the area you want to adjust.
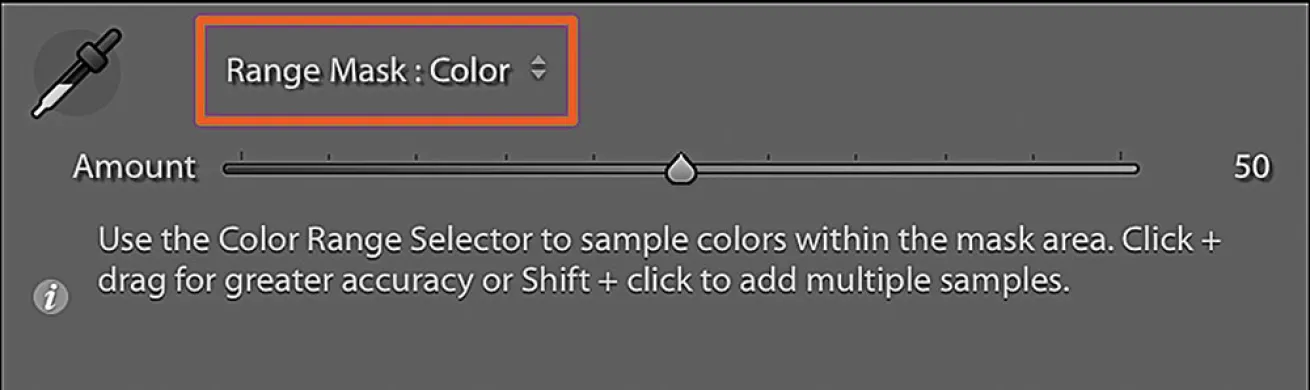
3. Select “Color” from the Range Mask pop-up menu.
4. Grab the Color Range eyedropper and click on a color you want to select. You can add four more colors to your selection by Shift-clicking with the eyedropper, or you can click and drag to select rectangular areas of varied colors or gradients. As you continue to sample colors, you’ll see the red Selected Mask Overlay become more and more precise.
Erin QuigleyFigure 2
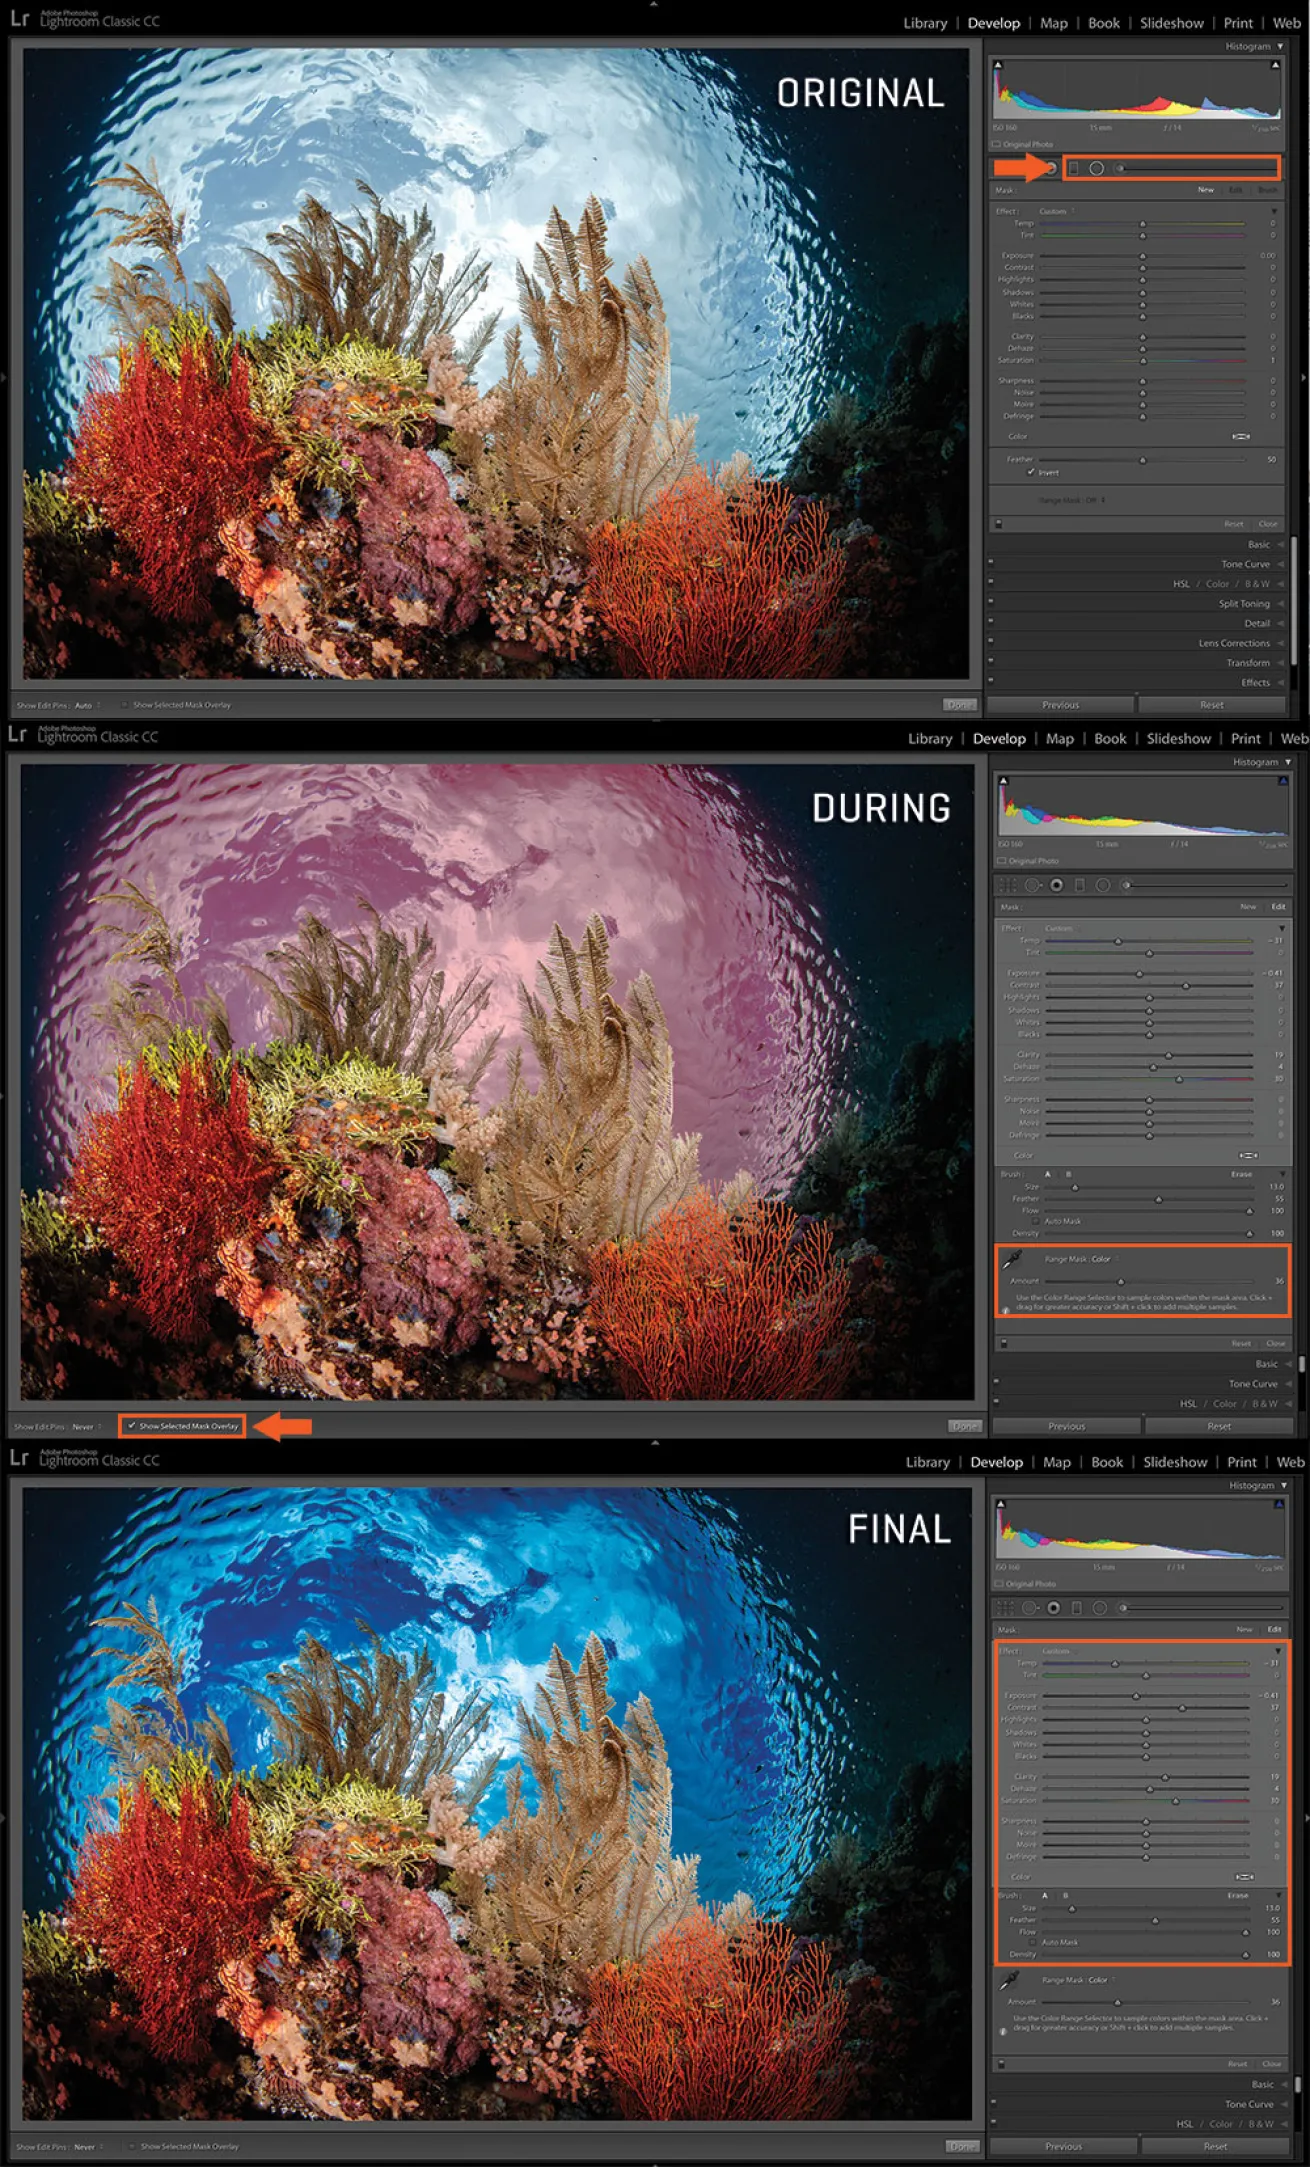
5. Adjust the Amount slider to control the transition between selected and non-selected areas. A low setting results in greater accuracy, with a harder edge. A high setting feathers the selection for a soft transition into surrounding colors. Hold down Opt (Mac)/Alt (PC) while moving the Amount slider to display the selection in grayscale, which makes it easier to see. White areas are selected, and black is deselected.
6. Once the selection looks good, turn OFF the “Show Selected Mask Overlay” checkbox in the tool panel, and add effects using the sliders in the Brush or Filter’s control panel. You can use the eraser brush for finesse, if necessary.
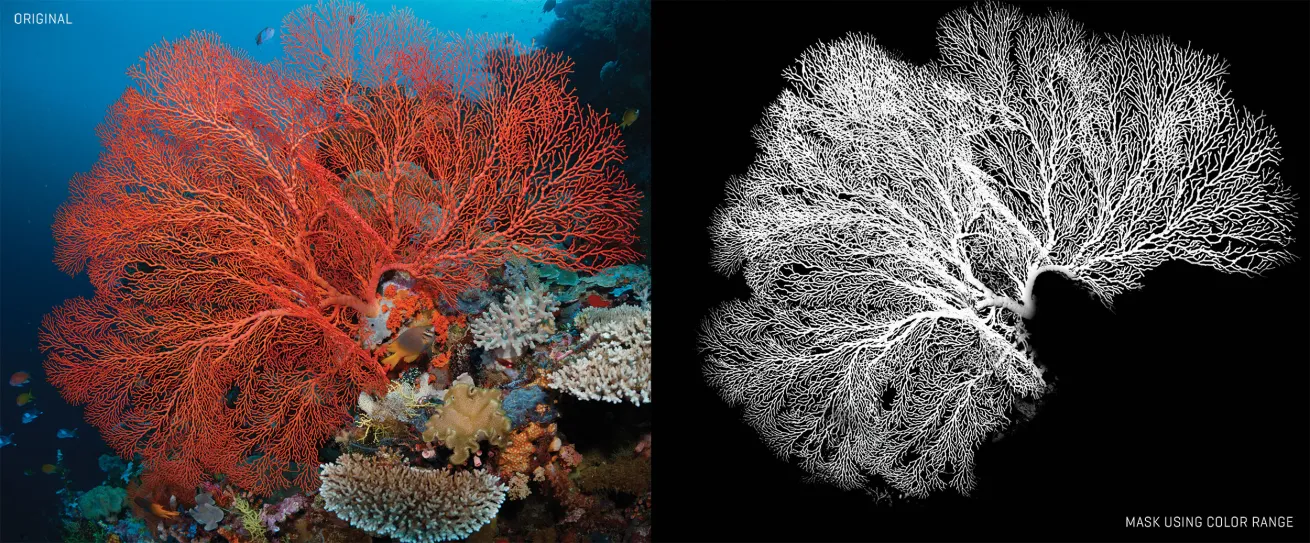
Good subjects for the Color Range Masking tool need to be a distinctly different color from their background. Brightly colored fans or sponges, colored stripes or patterns on reef dwellers, or blue water behind yellow or red schooling fish are all great candidates for Color Range Masking.
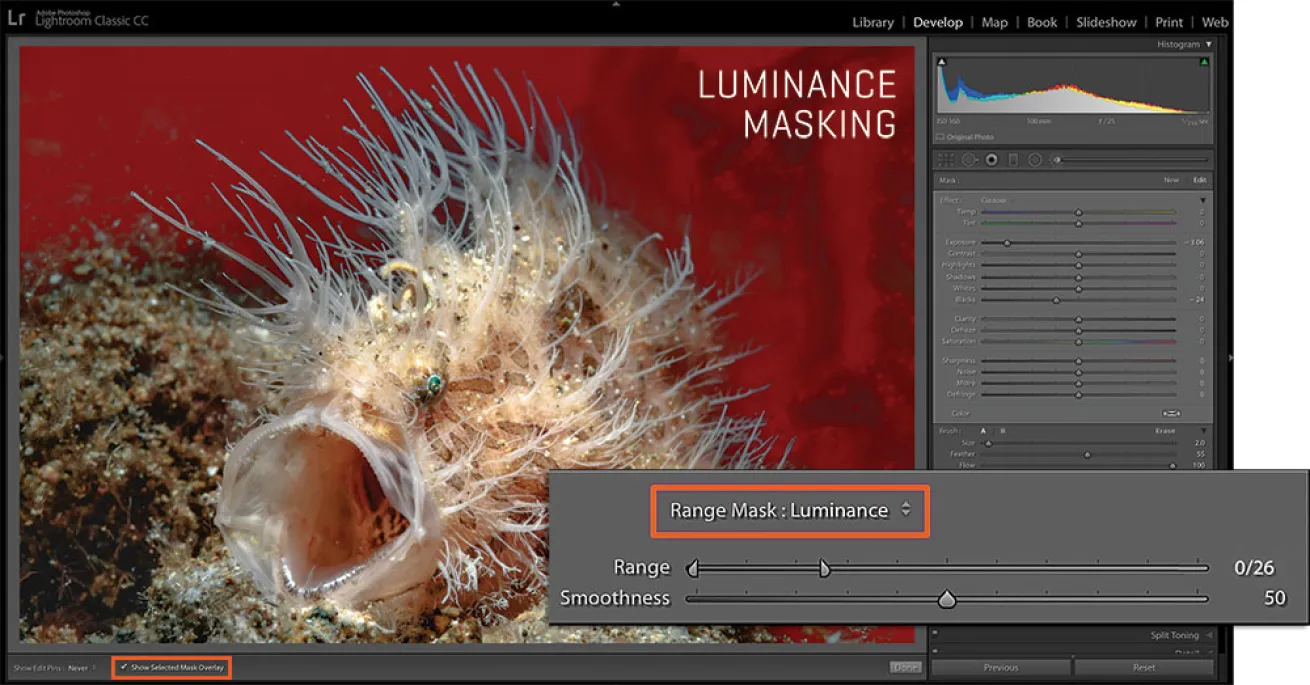
How to Use Luminance Range Masking
Erin QuigleyFigure 3
The Luminance Range Mask makes a selection based on tonal values. As with Color Range Masking, the menu will be grayed out until you add a brush or filter to your image.
To begin, follow steps 1 and 2 from the Color Range Masking section.
3. Select “Luminance” from the Range Mask pop-up menu.
4. Set the endpoints of the Range slider to select the tonal range you’re targeting. By default, the endpoints are set to include everything — they correlate to the histogram, so the left endpoint starts at black and the right endpoint starts at white. To target dark areas, move the Range Slider’s right endpoint to the left, eliminating bright tones from the current selection. To target midtones, but not darks or lights, move both endpoints toward the middle. The tones in between the endpoints will be selected, but not what’s outside them. To target light areas, move the left slider to the right, eliminating dark tones from the selection.
Erin QuigleyFigure 4
5. Use the Smoothing slider to determine how gradual the transition is between the selection and neighboring pixels. Hold down Opt (Mac)/Alt (PC) to see the mask in grayscale while you’re adjusting the Range Slider endpoints or Smoothing.
6. Once the selection is ready to go, turn OFF “Show Selected Mask Overlay” in the tool panel, and start adding effects.
Pro Tip
Resist the impulse to keep the Amount and Smoothing sliders dialed down too low — a harder, more accurate selection edge might seem like the logical goal, but some degree of falloff usually creates a more natural result.


