

Content Aware Fill is a quasimagical Photoshop process that removes bubbles, backscatter and bozos from your pictures. When it works as intended, Content Aware Fill is a beginner-level technique that renders stunning results in the blink of an eye. When it’s not quite on the money, a slightly more advanced knowledge of Photoshop’s other superpowers is required to finesse your final product.
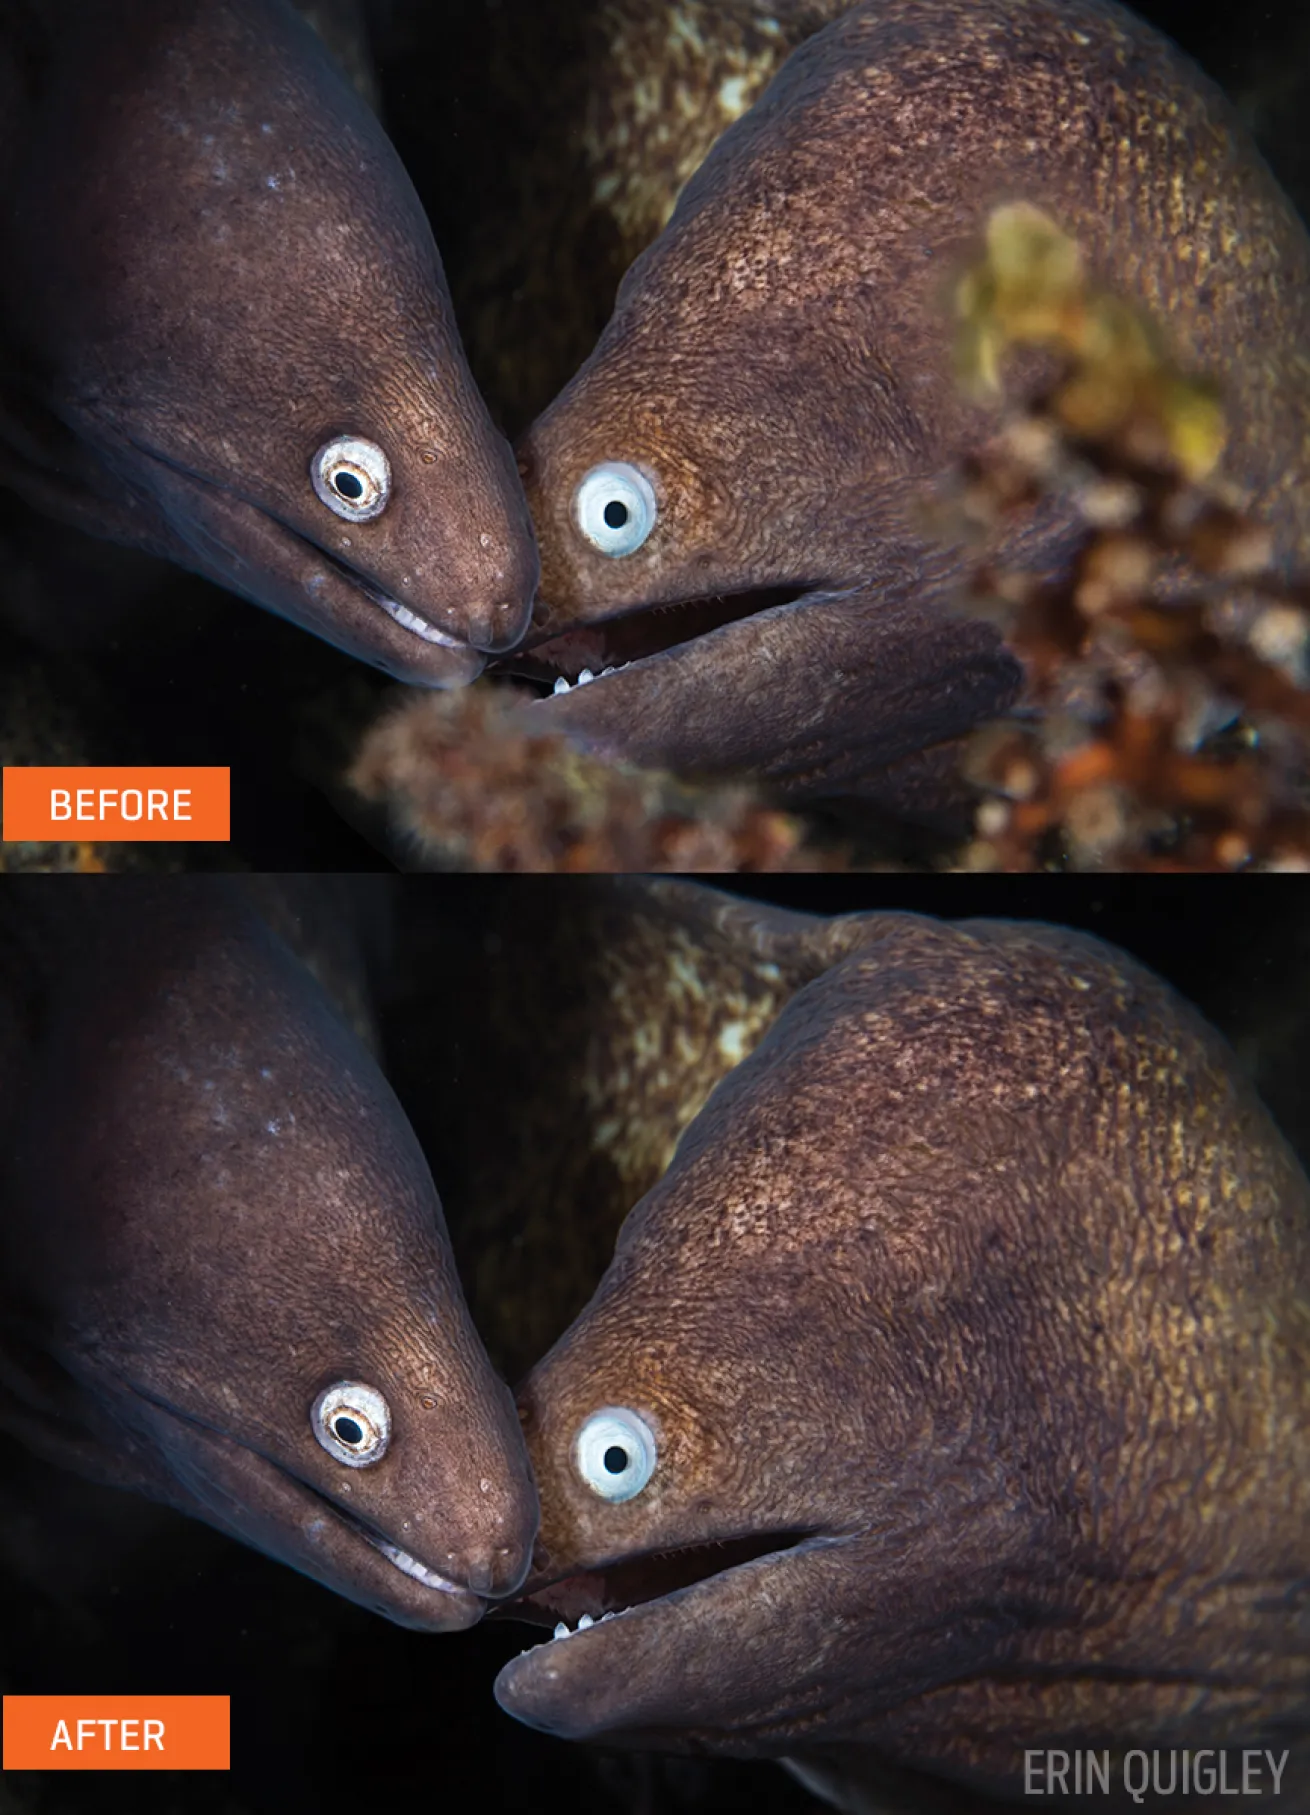
Erin QuigleyIn the "After" photo you'll notice the piece of coral obstructing the eels face has been removed with the Content Aware Fill tool.
In a perfect world, Content Aware Fill is a simple three-step process:
1) Using any selection tool, such as the Lasso, Patch or Marquee tool, create a loose selection around the area you want to eliminate.
2) Go to Edit>Fill, choose Content Aware from the menu, and click OK.
3) When the process is complete, type Command (Mac)/Control (PC) — D to deselect the edited area and get rid of the marching ants.
Easy, right? Unfortunately, Content Aware Fill doesn’t always deliver flawless results. If the object you want to edit is close to or overlapping another object, Content Aware Fill might not nail it. In that case, there are a few steps to take before trying other tools.
1) Start over. Even when you use the same exact selection, the voodoo that Content Aware Fill uses is never the same twice, so you might get a better result the second time around.
2) Work in smaller sections. An incremental approach, especially for removing bubbles or building reef structure, often works better.
3) For more-advanced users, create a temporary layer mask and paint with black over any areas you wish to hide from Content Aware Fill, limiting its access to only appropriate pixels for your edit. When you’re done, delete the layer mask.
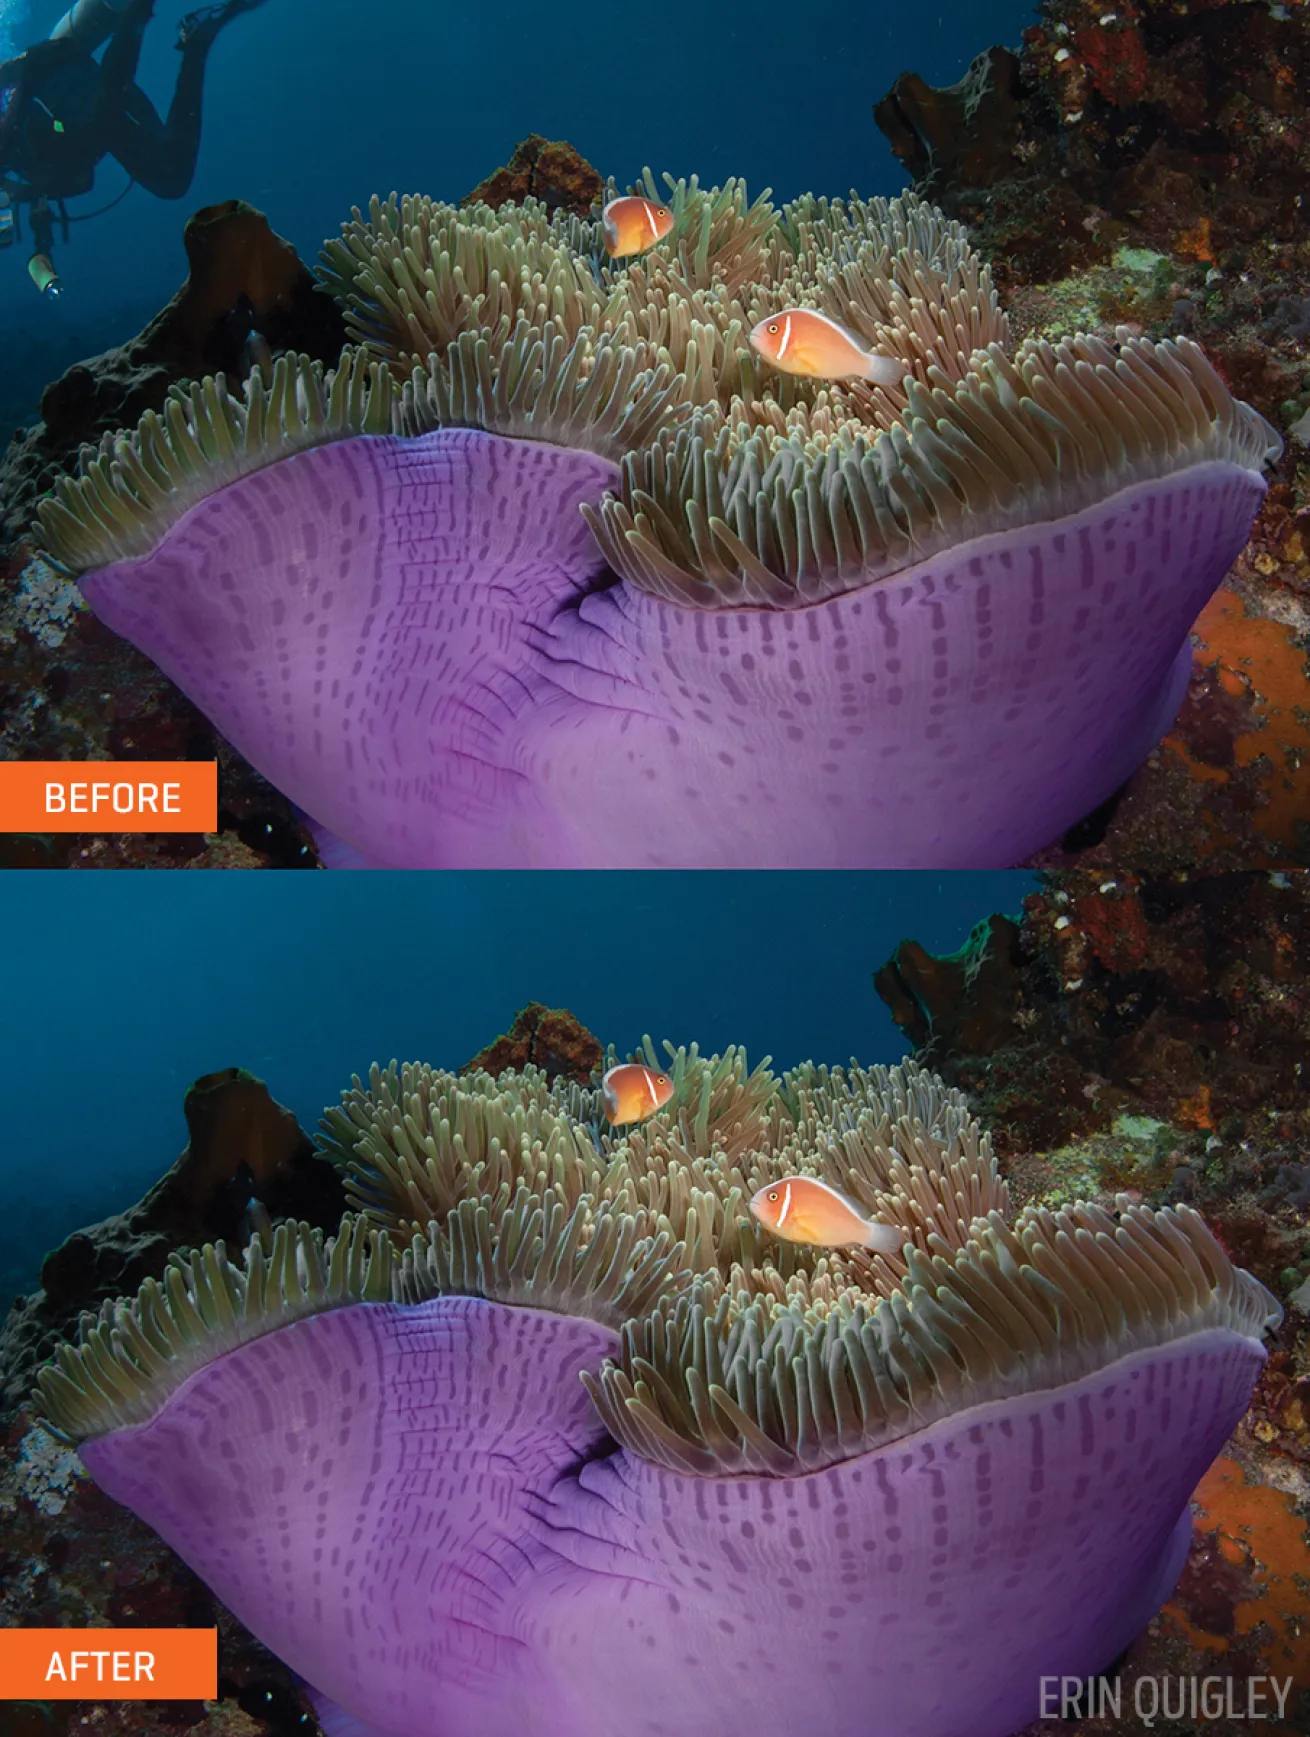
Erin QuigleyYou'll see in the "After" image that the diver in the upper left-hand corner has been removed.
If Content Aware Fill isn’t doing the job, it’s time to reach for a different tool. The Content Aware algorithm can be leveraged in a more targeted way when using the Spot Healing Brush or Patch Tool.
THE SPOT HEALING BRUSH
The Spot Healing Brush works much like the Spot Removal Tool in Lightroom or Adobe Camera Raw. Click or draw over the pixels you want to edit, and Photoshop does the rest. To get the best results, pay close attention to the tool options bar at the top left of the main window. Keep the blending mode to “Normal,” and from the “Type” options, choose between Content Aware, Create Texture and Proximity Match algorithms. There’s no sure way of knowing which will work best, so I typically start with Content Aware, then switch to Proximity Match. Steer clear of Create Texture; it’s not useful in this instance.
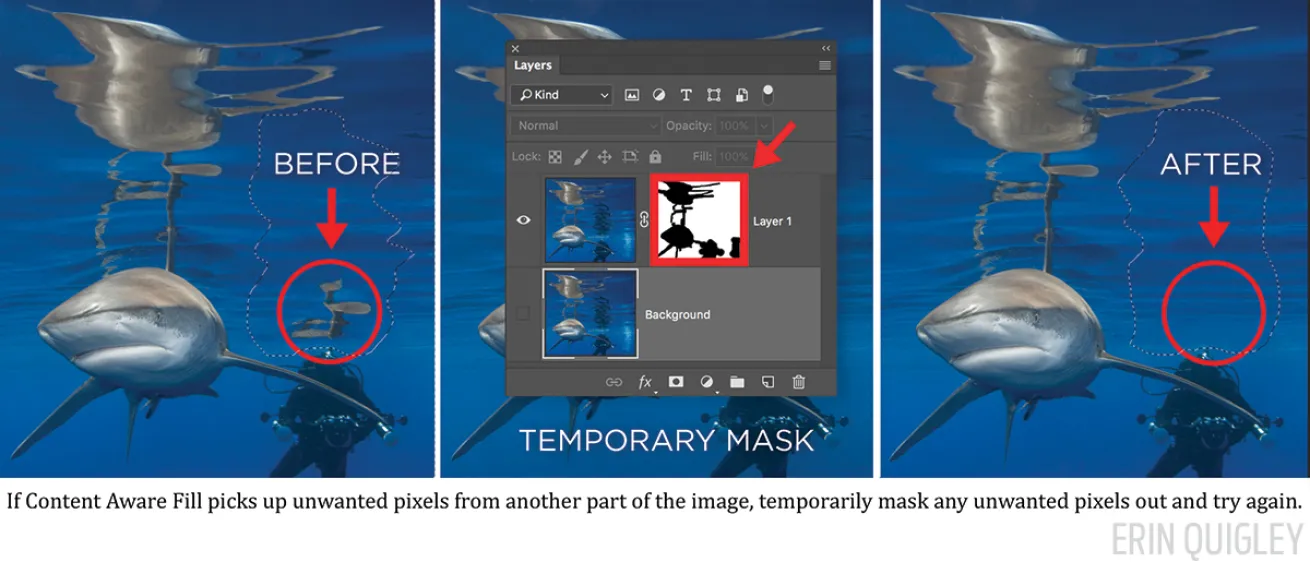
Erin QuigleyIf Content Aware Fill picks up unwanted pixels from another part of the image, temporarily mask out any unwanted pixels and try again.
Content Aware compares image content beyond the edge of the brush to seamlessly fill the selection, realistically maintaining key details such as shadows and object edges.
Proximity Match searches pixels around the edge of the brush to find the best area to use as a fi x. A Diffusion slider appears when you choose Proximity Match, which controls how quickly pixels blend into the surrounding image. Select a lower value for images with grain or fine details, or a higher value for smooth images. I start with a setting of 3.
THE PATCH TOOL
When the Patch mode is set to “Content Aware” in the tool options bar, two additional adaptation sliders, “Color” and “Structure,” are activated.

Erin QuigleyWhen using the Patch Tool, adjust the Structure and Color sliders to perfect your image.
Here’s how it works:
1) Grab the Patch Tool and draw a selection outline around the area or object you want to remove.
2) Click inside the outline and drag it to an area you wish to use for the patch. If satisfied with the result, deselect the outline, and you’re done.
3) If you’re dissatisfied with the result, leave the selection active, and immediately adjust the Structure and Color sliders. Each time you change the value of the sliders, the result will update.
A Structure setting of 7 maintains structure strictly, and 1 adheres very loosely. A setting of 5 is good for an area with lots of structure or hard edges that you want to keep; 1 is good for less-detailed areas, like open water.
A Color value between 0 and 10 specifies the extent to which you want Photoshop to apply color blending to the patch. If you enter 0, color blending is disabled. A color value of 10 applies maximum color blending. In real-world practice, you will probably have to do a little experimentation to get a satisfying result.
Erin Quigley is an Adobe ACE- certified digital-imaging consultant and an award-winning shooter. GoAskErin.com provides custom tutorials and one-on-one instruction for the underwater photographic community.


