

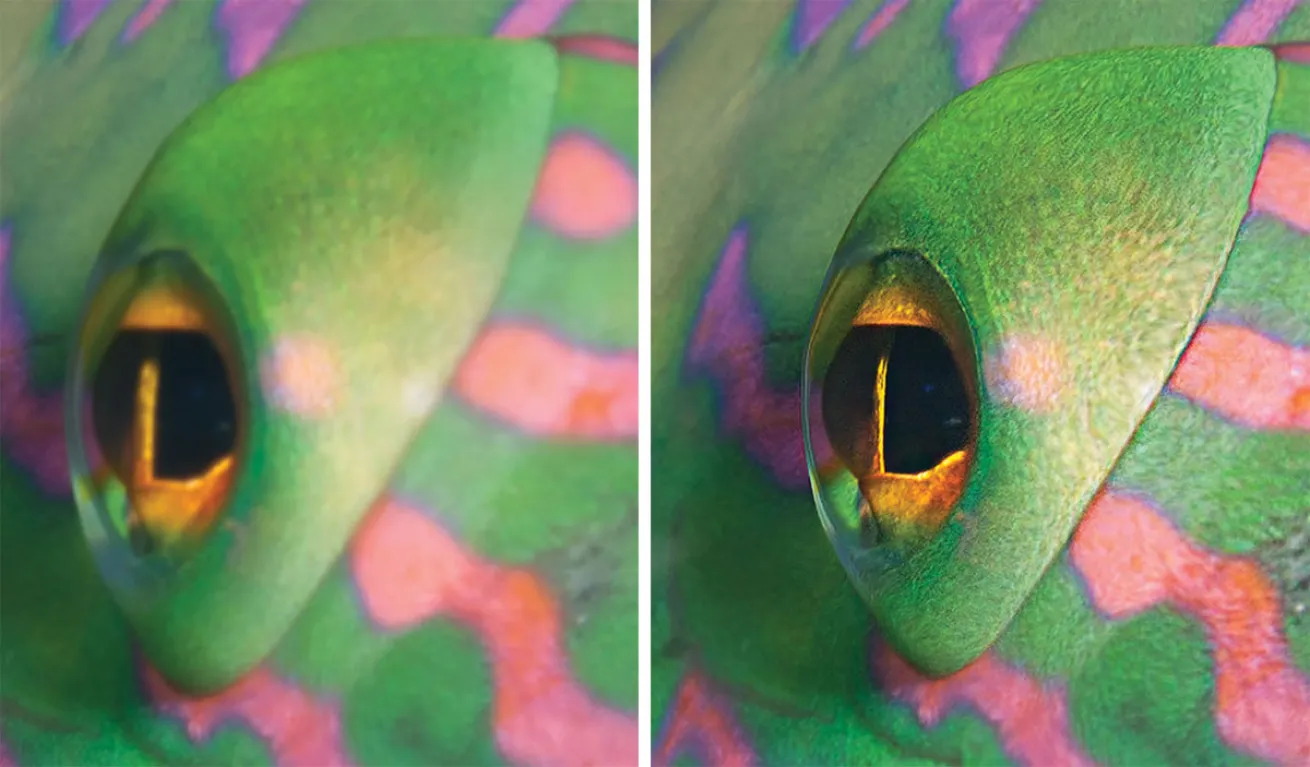
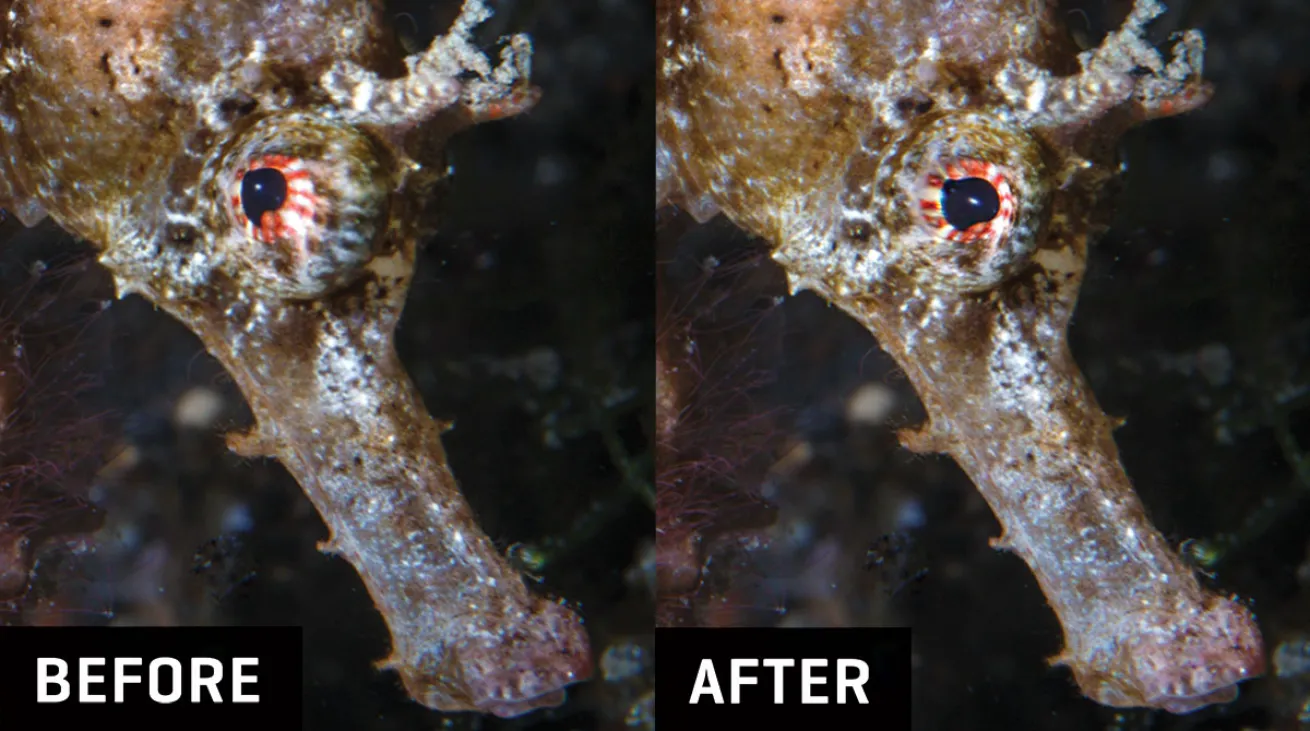
Erin QuigleyBefore and after.
Of all the miracles Photoshop can perform, fixing soft focus isn’t one of them. There’s simply no existing post-production voodoo that can restore acceptable photographic sharpness to large out-of-focus areas. That said, if a small detail of your image — an eye, for example — is only slightly soft, an artful combination of Liquify, Smart Sharpen and the rarely used Sharpen Tool might save an otherwise doomed shot. This somewhat-exotic technique doesn’t work on every photo, but when it does, the results are nothing short of amazing. The tools can also be used alone or in any combination to emphasize features that are already sharp.
LIQUIFY
When using Liquify, the idea is to squish pixels together along a slightly out-of-focus edge, compressing it to create the appearance of sharpness. Don’t push the pixels too far, or distorted elements will make the image look hokey.
1) In Photoshop, make a copy of the Background layer by dragging it down to the New Layer icon at the bottom of the Layers panel. Alternatively, use the keyboard shortcut Command-J (Mac) or Control-J (PC).
2) With the new layer selected, go to Filter>Liquify…, and make sure the Preview checkbox at the bottom right of the panel is ticked on. You can also toggle preview on and off by tapping the letter “P” on the keyboard.
3) In the Liquify window, zoom in on an out-of-focus area you’d like to sharpen up. Work at a minimum of 100 percent magnification. To zoom in, click on the Magnify options at the bottom left corner of the Liquify window, or use the keyboard shortcut Command or Control–plus (+) and Command or Control–minus (-) to zoom in and out.
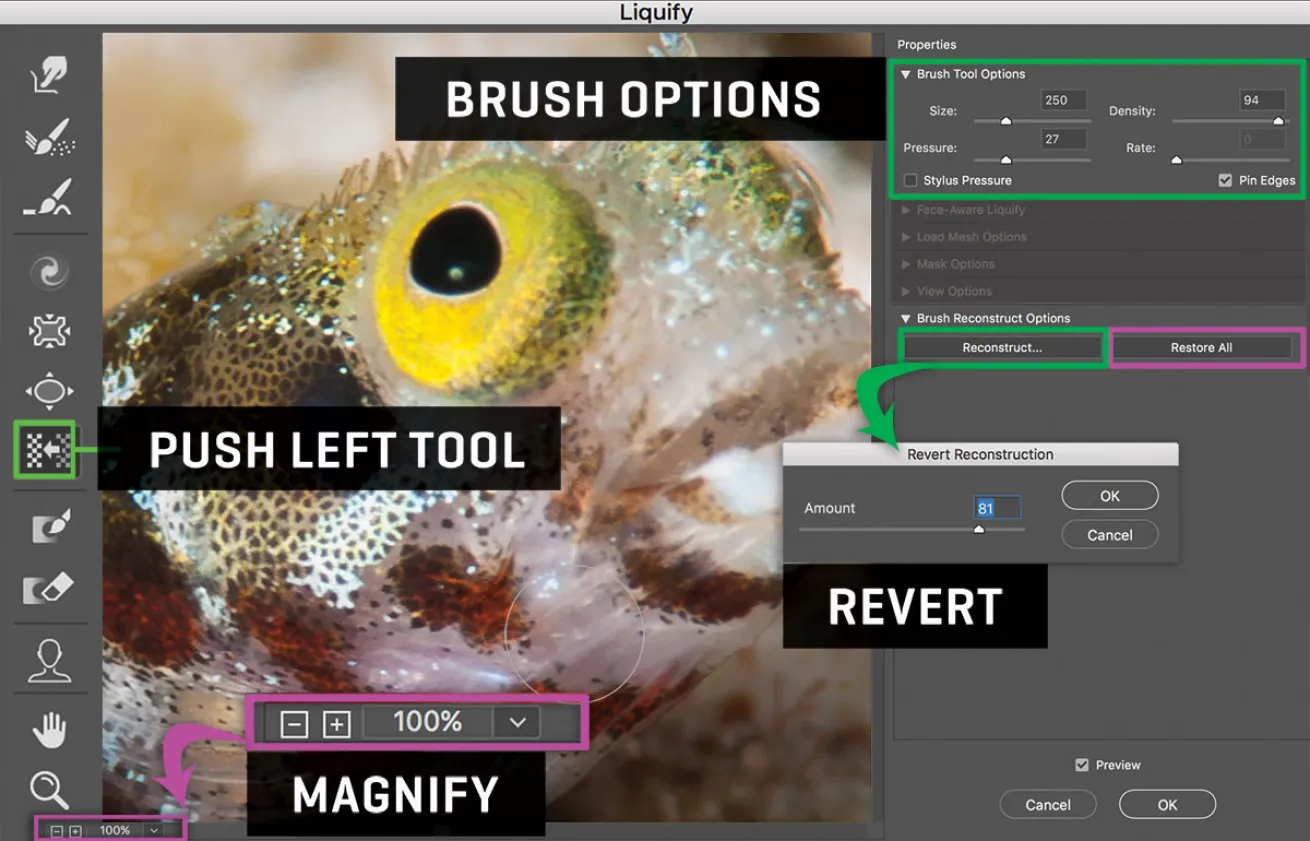
Erin QuigleyFigure 4.
4) From the toolbar on the left side of the Liquify panel, select the Push Left Tool and adjust the brush size. It should be big enough to completely cover the edge you want to sharpen. Err on the large side until you get a feel for how the tool works. The Density slider controls the strength of the edge of the brush, and the Pressure slider controls distortion strength. For starters, set Density and Pressure to amounts between 25 and 50.
5) Find the most prominent edges of the eye, and brush along (not on) them to increase edge contrast. The placement of your brush will have a specific effect.
- Brushing left along the top of an edge will push pixels downward, compressing the edge.
- Brushing right along the bottom of the same edge will push pixels up, making the edge even narrower.
- Brushing downward along the left side of an edge will push pixels inward, making it narrower.
- Brushing upward along the right side of the same edge will push pixels inward, further compressing the edge.
6) To finesse the entire Liquify effect, choose “Reconstruct” from the bottom right, and dial back the strength until it looks natural.
7) When you’re finished, click “OK.”
SMART SHARPEN
Smart Sharpen employs a more elegant algorithm than Photoshop’s old standard, Unsharp Mask. The filter is also more full-featured, offering blur-removal options and separate Highlights and Shadows faders. After using Liquify, apply Smart Sharpen to the entire image to crisp up and unify the rest of the photo.
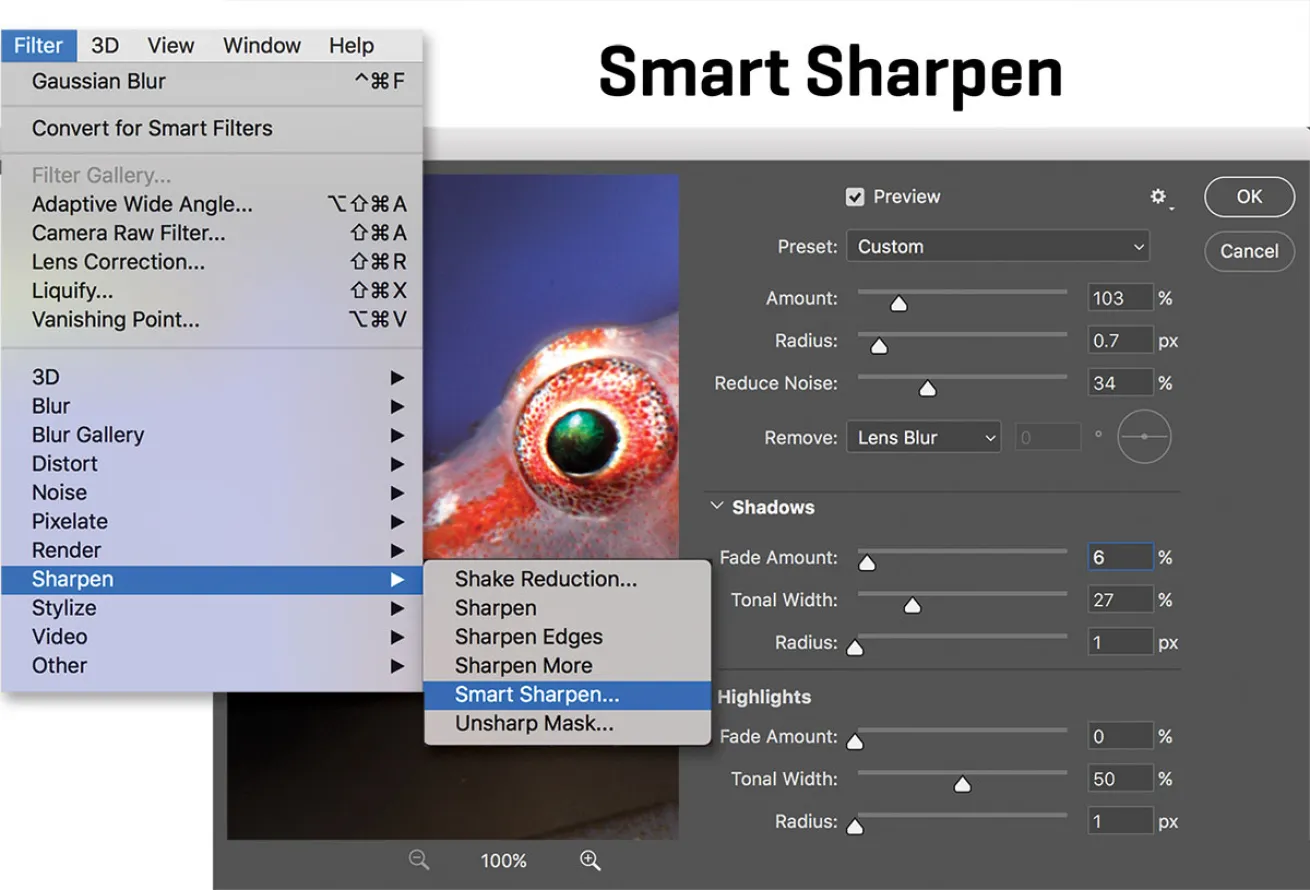
Erin QuigleyFigure 8.
8) Go to Filter>Sharpen>Smart Sharpen… and adjust the Smart Sharpen sliders to taste. Work at a minimum of 100 percent magnification.
- Amount is the intensity of contrast applied to edges in the image.
- Radius is how far from each edge sharpening persists.
- Reduce Noise compensates for unwanted graininess. A higher number means more noise reduction.
- The Remove Blur dropdown menu stipulates the kind of blur to remove. For photographs, Lens Blur is the way to go.
- Fade Highlights and Shadows to reduce artifacts in specific areas of brightness — only if necessary.
9) When you’re finished, click “OK.”
THE SHARPEN TOOL
The Sharpen Tool is a legacy tool in Photoshop that’s been much improved in the past few updates. It’s especially useful to gradually sharpen individual pixels, making it possible to selectively restore texture to areas of the image that might appear flat after using Liquify.
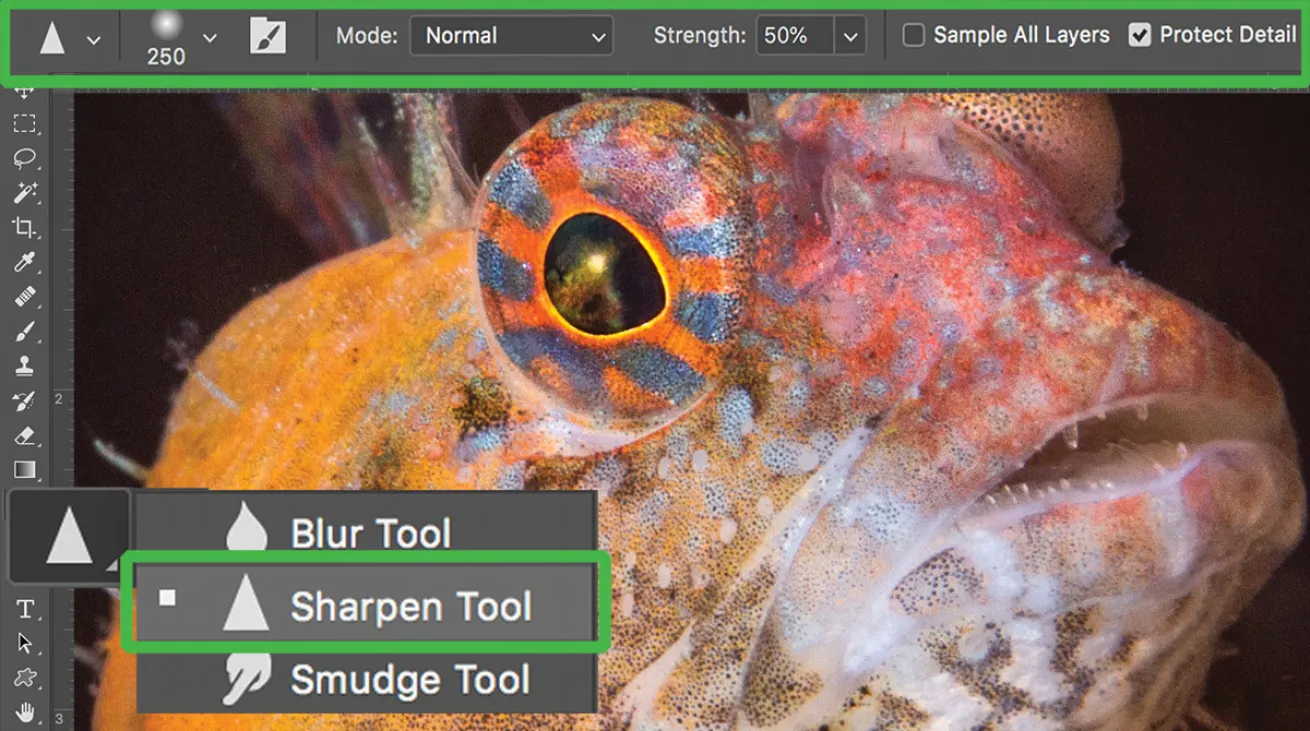
Erin QuigleyFigure 10.
10) Activate the Sharpen Tool from the toolbar. In the Sharpen Tool options bar, choose an appropriate brush size and set the strength at 50 percent or less. Keep the Protect Detail checkbox ticked on to prevent artifacting and pixelization. A heavy hand with the Sharpen Tool will still destroy pixels, so use a soft touch.
11) Working at a minimum of 100 percent magnification, click with the tool on and around the eye, unifying texture and blending the effects of Liquify into the rest of the frame.
Erin QuigleyFor detailed descriptions of how these and other Liquify tools work, check out my previous article, “Retouching for Good and Evil”.
PRO TIP
Liquify can be used not only to sharpen eyes, but also to redirect their gaze. The Push Forward, Bloat and Pucker tools in the Liquify panel can be used in concert to create eye contact with your subject.


