

Don’t get too excited. The techniques in this article won’t rescue fuzzy images. Out-of focus photos can’t be recovered in post, but you can (and should) enhance the sharpness of properly focused pictures to maximize their potential.
Erin QuigleyGet sharp images in post with this step-by-step Lightroom guide.
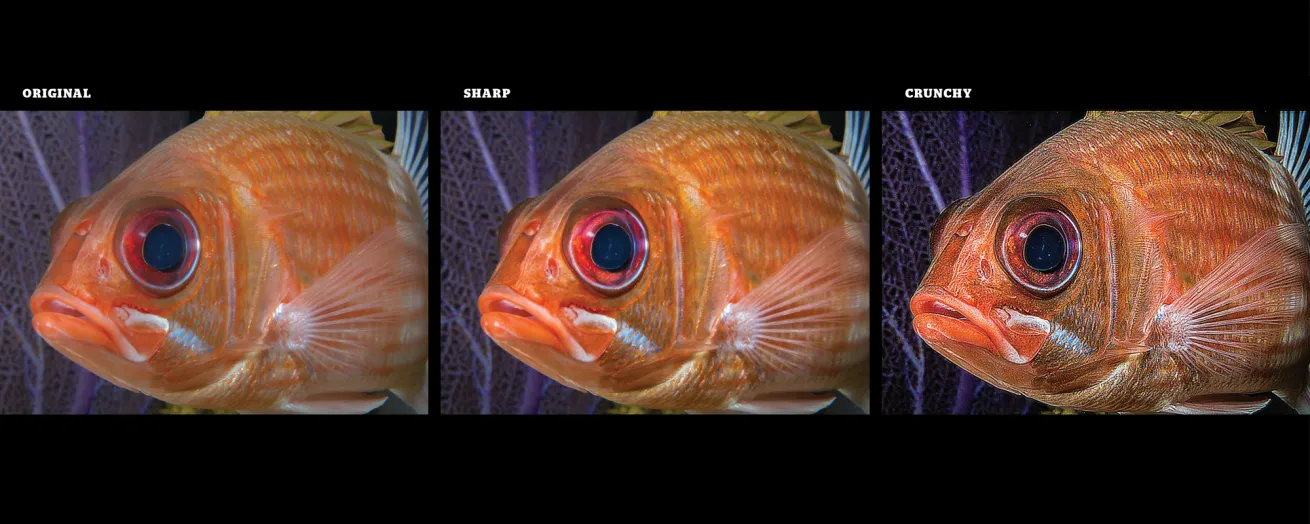
WHAT IS SHARPNESS?
Without getting too technical, you might say that sharpness is edge contrast. Sharp edges have high-contrast, crisp borders with a rapid transition from light to dark. The more gradually the boundaries of an edge fade from one tonal value to another, the softer
they appear. Sharpening in postproduction artificially increases edge contrast by
making the dark side of the edge darker, and the bright side brighter. There are three main kinds of sharpening — input, creative and output sharpening.
INPUT SHARPENING WITH THE DETAIL PANEL IN LIGHTROOM
Input sharpening is applied to counteract softness created by digital capture. I use Lightroom’s Detail panel for input sharpening.
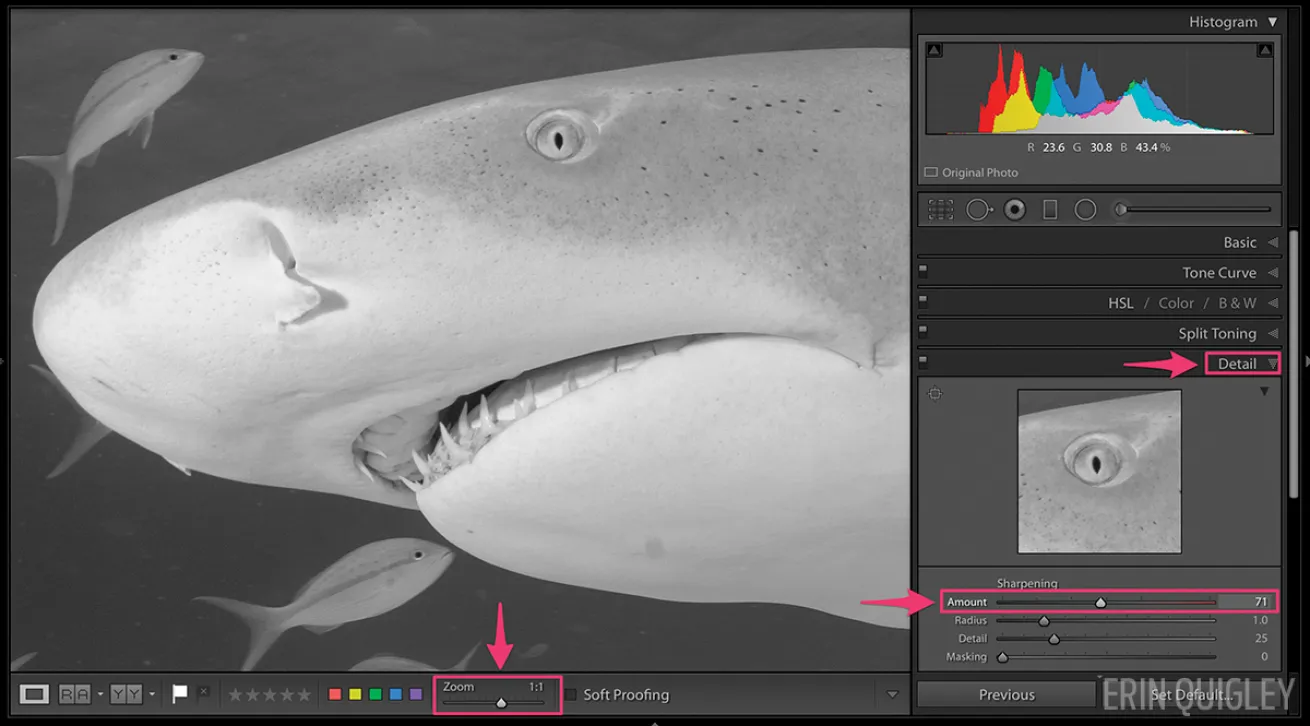
Erin QuigleyAMOUNT
Work at 100 percent magnification to be able to see your work. Holding down Option (Mac) or Alt (PC) while moving the sliders reveals monochromatic previews for each slider. Color messes with our ability to assess sharpness.
AMOUNT determines the intensity of edge contrast. Hold down Opt/Alt. Move the slider until you can just see important edges crisp up. It should be a very subtle change. Common Amount settings are between 35 and 75.
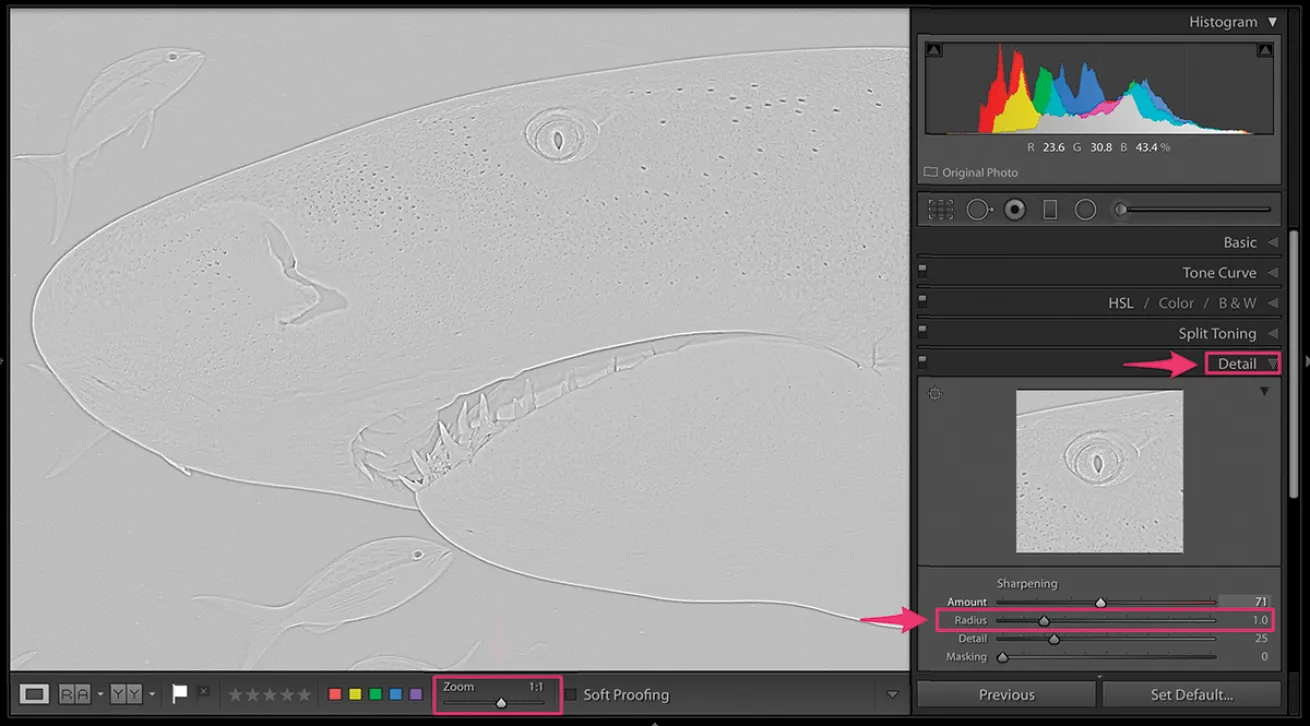
Erin QuigleyRADIUS
RADIUS is how many pixels out from an edge the effect of sharpening extends. Hold down Opt/Alt. Move the slider right until all critical edges are represented — an overly high radius setting results in dark or light halos. Common Radius settings fall between 1 and 1.5.
DETAIL controls sharpening on high-frequency edges (fine detail). A low setting limits sharpening to only broader edges, while a high value sharpens even the finest texture. Hold down Opt/Alt. Move the slider until you start to see texture where you want it, but beware of creating artifacts in areas that should otherwise be smooth. The Default setting is 25, but I often use less.
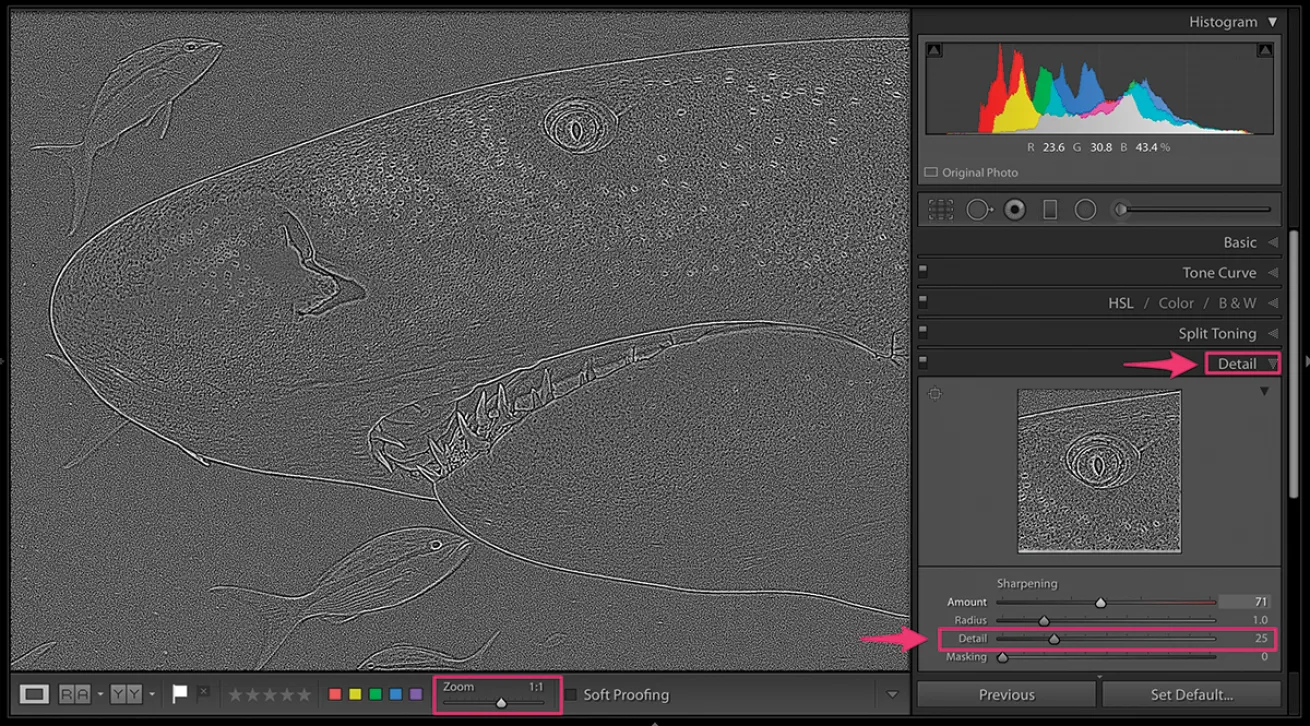
Erin QuigleyDETAIL
MASKING hides, or masks, sharpening by gradually eliminating it on areas of lower contrast.
Hold down Opt/Alt. When the slider is all the way to the left, you’ll see a completely white screen. White signifies pixels being sharpened at 100 percent. As you move the slider to the right, lower-contrast areas of the image turn gray and then black. Gray signifies partial sharpening; black means that no sharpening is applied.
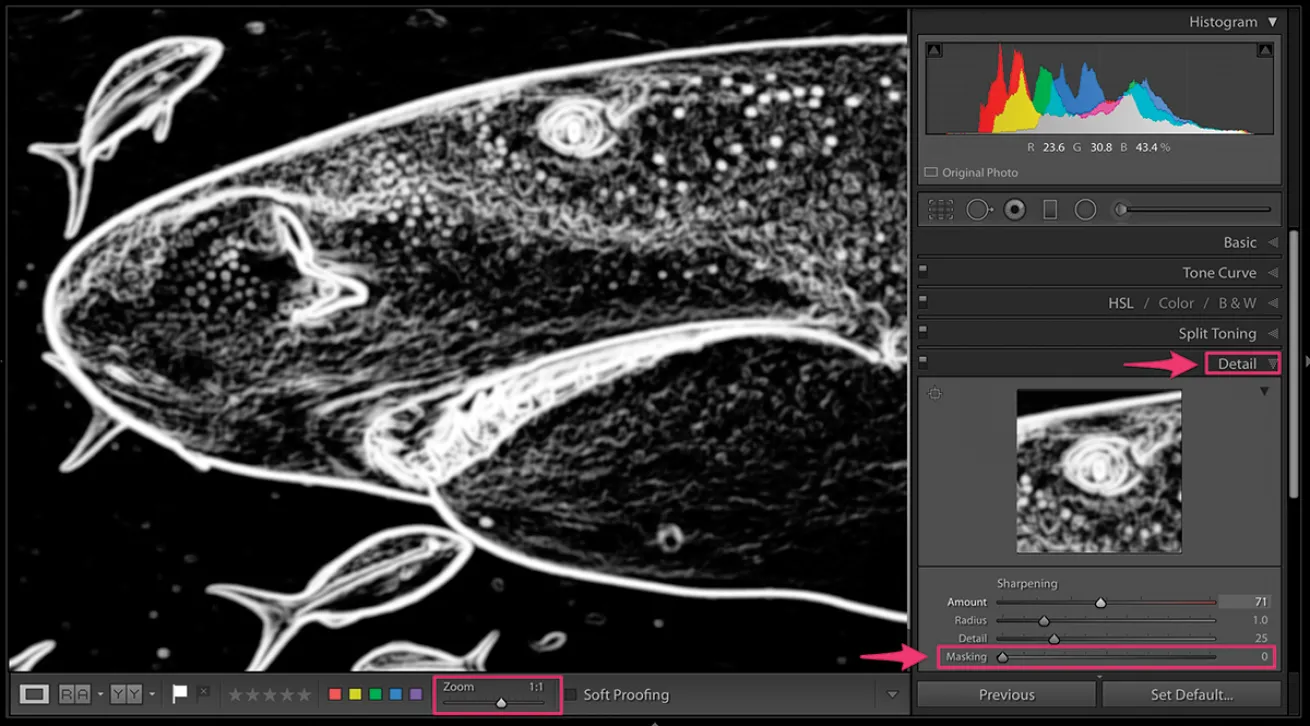
Erin QuigleyMASKING
Masking is an incredibly useful tool for underwater photographers, making it possible to enhance details of the subject without sharpening water or blurred backgrounds.
CREATIVE SHARPENING WITH THE DETAIL PANEL IN PHOTOSHOP
Creative sharpening directs the viewer’s eye to a specific part of the image by enhancing edge contrast selectively. Use the Camera Raw fiter in Photoshop via a Smart Object workflow for the ultimate in control.
1) In Lightroom, Control click (Mac) or R-click (PC) on the selected image, and choose Edit In>Open as Smart Object in Photoshop — the photo will open in Photoshop.
2) In Photoshop, go to Filters>Camera Raw Filter. The layer will open in Adobe Camera Raw.
3) Use the Detail panel to ramp up sharpness in the image, knowing you’ll be able to conceal any part of it selectively in the next step.
4) Click OK. This will create a Smart Filter with its own layer mask.
5) Click on the Smart Filter layer mask, and tap Command-I (Mac) or Control-I (PC) to fi ll it with black, which hides the sharpening you just did.
6) Grab the brush tool from the toolbar (B), and paint with white on the black layer mask to reveal the sharpening selectively.
7) Toggle the eyeball next to the Smart Filter layer mask to see before and after.
Pro Tip
For local sharpening with a pop of saturation in Lightroom, grab the brush, radial filter or graduated filter, and load it up with enough increased exposure to make the area it’s affecting look slightly washed out. On the same brush or filter, increase Clarity and Dehaze in small amounts to add punch and restore color. Be careful not to go too far!
ADDITIONAL CAMERA RAW SMART FILTER OPTIONS
1) Double-click the Smart Object icon in the bottom right of the layer thumbnail to open Camera Raw and adjust your original Lightroom settings.
2) At the bottom of the Smart Filter layer, double-click “Camera Raw Filter” to reopen and adjust the settings.
3) Double-click the filter options icon at the bottom right of the Smart Filter layer to control the opacity.
OUTPUT SHARPENING
Output sharpening is global sharpening applied to prepare the photo for its ultimate use, be it print or screen. Return to Lightroom for output sharpening, which is applied during export. The output sharpening choices at export are Matte paper, Glossy paper, or Screen in Low, Standard or High amounts.
Erin Quigley is an Adobe ACE-certified digital-imaging consultant and an award-winning shooter. GoAskErin.com provides custom tutorials and one-on-one instruction for the underwater photographic community.


