Underwater Photography: How To Take Split Images

Split Personality
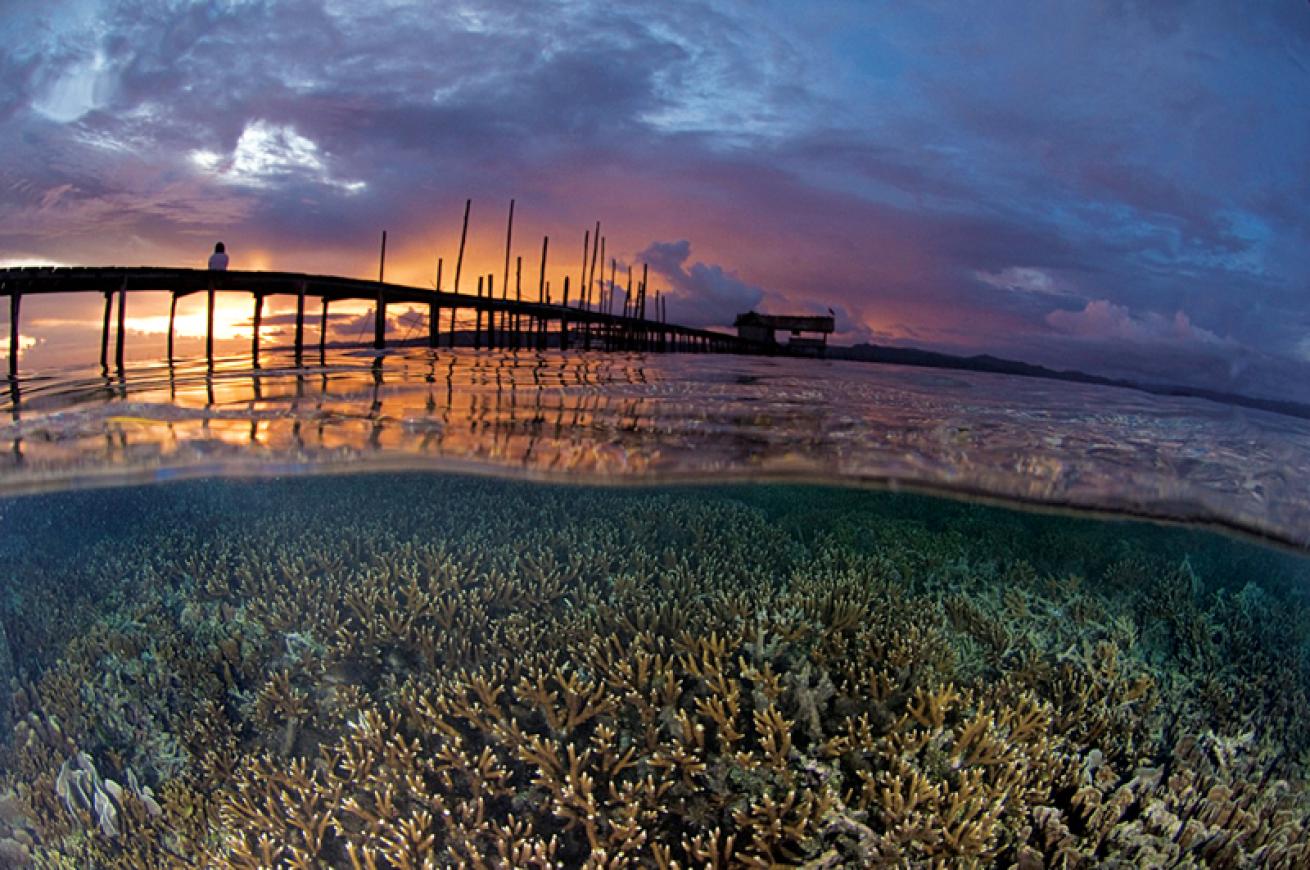
Split images are one of the most popular types of underwater images.
Sterling Zumbrunn
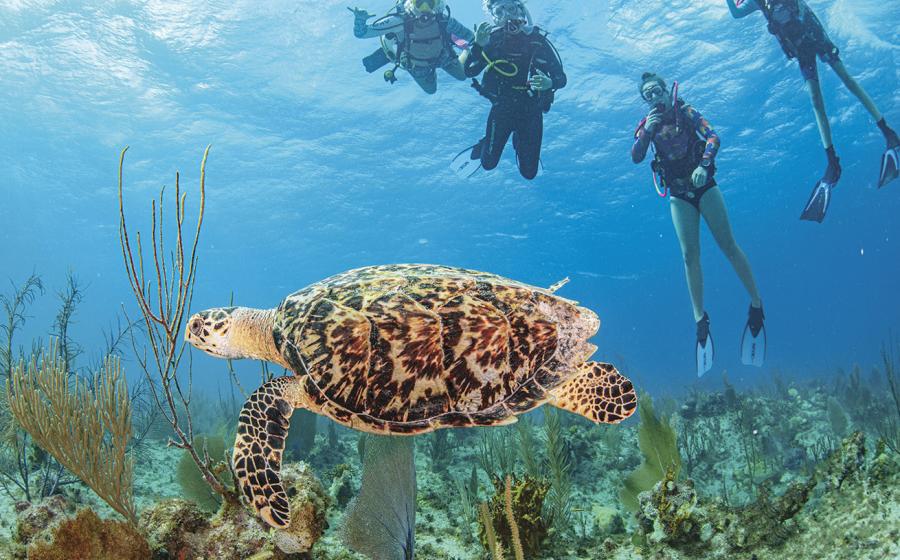
Split images — also known as half and halfs or over-unders — are one of the most popular types of underwater images, and for good reason. More than any other kind of photograph, they help tell the story of the connection between the underwater and topside worlds. Here are some of the techniques you can use to capture these unique images.
Find compelling subjects above and below. Photos that have a beautiful topside landscape and a dreary underwater scene or a beautiful underwater subject but only sky above are less compelling. Finding the right subjects usually takes scouting. For reef splits, it helps to work at low tide when the coral is only inches from the surface of the water. I typically explore an area with only my mask and camera, leaving my fins behind to avoid damaging the reef.
Look for calm conditions, bright light and clear viz. Split images work best when the surface of the water is as flat as possible, though sometimes you can use a curved split line to your benefit. When conditions are rough, shooting splits starts to become unmanageable. The contrast ratio between above and below can be enormous, so it’s easier to work on bright sunny days, where sunlight will be able to penetrate and light the underwater scene. If the subject is at close range, strobes are a useful tool to help provide supplementary lighting. Another key factor is visibility. If the water is murky, the bottom side of split is going to suffer, so find the clearest water you can.
Use a big glass dome. Split images benefit when you use the biggest dome you can find because the large diameter is able to mitigate choppy water at the surface, which shows up as a wavy line in your image. Typically, I use a dome that’s more than nine inches in diameter. Smaller domes can be used, but with lower success rates. Glass is preferable to acrylic, as the water sheets off of the surface instead of forming beads that show up in the image.
Choose your point of focus. Depth of field is a significant challenge due to the massive difference in focusing ranges and having both underwater and topside optics in the same shot. Fisheye lenses have a larger amount of depth of field than most lenses, which is one of the main reasons they are very effective when shooting splits. The first step is to determine where the more important subject is, topside or underwater. That will help determine where to set your focus. In most cases, it’s best to focus somewhere on the underwater subject, and allow the topside subject to be pulled in with depth of field.
Use a small aperture, a fast shutter speed and rapid fire. Use as high an f-stop as you can, preferably f/11 or higher to get the maximum depth of field. A shutter speed of at least 1/125 sec will help freeze the surface of the water, giving a nice crisp, water line. You may have to push your camera’s ISO to achieve these settings, but it will be worth it to get a sharp image. Using your camera’s motor drive to shoot at its maximum frame rate will increase your chances of nailing the shot where all elements (topside, underwater and water line) perfectly combine. Finally, shoot a ton of images. You may need to take dozens of images to get the one that captures the connection between land and sea the way you envision it.
Want more tips on spilt photography? Click here!
Sterling ZumbrunnSplit images are one of the most popular types of underwater images.
Split images — also known as half and halfs or over-unders — are one of the most popular types of underwater images, and for good reason. More than any other kind of photograph, they help tell the story of the connection between the underwater and topside worlds. Here are some of the techniques you can use to capture these unique images.
Find compelling subjects above and below. Photos that have a beautiful topside landscape and a dreary underwater scene or a beautiful underwater subject but only sky above are less compelling. Finding the right subjects usually takes scouting. For reef splits, it helps to work at low tide when the coral is only inches from the surface of the water. I typically explore an area with only my mask and camera, leaving my fins behind to avoid damaging the reef.
Look for calm conditions, bright light and clear viz. Split images work best when the surface of the water is as flat as possible, though sometimes you can use a curved split line to your benefit. When conditions are rough, shooting splits starts to become unmanageable. The contrast ratio between above and below can be enormous, so it’s easier to work on bright sunny days, where sunlight will be able to penetrate and light the underwater scene. If the subject is at close range, strobes are a useful tool to help provide supplementary lighting. Another key factor is visibility. If the water is murky, the bottom side of split is going to suffer, so find the clearest water you can.
Use a big glass dome. Split images benefit when you use the biggest dome you can find because the large diameter is able to mitigate choppy water at the surface, which shows up as a wavy line in your image. Typically, I use a dome that’s more than nine inches in diameter. Smaller domes can be used, but with lower success rates. Glass is preferable to acrylic, as the water sheets off of the surface instead of forming beads that show up in the image.
Choose your point of focus. Depth of field is a significant challenge due to the massive difference in focusing ranges and having both underwater and topside optics in the same shot. Fisheye lenses have a larger amount of depth of field than most lenses, which is one of the main reasons they are very effective when shooting splits. The first step is to determine where the more important subject is, topside or underwater. That will help determine where to set your focus. In most cases, it’s best to focus somewhere on the underwater subject, and allow the topside subject to be pulled in with depth of field.
Use a small aperture, a fast shutter speed and rapid fire. Use as high an f-stop as you can, preferably f/11 or higher to get the maximum depth of field. A shutter speed of at least 1/125 sec will help freeze the surface of the water, giving a nice crisp, water line. You may have to push your camera’s ISO to achieve these settings, but it will be worth it to get a sharp image. Using your camera’s motor drive to shoot at its maximum frame rate will increase your chances of nailing the shot where all elements (topside, underwater and water line) perfectly combine. Finally, shoot a ton of images. You may need to take dozens of images to get the one that captures the connection between land and sea the way you envision it.