I still remember the pain of my first trip with a housed digital camera, a Nikon D1X, to the Galapagos Islands in the fall of 2001. I did so many things terribly wrong. First, I shot the images in the TIF format, which required the camera to process images to high resolution internally, and the write time to the compact flash card was an eternity per image. This took up a lot of space on the "giant" Compact Flash card I had at the time, 512MB. By the way, that card cost me over $550--today a faster version of the same card costs just $14.99. Once I got back to my cabin on the boat, I had to download the card. With my combination of a slow card, a USB1 card reader and woefully inadequate computer, it took 20 minutes to download about 20 images. Then I had to do my editing with first-generation Nikon Capture software. The whole process was glacial--and I mean pre-global warming glacial. I hardly came out of my cabin the whole week, and I had very few significant images to show for my trouble.
We've all come a long way since then. Every part of the equation has gotten exponentially better in an unbelievably short amount of time. The cameras are far more efficient in terms of their write-speed to disk, and now we all know better than to use TIF as a capture format. In fact, most cameras don't even allow that anymore. Digital photographers can capture images in either RAW or JPG, and both are infinitely faster than what I did as an ignorant digital novice just seven years ago. Computers are also much faster these days, incorporating more memory and faster processors in smaller packages with far better screens. And the software options are more sophisticated and user-friendly now as well. Even the media the cameras write to, whether compact flash or secure digital, are now faster, better, more reliable and way cheaper than ever before. I just bought a 16GB card for $175, 30 times the capacity, 10 times the speed, and one-third the cost as compared to that first 512MB card.
But despite all the technological advances, working smart to get those images off the camera, into the computer, edited, safely back home, and then processed in a manner that allows time for enjoying something other than digital drudgery is still something of an art form. Habits do vary by photographer, but at the core of any photographer's digital workflow technique is a smart selection of equipment and the knowledge to use it all efficiently. From the first click of your shutter to your final retouch in Photoshop, here are six digital workflow tips for maximizing your time and potential.
The Point of Capture
Use the fastest card These days my camera is a Canon EOS1DsMKIII, which writes big files--each RAW file can be 20MB or more--to either compact flash or secure digital cards. The Nikon D2X is another example of a camera that captures beefy RAW files, typically over 19MB each. Any of the modern DSLR cameras have the potential to write large files to their media very quickly, so the fail point is more likely the memory card. The compact flash card database compiled by photojournalist Rob Galbraith (get it here) shows significant performance differences among different cards from different manufacturers, or even different cards within the same family. For example, in my camera, a Sandisk Extreme III 16GB card will take on data at 17.23MB per second, whereas the Sandisk Extreme III 8GB card only takes on data at 12.8MB per second. The 16GB card is nearly 35 percent faster. Do your research before buying storage media to make sure you get a card that will keep up with your camera.
Shoot in RAW DSLR underwater photographers learned early on they needed to get their shots right the first time because fish rarely allow a retake. And shooting RAW provides for the greatest control of the image and by far the best final result. RAW files retain all the information that can be captured by the camera's computer, and they allow the photographer to make all processing adjustments in the most nondestructive fashion--after the fact with a computer and image processing software. JPG is another popular file format, but shooting JPGs requires the camera to selectively toss out parts of the image in its compression algorithm. I don't know about you, but I want that to be my responsibility, not an automated function created by some computer programmer in Japan.
Hardware for Storing, Organizing and Viewing Images
On the road, some shooters choose to travel with a simple storage device rather than a laptop, something like an Epson P5000 or a SmartDisk FlashTrax--both of which accept various media cards and allow images to be downloaded directly to an internal hard drive, complete with an integrated monitor for rudimentary viewing and editing. These are good if all you want is a place to dump your images and the ability to scroll through, deleting obvious duds. However, I prefer to travel with a laptop, which allows me to store my images, as well as confidently plow through a first edit, typically by the end of each day. The whole PC versus Mac debate is not much of an issue these days because most software is cross-platform. And since my laptop is basically a stopgap tool for storing and organizing images on the road, I don't obsess over performance features other than hard drive capacity. Personally, I need at least 120GB to store one set of edited images plus all the files and software that reside on my computer. Your own needs depend on how much you shoot and the size of your RAW files. I also bring along at least one, generally two, portable hard drives so I can back my files up in redundant locations.
My home computer is where I splurge. Most importantly, I need a calibrated monitor and the processing speed to churn through lots of big files quickly. Unlike the days when the viewing standard for slides was a lightbox and a Scheider 4X loupe, there are now massive variables in the way computer monitors can display an image. To make certain your monitor displays as accurately as possible, it should be calibrated frequently with an external device like an X-rite calibration tool (at least once a month), and the images should be viewed in a darkened room. For processing lots of large files, you'll also need as fast a computer as you can afford. I'll often process 60 or more high-res files in a day, so if I can save even a couple of minutes in processing time per file, that can add up to a couple of hours saved by the end of each day.
The Software
My current workflow process is an amalgam of three processing programs: Photo Mechanic, Lightroom and Photoshop CS3. Other programs--like Apple's Aperture 2 or Breezebrowser--perform similar functions and have rabid devotees of their own. I have personally avoided these two because they don't operate cross-platform, and while it may not matter to me personally, I teach courses where a student may have either Mac or PC and I need to be conversant with software functional on each. Here's a rundown of what my programs of choice can do, and how you can use them together to maximize your workflow potential:
Photo Mechanic
This is the fastest editing program I have ever come across. It builds thumbnails from even large RAW files very quickly because it works with the much smaller JPGs embedded within each file. Yet, the quality of the thumbnails is high enough that you can easily make critical keep/toss decisions. Additionally, the edit screen provides a graphic view of the histogram, aiding the decision as to whether an image is worthy of subsequent processing work in either Lightroom or Photoshop. Other tasks Photo Mechanic does quickly and painlessly:
Renaming the files. Tired of your files having clever names like Z8E1533.CR2, and prefer instead they say something intuitive like RedSea_NumidiaShipwreck_207.CR2? Photo Mechanic does it quickly and easily.
Embedding important metadata. Camera and exposure information for each particular shot is done in-camera, but photographers should also add copyright information and important caption and keyword data within the IPTC (International Press Telecommunication Council) fields, so wherever the photo goes, and whatever software is used to open it, the ownership and caption information is readily available.
Shuffling the file presentation by capture time, file number or any number of other criteria.
Quick deletes. With a brutal Photo Mechanic edit, I can distill 20GB of marginal images from a seven-day live-aboard trip down to 7GB worth of keepers. If the images were bad the first time, do you really need to wade through them again later? Put them out of their misery with a quick click of the delete key. camerabits.com
Adobe Lightroom 2
Lightroom will do the same editing, renaming and IPTC insertion tasks that Photo Mechanic does, but Photo Mechanic does it faster. And Photoshop CS3 does all the same file processing tasks that Lightroom does. So why spend $300 for software that only does what these other programs do already? Because Lightroom does it so very well. Think of it as a streamlined version of Photoshop that can do the smaller image-improvement tasks of its big brother quicker and easier, but not as much of the heavy lifting in the layers, type and composite departments.
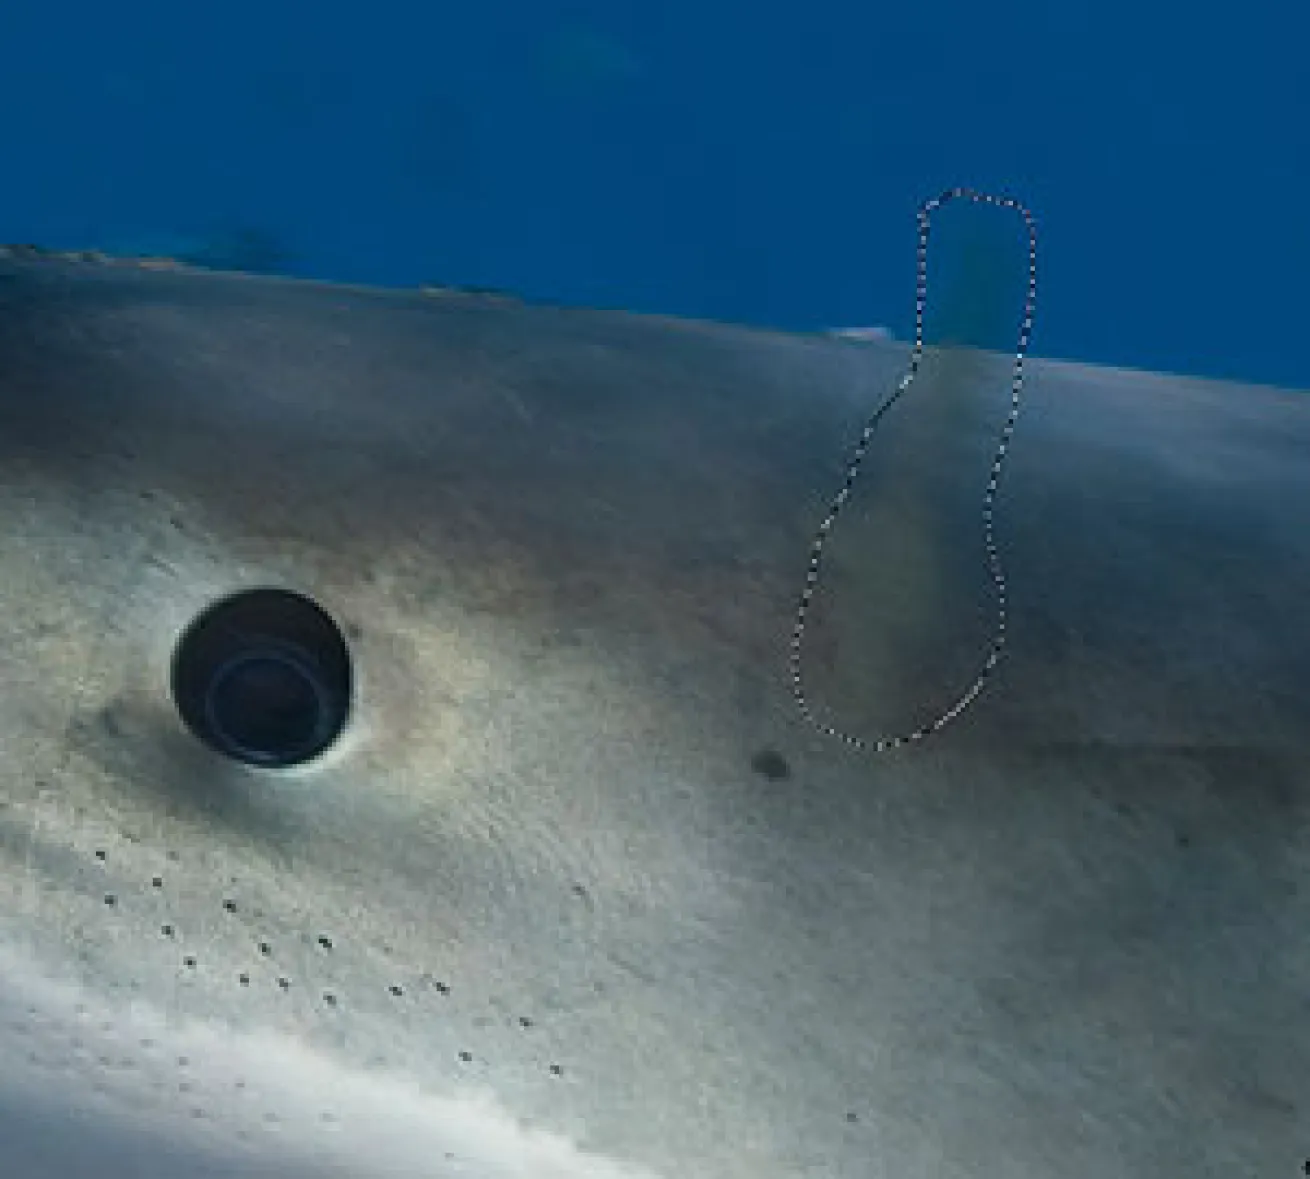
Lightroom has five modules: Library, Develop, Slideshow, Print and Web. While all five are certainly functional, it is the first two, Library and Develop, that get constant use in my workflow. The Develop module presents a series of intuitive sliders that allow quick correction to exposure and color balance, as well as more subtle corrections to highlights and blacks and esoteric corrections like "clarity" and "vibrance." There are also quick conversions to grayscale (black-and-white). Cropping is easy, and even crude spotting controls are available for backscatter removal. Once you've made the necessary adjustments with the slider controls, a quick hop back to Library allows the files to be exported to whatever format (PSD, TIF or JPG), in whatever file size you need for end use. Lightroom 2 also has terrific tools for selective pixel control. Want to paint some exposure, contrast or color control into a small, defined area of an image? Lightroom 2 offers the tools to do so quickly and intuitively. Whether for printing, publication or web, Lightroom is a beautiful, efficient processing and export tool. adobe.com/products/photoshoplightroom.
Photoshop CS3
If you're hunting squirrels, you can do it with a .306, but it's total overkill. A .22 is lighter, easier and will do the job more efficiently. But if you need to take down a 12-point buck, break out the big gun. Photoshop is that big gun. It's the granddaddy of all image processing applications, and by far the most powerful. The combination of Adobe Camera RAW, Adobe Bridge and Photoshop--the three components of the CS3 suite--does almost everything that can possibly be done with an image, but it's significantly more cumbersome to get there. Now that Lightroom is in my picture, Photoshop really only gets the go-to call when I need to do creative cloning and spotting--in Photoshop, these tools remain far better than the relatively crude cousins that reside in Lightroom. Of course the other classic Photoshop tasks like adding type, creating page layouts and the fun, albeit sometimes dangerous, task of adding subjects that were never there to begin with remain ample justification for owning Photoshop CS3. Just make sure you disclose any misleading fiddling if you're trying to ethically sell your images. (adobe.com/products/photoshop). Note: The problem with buying digital technology, or writing about software, is that something newer and better is always on the near horizon. As this article went to print, Adobe announced Photoshop CS4, the next "must-have" application.
Gear Corner
I recently used the new Ikelite DS160 to photograph great white sharks at Guadalupe Island, Mexico. New regulations here have changed how close the sharks come to the cages. The sharks only came about six feet from my lens, meaning most of my best shots came from the 35mm end of my 16-35 zoom. For this reason, I appreciated the extra peak power on the DS160, as compared to my familiar DS125 (the previous iteration and cosmetic clone of this strobe). I was likewise quite happy with the quick recycle time, allowing multiple shots when I did have the good fortune of a shark passing nearby. The ergonomics of the strobe are similar to the DS125, except for the extra click stops on the power setting control. And the new strobe was lightweight enough to dangle at the end of the aluminum rod supporting my pole-mounted camera, while offering virtually instantaneous recycling at the half-power setting. While this particular shoot was not about small critters, I was also pleased to see that the model light on the DS160 is now an LED rather than halogen light used on the DS125 and DS200 strobes. A bright halogen model light emits too much light and too much discernible heat for many skittish reef creatures, and an LED is a far stealthier option. All in all, it retains the size, weight, battery pack configuration, and the informational "fuel" gauge for battery life remaining that I liked about Ikelite's older models, but with a half-stop power increase.
MSRP: $840
Contact: ikelite.com

I still remember the pain of my first trip with a housed digital camera, a Nikon D1X, to the Galapagos Islands in the fall of 2001. I did so many things terribly wrong. First, I shot the images in the TIF format, which required the camera to process images to high resolution internally, and the write time to the compact flash card was an eternity per image. This took up a lot of space on the "giant" Compact Flash card I had at the time, 512MB. By the way, that card cost me over $550--today a faster version of the same card costs just $14.99. Once I got back to my cabin on the boat, I had to download the card. With my combination of a slow card, a USB1 card reader and woefully inadequate computer, it took 20 minutes to download about 20 images. Then I had to do my editing with first-generation Nikon Capture software. The whole process was glacial--and I mean pre-global warming glacial. I hardly came out of my cabin the whole week, and I had very few significant images to show for my trouble.
We've all come a long way since then. Every part of the equation has gotten exponentially better in an unbelievably short amount of time. The cameras are far more efficient in terms of their write-speed to disk, and now we all know better than to use TIF as a capture format. In fact, most cameras don't even allow that anymore. Digital photographers can capture images in either RAW or JPG, and both are infinitely faster than what I did as an ignorant digital novice just seven years ago. Computers are also much faster these days, incorporating more memory and faster processors in smaller packages with far better screens. And the software options are more sophisticated and user-friendly now as well. Even the media the cameras write to, whether compact flash or secure digital, are now faster, better, more reliable and way cheaper than ever before. I just bought a 16GB card for $175, 30 times the capacity, 10 times the speed, and one-third the cost as compared to that first 512MB card.
But despite all the technological advances, working smart to get those images off the camera, into the computer, edited, safely back home, and then processed in a manner that allows time for enjoying something other than digital drudgery is still something of an art form. Habits do vary by photographer, but at the core of any photographer's digital workflow technique is a smart selection of equipment and the knowledge to use it all efficiently. From the first click of your shutter to your final retouch in Photoshop, here are six digital workflow tips for maximizing your time and potential.
The Point of Capture
Use the fastest card These days my camera is a Canon EOS1DsMKIII, which writes big files--each RAW file can be 20MB or more--to either compact flash or secure digital cards. The Nikon D2X is another example of a camera that captures beefy RAW files, typically over 19MB each. Any of the modern DSLR cameras have the potential to write large files to their media very quickly, so the fail point is more likely the memory card. The compact flash card database compiled by photojournalist Rob Galbraith (get it here) shows significant performance differences among different cards from different manufacturers, or even different cards within the same family. For example, in my camera, a Sandisk Extreme III 16GB card will take on data at 17.23MB per second, whereas the Sandisk Extreme III 8GB card only takes on data at 12.8MB per second. The 16GB card is nearly 35 percent faster. Do your research before buying storage media to make sure you get a card that will keep up with your camera.
Shoot in RAW DSLR underwater photographers learned early on they needed to get their shots right the first time because fish rarely allow a retake. And shooting RAW provides for the greatest control of the image and by far the best final result. RAW files retain all the information that can be captured by the camera's computer, and they allow the photographer to make all processing adjustments in the most nondestructive fashion--after the fact with a computer and image processing software. JPG is another popular file format, but shooting JPGs requires the camera to selectively toss out parts of the image in its compression algorithm. I don't know about you, but I want that to be my responsibility, not an automated function created by some computer programmer in Japan.
Hardware for Storing, Organizing and Viewing Images
On the road, some shooters choose to travel with a simple storage device rather than a laptop, something like an Epson P5000 or a SmartDisk FlashTrax--both of which accept various media cards and allow images to be downloaded directly to an internal hard drive, complete with an integrated monitor for rudimentary viewing and editing. These are good if all you want is a place to dump your images and the ability to scroll through, deleting obvious duds. However, I prefer to travel with a laptop, which allows me to store my images, as well as confidently plow through a first edit, typically by the end of each day. The whole PC versus Mac debate is not much of an issue these days because most software is cross-platform. And since my laptop is basically a stopgap tool for storing and organizing images on the road, I don't obsess over performance features other than hard drive capacity. Personally, I need at least 120GB to store one set of edited images plus all the files and software that reside on my computer. Your own needs depend on how much you shoot and the size of your RAW files. I also bring along at least one, generally two, portable hard drives so I can back my files up in redundant locations.
My home computer is where I splurge. Most importantly, I need a calibrated monitor and the processing speed to churn through lots of big files quickly. Unlike the days when the viewing standard for slides was a lightbox and a Scheider 4X loupe, there are now massive variables in the way computer monitors can display an image. To make certain your monitor displays as accurately as possible, it should be calibrated frequently with an external device like an X-rite calibration tool (at least once a month), and the images should be viewed in a darkened room. For processing lots of large files, you'll also need as fast a computer as you can afford. I'll often process 60 or more high-res files in a day, so if I can save even a couple of minutes in processing time per file, that can add up to a couple of hours saved by the end of each day.
The Software
My current workflow process is an amalgam of three processing programs: Photo Mechanic, Lightroom and Photoshop CS3. Other programs--like Apple's Aperture 2 or Breezebrowser--perform similar functions and have rabid devotees of their own. I have personally avoided these two because they don't operate cross-platform, and while it may not matter to me personally, I teach courses where a student may have either Mac or PC and I need to be conversant with software functional on each. Here's a rundown of what my programs of choice can do, and how you can use them together to maximize your workflow potential:
Photo Mechanic
This is the fastest editing program I have ever come across. It builds thumbnails from even large RAW files very quickly because it works with the much smaller JPGs embedded within each file. Yet, the quality of the thumbnails is high enough that you can easily make critical keep/toss decisions. Additionally, the edit screen provides a graphic view of the histogram, aiding the decision as to whether an image is worthy of subsequent processing work in either Lightroom or Photoshop. Other tasks Photo Mechanic does quickly and painlessly:
Renaming the files. Tired of your files having clever names like Z8E1533.CR2, and prefer instead they say something intuitive like RedSea_NumidiaShipwreck_207.CR2? Photo Mechanic does it quickly and easily.
Embedding important metadata. Camera and exposure information for each particular shot is done in-camera, but photographers should also add copyright information and important caption and keyword data within the IPTC (International Press Telecommunication Council) fields, so wherever the photo goes, and whatever software is used to open it, the ownership and caption information is readily available.
Shuffling the file presentation by capture time, file number or any number of other criteria.
Quick deletes. With a brutal Photo Mechanic edit, I can distill 20GB of marginal images from a seven-day live-aboard trip down to 7GB worth of keepers. If the images were bad the first time, do you really need to wade through them again later? Put them out of their misery with a quick click of the delete key. camerabits.com
Adobe Lightroom 2
Lightroom will do the same editing, renaming and IPTC insertion tasks that Photo Mechanic does, but Photo Mechanic does it faster. And Photoshop CS3 does all the same file processing tasks that Lightroom does. So why spend $300 for software that only does what these other programs do already? Because Lightroom does it so very well. Think of it as a streamlined version of Photoshop that can do the smaller image-improvement tasks of its big brother quicker and easier, but not as much of the heavy lifting in the layers, type and composite departments.
Lightroom has five modules: Library, Develop, Slideshow, Print and Web. While all five are certainly functional, it is the first two, Library and Develop, that get constant use in my workflow. The Develop module presents a series of intuitive sliders that allow quick correction to exposure and color balance, as well as more subtle corrections to highlights and blacks and esoteric corrections like "clarity" and "vibrance." There are also quick conversions to grayscale (black-and-white). Cropping is easy, and even crude spotting controls are available for backscatter removal. Once you've made the necessary adjustments with the slider controls, a quick hop back to Library allows the files to be exported to whatever format (PSD, TIF or JPG), in whatever file size you need for end use. Lightroom 2 also has terrific tools for selective pixel control. Want to paint some exposure, contrast or color control into a small, defined area of an image? Lightroom 2 offers the tools to do so quickly and intuitively. Whether for printing, publication or web, Lightroom is a beautiful, efficient processing and export tool. adobe.com/products/photoshoplightroom.
Photoshop CS3
If you're hunting squirrels, you can do it with a .306, but it's total overkill. A .22 is lighter, easier and will do the job more efficiently. But if you need to take down a 12-point buck, break out the big gun. Photoshop is that big gun. It's the granddaddy of all image processing applications, and by far the most powerful. The combination of Adobe Camera RAW, Adobe Bridge and Photoshop--the three components of the CS3 suite--does almost everything that can possibly be done with an image, but it's significantly more cumbersome to get there. Now that Lightroom is in my picture, Photoshop really only gets the go-to call when I need to do creative cloning and spotting--in Photoshop, these tools remain far better than the relatively crude cousins that reside in Lightroom. Of course the other classic Photoshop tasks like adding type, creating page layouts and the fun, albeit sometimes dangerous, task of adding subjects that were never there to begin with remain ample justification for owning Photoshop CS3. Just make sure you disclose any misleading fiddling if you're trying to ethically sell your images. (adobe.com/products/photoshop). Note: The problem with buying digital technology, or writing about software, is that something newer and better is always on the near horizon. As this article went to print, Adobe announced Photoshop CS4, the next "must-have" application.
Gear Corner
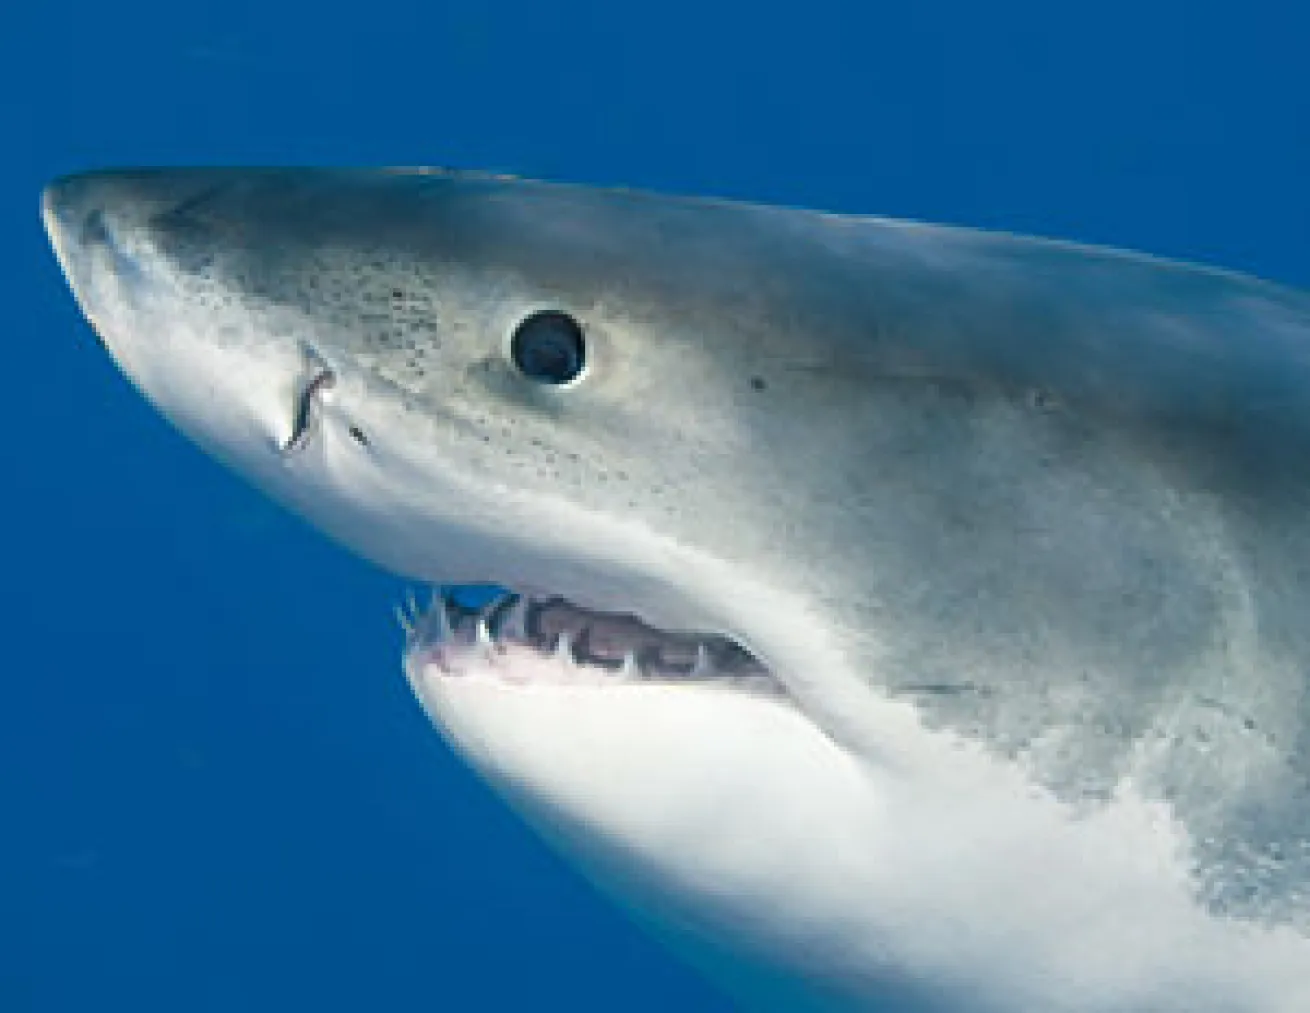
I recently used the new Ikelite DS160 to photograph great white sharks at Guadalupe Island, Mexico. New regulations here have changed how close the sharks come to the cages. The sharks only came about six feet from my lens, meaning most of my best shots came from the 35mm end of my 16-35 zoom. For this reason, I appreciated the extra peak power on the DS160, as compared to my familiar DS125 (the previous iteration and cosmetic clone of this strobe). I was likewise quite happy with the quick recycle time, allowing multiple shots when I did have the good fortune of a shark passing nearby. The ergonomics of the strobe are similar to the DS125, except for the extra click stops on the power setting control. And the new strobe was lightweight enough to dangle at the end of the aluminum rod supporting my pole-mounted camera, while offering virtually instantaneous recycling at the half-power setting. While this particular shoot was not about small critters, I was also pleased to see that the model light on the DS160 is now an LED rather than halogen light used on the DS125 and DS200 strobes. A bright halogen model light emits too much light and too much discernible heat for many skittish reef creatures, and an LED is a far stealthier option. All in all, it retains the size, weight, battery pack configuration, and the informational "fuel" gauge for battery life remaining that I liked about Ikelite's older models, but with a half-stop power increase.
MSRP: $840
Contact: ikelite.com