

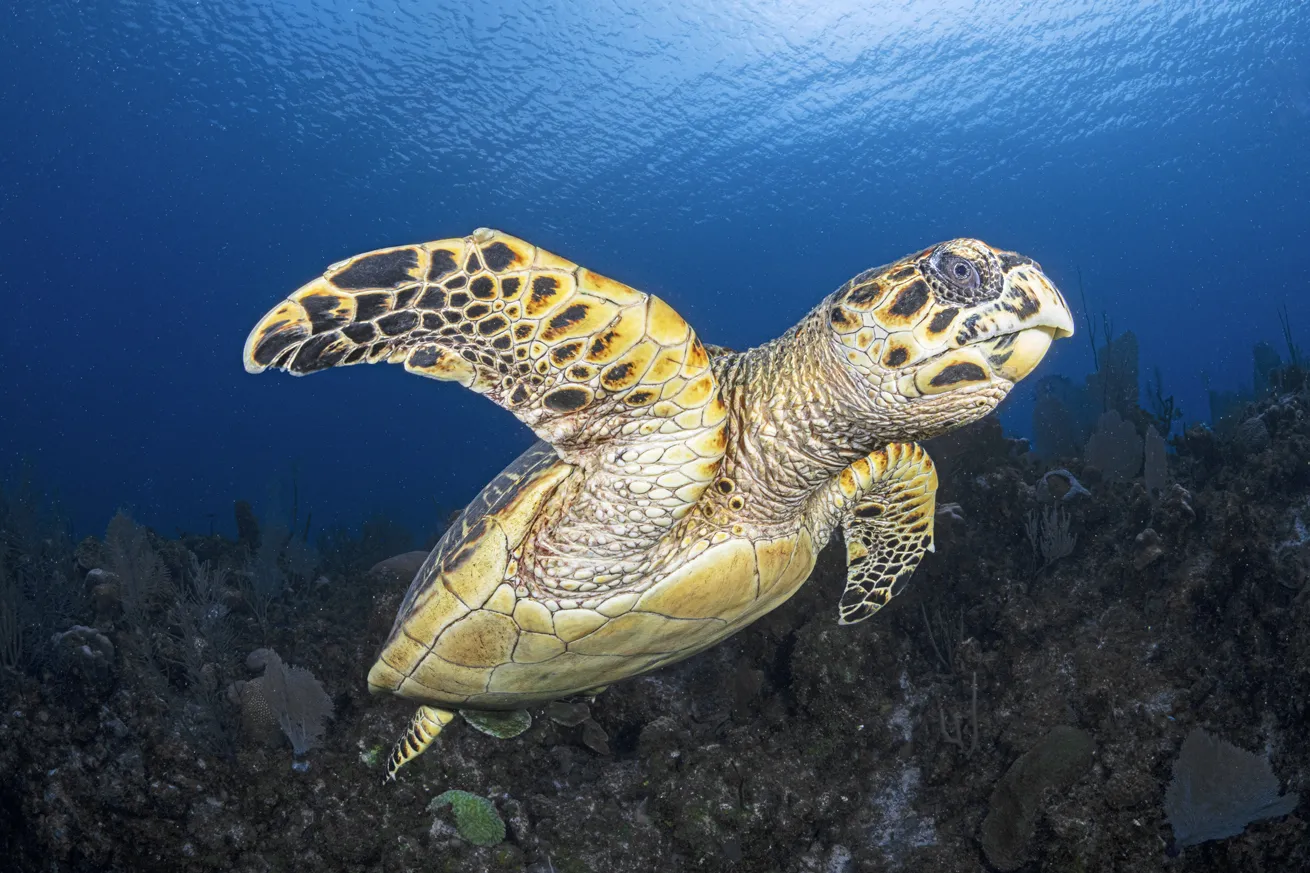
Thomas AndersonUsing warm strobes and a custom white balance can make foreground subjects pop and backgrounds look bluer.
Nothing beats a rich blue background when capturing wide-angle images. This look adds depth and a sense of scale while creating stronger contrast with your foreground subject. Though this can be achieved in many destinations, a dark blue backdrop is especially pleasing to depict liveaboard diving encounters, reinforcing the mystique and majesty of remote locations. Let’s say goodbye to boring, washed-out cyan backgrounds and talk about how to consistently capture bold blue water.
Related Reading: How to Take Stunning Fish Photos Underwater
The Gear
To get started, a fully manual camera will make controlling your image much easier. As we’re focusing on wide angle, the first thing you’ll need is a good lens, typically a fisheye, a 16–35mm (or equivalent), a wet wide lens or a conversion port. Generally speaking, wider lenses better emphasize the background, but each serves a different purpose.
Take out your fisheye if you’re shooting reef photography and can get super close to your subject, and use the wide-angle zoom for subjects that are farther away, like pelagics.
For lighting, a good pair of wide-angle strobes is ideal, as video lights aren’t bright enough for this style of photography. While strobes don’t light the background water, their color can still play a role in creating a bluer background.
Each underwater flash model has its own color temperature, either natively or through special diffusers. Some appear warmer than others. Warmer strobes (between 5500 and 4500 Kelvin) can help produce deeper-looking blue backgrounds and reduce greenish casts when paired with a manual or custom white balance.
This effect is not due to the strobes lighting the water itself, but because the warmer white balance neutralizes the strobe-lit foreground, often causing ambient-lit areas to shift toward richer blues. This can even make greener water photograph blue, providing you with a blue-water background where you wouldn’t normally have one.

The Settings
When it comes to settings, the goal is to control ambient light. Brighter ambient exposures record more background light, which often gives water a washed-out cyan appearance. Shutter speed primarily controls ambient exposure—without affecting flash exposure. ISO and aperture are global adjustments that influence both ambient light and flash.
Aperture and ISO are moving targets depending on conditions, but f/8–f/11 and ISO 200–400 are solid jump settings. Adjustments can then be made by stopping down the aperture or lowering ISO in brighter environments. Shutter speed should be relatively fast, typically 1/125 or higher. Brighter, shallower scenes demand faster speeds, while deeper dives allow slower ones.
If using warmer strobes, you can manually set white balance to match them or perform a custom white balance using strobe light. When performing a custom white balance, it is important to capture it off a neutral target, such as a gray card or slate, and ensure the target is lit only by strobe light rather than ambient light.
Related Reading: Underwater Photography Tips for Shooting Shipwrecks
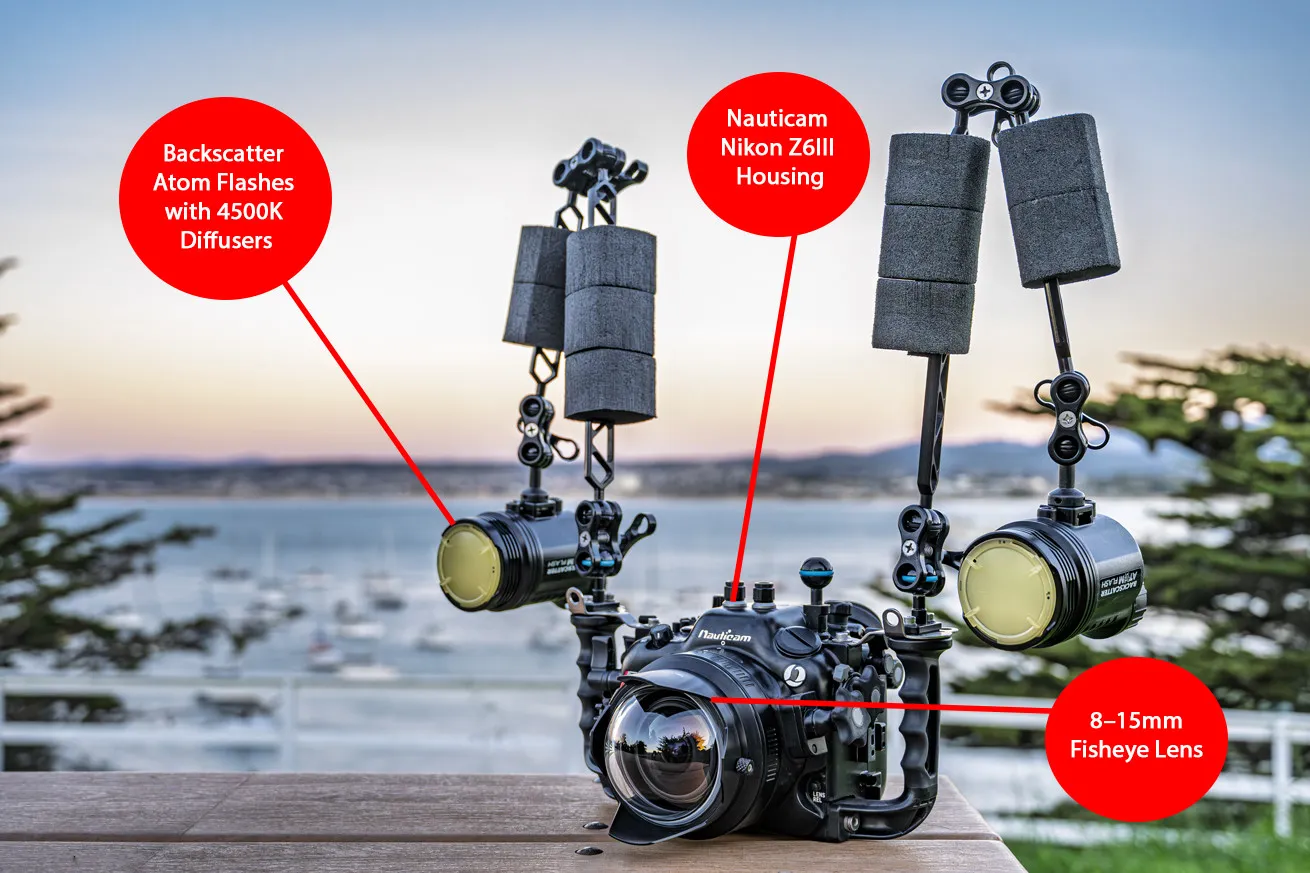
Thomas AndersonBackscatter Atom Flashes with 4500K Diffusers Nauticam Nikon Z6III Housing 8–15mm Fisheye Lens
The Technique
With gear and settings squared away, let's talk technique. Shooting with the sun to your back simplifies exposure and often produces cleaner blue backgrounds.
Begin with your jump settings and take a test shot to review the background. If the water appears overly cyan, increasing shutter speed to 1/160–1/250 will reduce ambient exposure, typically shifting the background toward deeper blues.
Understanding Sync Speed Underwater
Shutter speed adjustments are restricted by your camera’s flash sync speed, which is the fastest shutter speed at which the entire frame can be properly lit by the flash. Most cameras fall within the range of 1/160–1/250, with some exceptions being faster. It is important to be familiar with your camera's limits to better work with it.
If using your shutter speed isn’t enough, darkening the background will require lowering ISO or stopping down aperture, which means you’ll need to increase strobe power. Though this works, using a strobe on full dump results in slower recycle times, which equates to fewer shots during fast action or fleeting moments. This is a big reason why we lean on shutter speed for background control.
Related Reading: 23 Underwater Cameras, Lights and Accessories for Divers
Using Histograms to Color Check
It turns out your camera’s LCD screen can lie to you when you review images via playback underwater. This is where histograms are extremely helpful. The RGB histogram is particularly useful for checking color. You’ll want to compare the blue and green channels.
A strong blue background will produce a dominant blue channel, with the green channel noticeably lower. When green rivals blue, the background will often appear more cyan than deep blue.
The exposure histogram helps you read your background based on brightness rather than color. For richer blue backgrounds, the curve should sit left of center without clipping against the edge. Basically, we want a controlled underexposure that preserves color without creating a black background.
Finally, depth will make capturing darker, richer blues easier. Ambient light decreases with depth, making darker blue backgrounds easier to capture and allowing more forgiving exposure settings. As always, keep an eye on your gas and computer if you’re going deeper!
Remember, always shoot more than you think you’ll need, and play with settings to find the image that is most pleasing to you. With these tools and tips, you should be able to squash cyan backgrounds and create stunning blue backdrops on your next trip.


