

Every diver loves bathtub-warm water with 100 feet of visibility, but if you limit yourself to these tropical dream dives, you'll miss out on the treasure trove of lakes, rivers, quarries and coastal areas where awesome dives lie obscured by low vis. Not only will learning limited-visibility diving greatly expand your diving opportunities but it will also bring them closer to home. You'll gain access to a whole new range of shipwrecks, some of them pristinely preserved in cold, fresh water; explore mountainous areas where dams have created manmade lakes and submerged entire cities; and scour rivers that hold archaeological finds ranging from Civil War armaments to Native American artifacts and prehistoric fossils. But while low-vis diving opens up a new world of diving adventures, it also presents unique challenges and dangers, and to do it properly, you need to come prepared with specialized knowledge and equipment. So, before you descend into low-vis diving, take a look at this guide to the gear, planning and techniques you'll need to do it right.
Gear Selection
Lights
Bigger is not always better when there's lots of sediment in the water. A broad light beam tends to light up the particulates so they stand out even more, which makes it harder to see what's in front of you. For dive sites with less than about 15 feet of visibility, the best lights are ones with bright, narrow beams. Some of the standard halogen lights made for night diving have interchangeable reflectors so you can switch the wide-angle reflector for one that focuses the beam. If you dive for artifacts or otherwise find yourself in really low vis--less than a few feet--even the brightest, narrowest light will merely make the water around you a lighter shade of brown. In these cases, you're better off making your way by feel rather than sight, but don't forget to bring a small mask- or head-mounted light to help you see your gauges or other objects that you can hold directly in front of your mask.
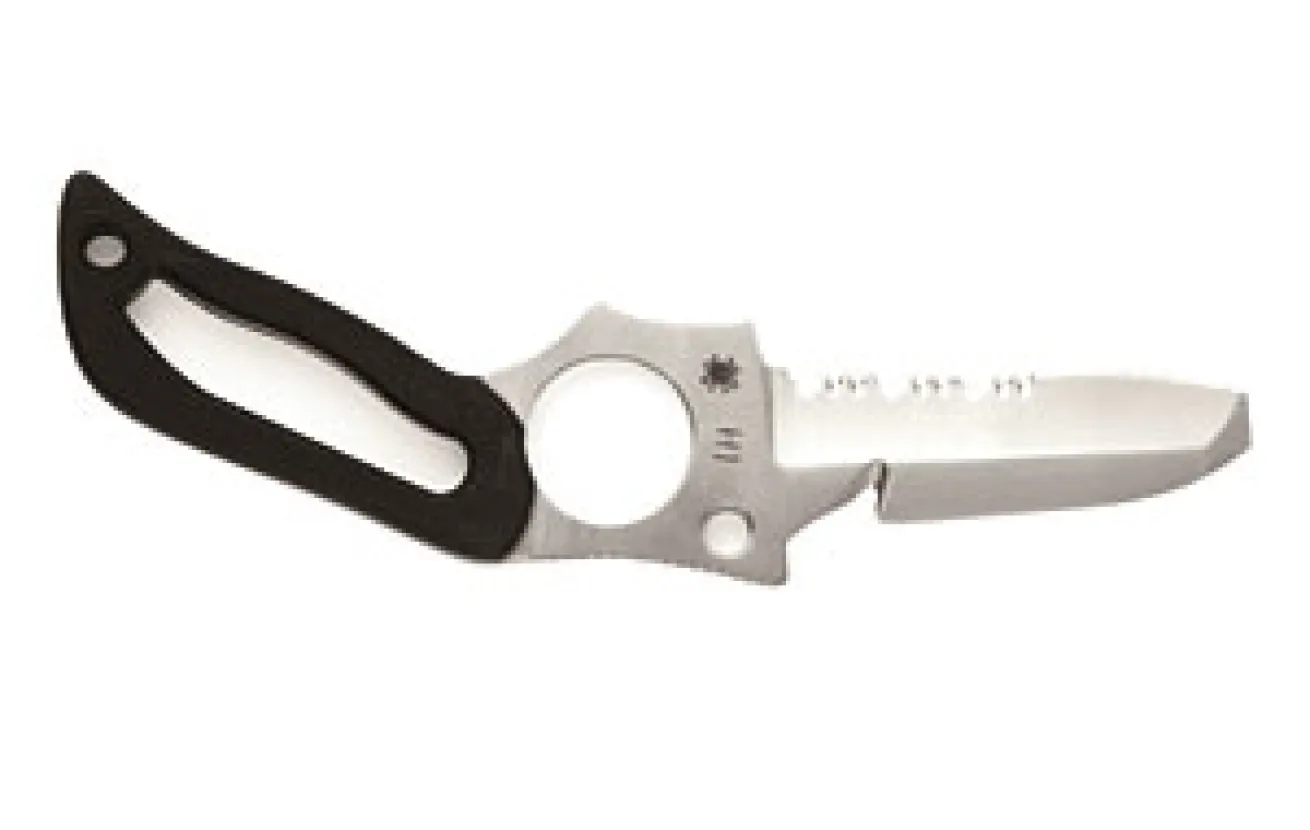
Cutting Tools
Low-vis dive sites come with an increased risk of entanglement for two reasons: 1) Low-vis environments like rivers, lakes and kelp forests have a higher concentration of potential tangles--such as fishing line, netting or plant life--than an ocean reef. 2) Because you can't see much of what's around you, it's harder to spot and avoid these snags when you do come across them.
You should carry at least one solid cutting tool on these types of dives, and the best option isn't always a standard dive knife. Paramedic shears are heavy-duty scissors that can cut through the stainless steel wire used on some fishing leaders. They're available in special pouches that you can rig to your equipment, or you can simply tuck them away in your BC pocket. A Z-knife is a small S-shaped device with a very sharp razor blade housed inside a curved, protected hook. Both are safer to carry than a knife, and they're compact and effective at slashing through line. If you opt for a standard knife, use one that's low profile and that you can mount in an easily accessible position. Knives with blunt tips are more practical because you can use them to dig or pry if necessary, and you're less likely to stick yourself or your buddy with them. No matter which cutting tools you use, always rinse them well and keep them sharp so they'll work efficiently.
Navigation Equipment
Look for a compass with a large face, preferably with a long-lasting glow-in-the-dark compass card that you can recharge by holding your dive light on it for a few seconds. The best places to mount a compass are on your wrist or on a compass board (a dive slate with a compass mounted at the top). If you opt for a compass board, make sure to attach it securely to your equipment in a place that provides easy access and minimizes possible entanglement. One benefit of the compass board is that you can easily take notes while you navigate--write down your initial heading, any turns made, the reciprocal heading back to your exit point and notes about natural features you pass along the way. And again, a small headlamp can help illuminate the compass in low vis. If your dive involves a search of some sort, a line reel like those used by cave divers or a larger diameter rope can also make useful tools to have along. See the "Getting Around" section on page 77 for more on using these items.
Safety Equipment
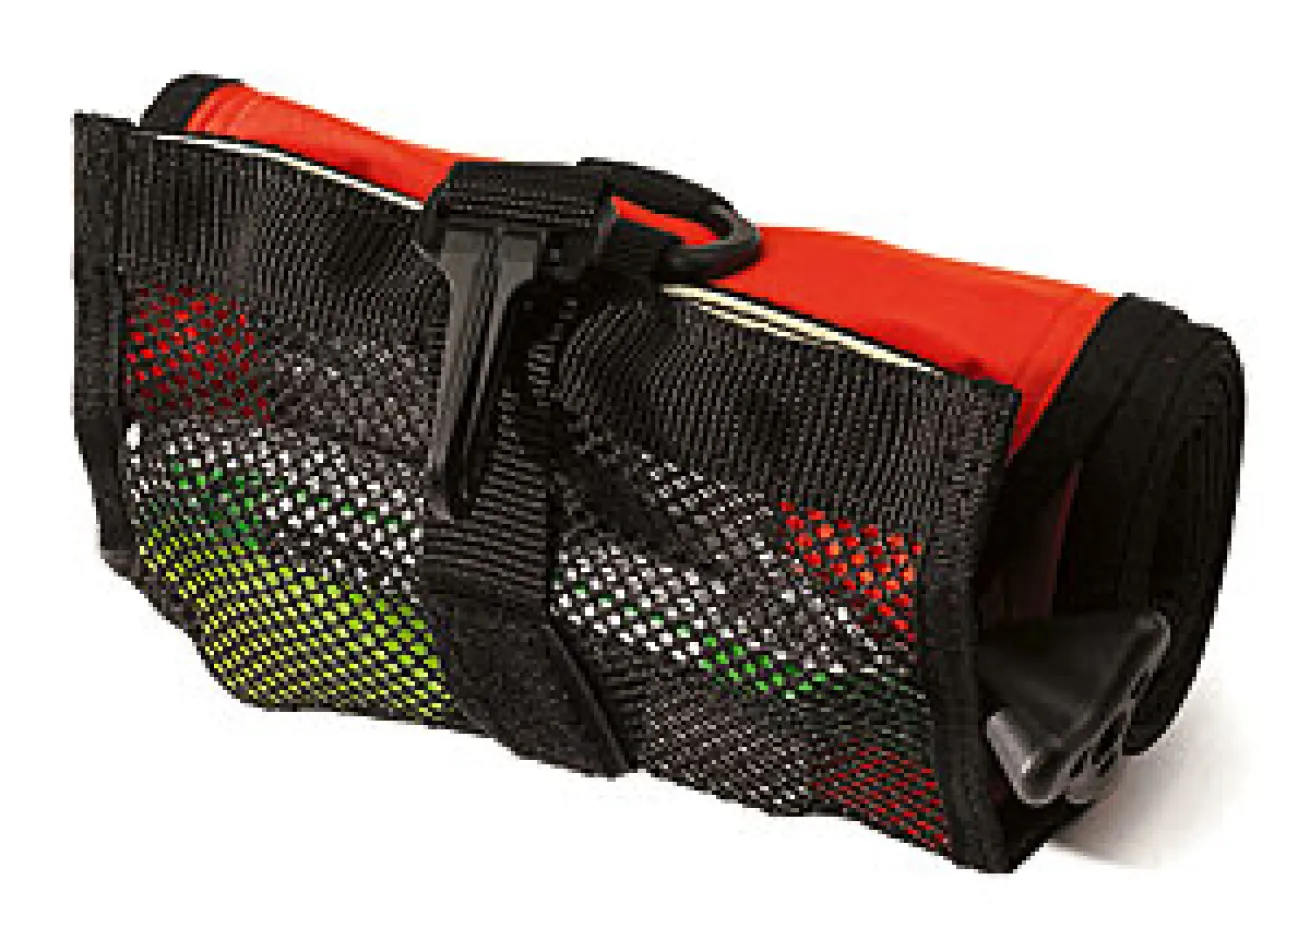
No dive gear setup is complete without the requisite safety equipment. Because low-vis dives are potentially disorienting, and because they are often found in high current or high tidal flow areas, the likelihood of being separated from the dive boat, your dive buddy or a shore exit point is even higher than during a typical open-water dive. Always carry a quality safety sausage or surface marker bag, an audible signaling device like a whistle or an air-powered sonic alert device and a signal strobe, which you and your buddy can also use to keep track of each other underwater by attaching them to your tank valves and turning them on before you go in the water.
Gear Configuration
Because of the added entanglement risk in low-vis environments, streamlining your equipment and making sure your gauges and accessories are neatly tucked away are especially important. Use a secure octopus holder and place your gauges either in a BC pocket or clip them to a chest strap. Marine-supply stores are a great place to find a variety of sturdy brass clips for securing gear. One trick used by technical divers is pulling the high-pressure hose down the back of the BC so most of the hose is contained within the jacket. Once your gear is on, pull the gauge out from under your shoulder and clip it off to a chest D-ring. Or, with a small gauge, you can tuck it securely under the cummerbund of your BC. Do not do this with your octopus hose, however, or you won't be able to share air effectively in an emergency. And don't strap anything to your legs. Small knives can be moved to your BC inflator hose or your forearm. Mount larger knives on a BC chest strap or a waist harness where they pose less of an entanglement risk and are easier to reach.
Getting Started
When diving in low vis, you'll need to swim slowly, stay within a much smaller area than you would normally cover on a typical clear-water dive and keep an extra-close eye on your buddy, so a detailed dive plan is a necessity. Before going in the water, determine who will lead and who will follow on the dive, discuss hand signals and the procedures to follow if you get separated--use the standard rule of searching for one minute before ascending to meet on the surface. Then make sure you and your buddy both know the goals of the dive, the layout of the planned dive area and all relevant compass headings.
Ascending and descending can be disorienting in low vis, so it's best to use a physical reference. If you're starting your dive in deep water, use a descent line--either the anchor line of the boat or a small anchor attached to a dive float or flag. When starting your dive from the shore, drop down in shallow water and use the bottom contour as a physical reference. You should also have a contingency plan in case you can't find your way back to your starting point at the end of the dive. Technical divers prepare for this contingency by carrying a surface marker bag (a large, easily inflated safety sausage) attached to a line reel. You can use this equipment to make a free ascent in open water by inflating the bag on the bottom with your octopus. Let the bag float to the surface as it pulls out line from the reel, creating a makeshift ascent line, then slowly reel the line back in as you make a controlled ascent.
Getting Around
When diving a low-vis site for the first time, it's critical that you get a detailed dive briefing from someone with local dive site knowledge. Find out the locations of any specific hazards, and plan to avoid these spots. Even better, see if you can join a group that has experience with the site for your first dive in the area.
In order to navigate these sites, you'll need a good compass orientation on the surface beforehand. Bring a small slate and write down the compass heading you'll swim from the entry point, calculate the headings for any turns or patterns you'll swim, and figure out the return heading to your exit point. Also plan how you'll measure distance--either counting fin kicks or timing each leg of your navigation will give a fairly accurate measure of distance.
The easiest form of compass navigation is a simple linear pattern. Just follow your planned heading away from your starting point until your turnaround time, and then follow the reciprocal heading back to the exit. Another simple pattern that will allow you to cover a wider area is a square. Before you get in the water, figure out the initial heading you'll take from the starting point. Then calculate the other three headings by adding or subtracting 90 degrees for each turn. Make sure the number of fin kicks or the timed distance you swim is equal for each side of the square, otherwise you won't end up back where you started. To learn more complex navigation patterns like the U-pattern or the expanding square, sign up for a search and recovery or navigation course.
A transverse line is another tool you can use to help keep your bearings in low vis. This is a rope, weighted at each end, that's stretched across the middle of your planned dive area. You can explore a wide area by starting along the length of the rope and making short, linear navigations perpendicular to the rope using your compass. To make longer forays away from the transverse line, you can tie off a small reel and pay out a guideline as you swim away, then reel the line in as you make your way back. Another technique using a reel is to tie off the guideline, and swim along the transverse line while letting out a length of line from the reel. Then you can swim a large arc by simply keeping the guideline tight as you swim both away from the primary line and back toward your tie-off point. To swim an expanding-arc pattern, simply pay out a few more feet of line and reverse your course every time you reach the transverse line. But be careful using this technique in debris-ridden areas. You don't want to get wrapped up in your own guideline or tangle the guideline on snags. In a debris field, a stationary transverse line can still be used in most cases, but carrying an individual guideline may cause more trouble than it's worth.
Communication
In low vis, physical contact is often the best way for you and your buddy to stay together. Either swim shoulder to shoulder or have the diver who is following maintain contact with the leader's tank valve or BC strap. If you can see each other, standard hand signals will work just fine, but for diving in very low visibility, you may need to learn touch communication procedures, and these should be as simple as possible. Here are the basics:
OK Take your buddy's hand and move it in a circular motion.
Go Up/Down Make the thumbs up signal and place your buddy's hand on your hand signal.
Out of Air Grab your buddy's hand and pull it back and forth across your chest.
Trouble Twist your buddy's hand back and forth. Guide his or her hand to the problem area if you need assistance.
In extremely low visibility, basic skills like air sharing can be extremely difficult if you aren't prepared. At the very least, discuss the procedures you'll use. If you can, also practice them on land with your eyes closed and without talking--do this a few times before your dive.
Every diver loves bathtub-warm water with 100 feet of visibility, but if you limit yourself to these tropical dream dives, you'll miss out on the treasure trove of lakes, rivers, quarries and coastal areas where awesome dives lie obscured by low vis. Not only will learning limited-visibility diving greatly expand your diving opportunities but it will also bring them closer to home. You'll gain access to a whole new range of shipwrecks, some of them pristinely preserved in cold, fresh water; explore mountainous areas where dams have created manmade lakes and submerged entire cities; and scour rivers that hold archaeological finds ranging from Civil War armaments to Native American artifacts and prehistoric fossils. But while low-vis diving opens up a new world of diving adventures, it also presents unique challenges and dangers, and to do it properly, you need to come prepared with specialized knowledge and equipment. So, before you descend into low-vis diving, take a look at this guide to the gear, planning and techniques you'll need to do it right.
Gear Selection
Lights
Bigger is not always better when there's lots of sediment in the water. A broad light beam tends to light up the particulates so they stand out even more, which makes it harder to see what's in front of you. For dive sites with less than about 15 feet of visibility, the best lights are ones with bright, narrow beams. Some of the standard halogen lights made for night diving have interchangeable reflectors so you can switch the wide-angle reflector for one that focuses the beam. If you dive for artifacts or otherwise find yourself in really low vis--less than a few feet--even the brightest, narrowest light will merely make the water around you a lighter shade of brown. In these cases, you're better off making your way by feel rather than sight, but don't forget to bring a small mask- or head-mounted light to help you see your gauges or other objects that you can hold directly in front of your mask.
Cutting Tools
Low-vis dive sites come with an increased risk of entanglement for two reasons: 1) Low-vis environments like rivers, lakes and kelp forests have a higher concentration of potential tangles--such as fishing line, netting or plant life--than an ocean reef. 2) Because you can't see much of what's around you, it's harder to spot and avoid these snags when you do come across them.
You should carry at least one solid cutting tool on these types of dives, and the best option isn't always a standard dive knife. Paramedic shears are heavy-duty scissors that can cut through the stainless steel wire used on some fishing leaders. They're available in special pouches that you can rig to your equipment, or you can simply tuck them away in your BC pocket. A Z-knife is a small S-shaped device with a very sharp razor blade housed inside a curved, protected hook. Both are safer to carry than a knife, and they're compact and effective at slashing through line. If you opt for a standard knife, use one that's low profile and that you can mount in an easily accessible position. Knives with blunt tips are more practical because you can use them to dig or pry if necessary, and you're less likely to stick yourself or your buddy with them. No matter which cutting tools you use, always rinse them well and keep them sharp so they'll work efficiently.
Navigation Equipment
Look for a compass with a large face, preferably with a long-lasting glow-in-the-dark compass card that you can recharge by holding your dive light on it for a few seconds. The best places to mount a compass are on your wrist or on a compass board (a dive slate with a compass mounted at the top). If you opt for a compass board, make sure to attach it securely to your equipment in a place that provides easy access and minimizes possible entanglement. One benefit of the compass board is that you can easily take notes while you navigate--write down your initial heading, any turns made, the reciprocal heading back to your exit point and notes about natural features you pass along the way. And again, a small headlamp can help illuminate the compass in low vis. If your dive involves a search of some sort, a line reel like those used by cave divers or a larger diameter rope can also make useful tools to have along. See the "Getting Around" section on page 77 for more on using these items.
Safety Equipment
No dive gear setup is complete without the requisite safety equipment. Because low-vis dives are potentially disorienting, and because they are often found in high current or high tidal flow areas, the likelihood of being separated from the dive boat, your dive buddy or a shore exit point is even higher than during a typical open-water dive. Always carry a quality safety sausage or surface marker bag, an audible signaling device like a whistle or an air-powered sonic alert device and a signal strobe, which you and your buddy can also use to keep track of each other underwater by attaching them to your tank valves and turning them on before you go in the water.
Gear Configuration
Because of the added entanglement risk in low-vis environments, streamlining your equipment and making sure your gauges and accessories are neatly tucked away are especially important. Use a secure octopus holder and place your gauges either in a BC pocket or clip them to a chest strap. Marine-supply stores are a great place to find a variety of sturdy brass clips for securing gear. One trick used by technical divers is pulling the high-pressure hose down the back of the BC so most of the hose is contained within the jacket. Once your gear is on, pull the gauge out from under your shoulder and clip it off to a chest D-ring. Or, with a small gauge, you can tuck it securely under the cummerbund of your BC. Do not do this with your octopus hose, however, or you won't be able to share air effectively in an emergency. And don't strap anything to your legs. Small knives can be moved to your BC inflator hose or your forearm. Mount larger knives on a BC chest strap or a waist harness where they pose less of an entanglement risk and are easier to reach.
Getting Started
When diving in low vis, you'll need to swim slowly, stay within a much smaller area than you would normally cover on a typical clear-water dive and keep an extra-close eye on your buddy, so a detailed dive plan is a necessity. Before going in the water, determine who will lead and who will follow on the dive, discuss hand signals and the procedures to follow if you get separated--use the standard rule of searching for one minute before ascending to meet on the surface. Then make sure you and your buddy both know the goals of the dive, the layout of the planned dive area and all relevant compass headings.
Ascending and descending can be disorienting in low vis, so it's best to use a physical reference. If you're starting your dive in deep water, use a descent line--either the anchor line of the boat or a small anchor attached to a dive float or flag. When starting your dive from the shore, drop down in shallow water and use the bottom contour as a physical reference. You should also have a contingency plan in case you can't find your way back to your starting point at the end of the dive. Technical divers prepare for this contingency by carrying a surface marker bag (a large, easily inflated safety sausage) attached to a line reel. You can use this equipment to make a free ascent in open water by inflating the bag on the bottom with your octopus. Let the bag float to the surface as it pulls out line from the reel, creating a makeshift ascent line, then slowly reel the line back in as you make a controlled ascent.
Getting Around
When diving a low-vis site for the first time, it's critical that you get a detailed dive briefing from someone with local dive site knowledge. Find out the locations of any specific hazards, and plan to avoid these spots. Even better, see if you can join a group that has experience with the site for your first dive in the area.
In order to navigate these sites, you'll need a good compass orientation on the surface beforehand. Bring a small slate and write down the compass heading you'll swim from the entry point, calculate the headings for any turns or patterns you'll swim, and figure out the return heading to your exit point. Also plan how you'll measure distance--either counting fin kicks or timing each leg of your navigation will give a fairly accurate measure of distance.
The easiest form of compass navigation is a simple linear pattern. Just follow your planned heading away from your starting point until your turnaround time, and then follow the reciprocal heading back to the exit. Another simple pattern that will allow you to cover a wider area is a square. Before you get in the water, figure out the initial heading you'll take from the starting point. Then calculate the other three headings by adding or subtracting 90 degrees for each turn. Make sure the number of fin kicks or the timed distance you swim is equal for each side of the square, otherwise you won't end up back where you started. To learn more complex navigation patterns like the U-pattern or the expanding square, sign up for a search and recovery or navigation course.
A transverse line is another tool you can use to help keep your bearings in low vis. This is a rope, weighted at each end, that's stretched across the middle of your planned dive area. You can explore a wide area by starting along the length of the rope and making short, linear navigations perpendicular to the rope using your compass. To make longer forays away from the transverse line, you can tie off a small reel and pay out a guideline as you swim away, then reel the line in as you make your way back. Another technique using a reel is to tie off the guideline, and swim along the transverse line while letting out a length of line from the reel. Then you can swim a large arc by simply keeping the guideline tight as you swim both away from the primary line and back toward your tie-off point. To swim an expanding-arc pattern, simply pay out a few more feet of line and reverse your course every time you reach the transverse line. But be careful using this technique in debris-ridden areas. You don't want to get wrapped up in your own guideline or tangle the guideline on snags. In a debris field, a stationary transverse line can still be used in most cases, but carrying an individual guideline may cause more trouble than it's worth.
Communication
In low vis, physical contact is often the best way for you and your buddy to stay together. Either swim shoulder to shoulder or have the diver who is following maintain contact with the leader's tank valve or BC strap. If you can see each other, standard hand signals will work just fine, but for diving in very low visibility, you may need to learn touch communication procedures, and these should be as simple as possible. Here are the basics:
OK Take your buddy's hand and move it in a circular motion.
Go Up/Down Make the thumbs up signal and place your buddy's hand on your hand signal.
Out of Air Grab your buddy's hand and pull it back and forth across your chest.
Trouble Twist your buddy's hand back and forth. Guide his or her hand to the problem area if you need assistance.
In extremely low visibility, basic skills like air sharing can be extremely difficult if you aren't prepared. At the very least, discuss the procedures you'll use. If you can, also practice them on land with your eyes closed and without talking--do this a few times before your dive.


