

I just finished judging a photo contest, and although the rules were quite clear, a few excellent photos were still disqualified because of willful or unintentional violations. Some pictures didn’t make it because of overzealous editing. It’s a shame to see potentially winning images get booted, but it happens all the time. Here are three simple steps using Lightroom, Photoshop and plain old common sense to help avoid mistakes that could cost you a prize: Follow the Rules, Don't Over Edit and Check Your Work.

Erin QuigleyDon't let small photography editing errors cost you a big prize. On the left is the image before an exposure check, but on the right you can see sloppy editing revealed.
Tip 1: Follow the Rules
Even pros look like rookies when they don’t comply with contest rules.
Incorrectly naming entries or entering them in the wrong category can get your images disqualified before they’re even looked at. Violating editing guidelines not only gets your picture eliminated, it marks you as unethical, even if you broke the rules inadvertently. A “no spot removal” rule means that retouching even a single teensy piece of goo makes you a cheater. It’s hard not to bend the rules when an indiscretion seems minor, but winning unfairly cheats a fellow photographer out of a prize, and isn’t worth the consequences if you get busted. Many contests require original raw files to verify that the images fall within the rules.
In general, “traditional” contest categories allow global changes, but no cropping or selective editing. Global changes affect the entire image at once. In Lightroom or Adobe Camera Raw, global changes are made in the Basic panel, Tone Curve, HSL, Lens Correction, Detail (sharpening and noise reduction) and Camera Calibration. In the Effects panel, Dehaze and Grain are global, but Post-Crop Vignetting is not.
“Open,” “unrestricted” or “creative” categories typically permit selective editing and sometimes even allow compositing, but read carefully — rules vary. Selective changes affect only part of an image and usually consist of edits made with spot-removal tools, adjustment brushes and filters, cloners or healing brushes. Compositing combines multiple images or parts of images.
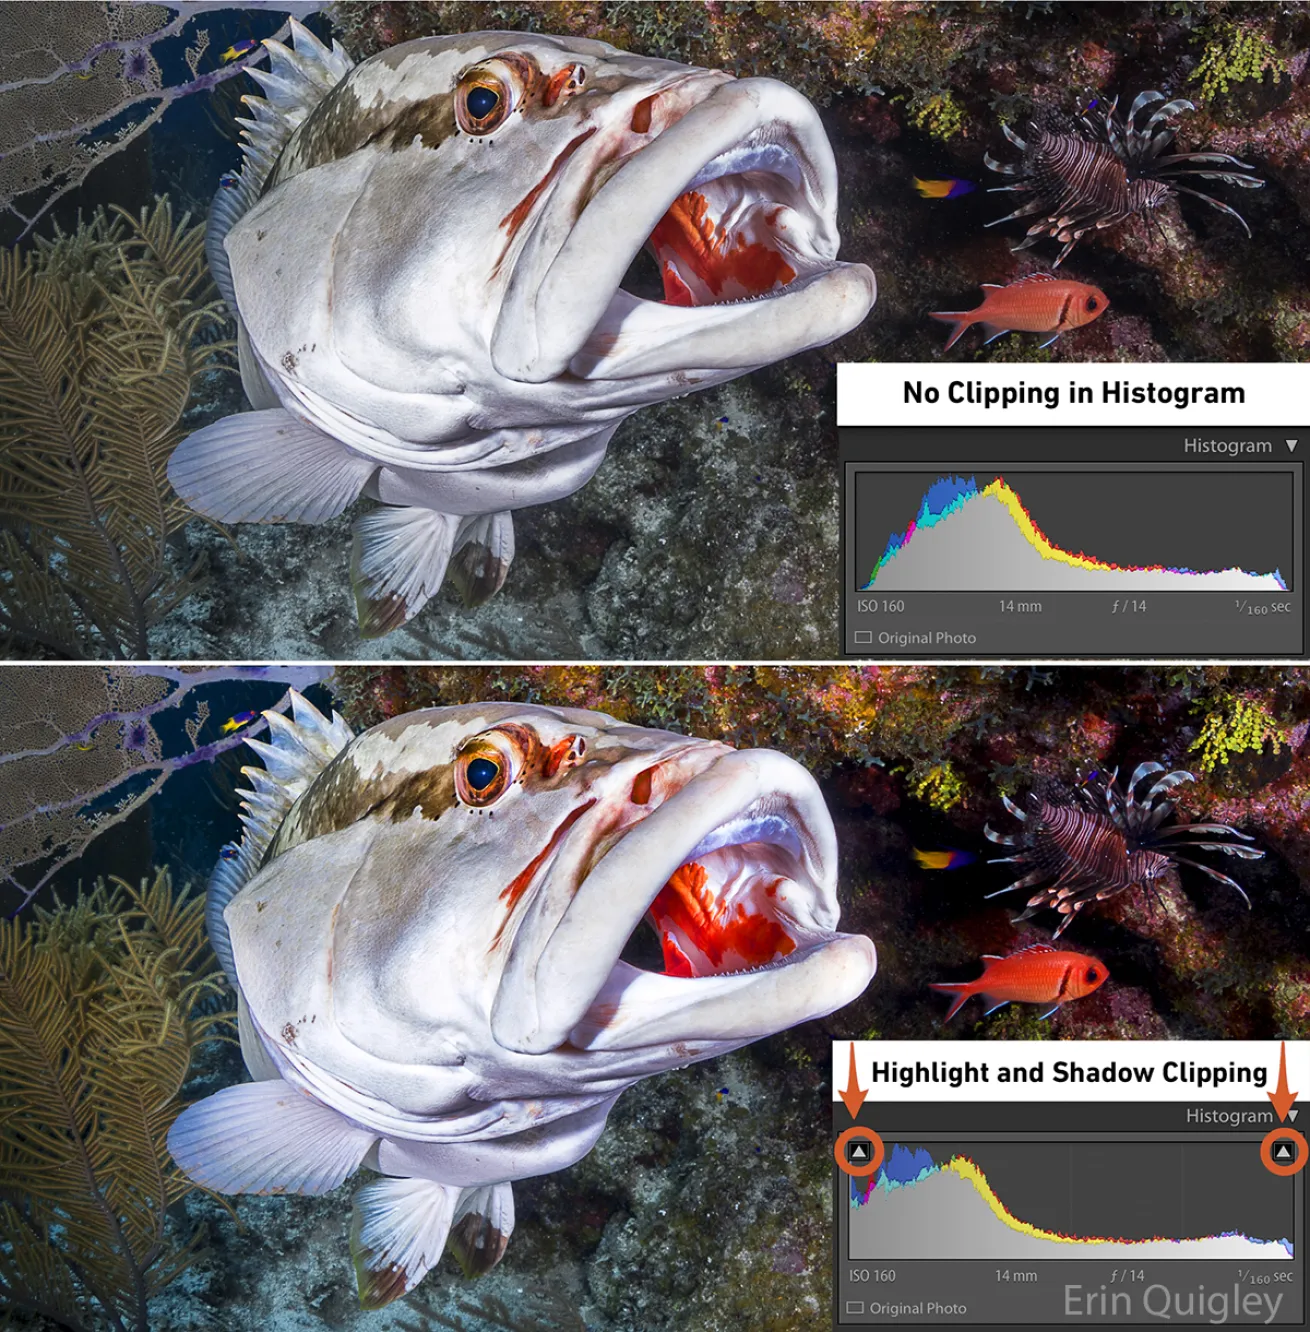
Erin QuigleyHighlight and Shadow clipping in Histogram.
Tip 2: Don't Over-Edit Your Photos
Fluency in Lightroom and Photoshop provides an undeniable advantage in contests that allow photo editing, but heavy-handed editing is often the reason an otherwise prize-worthy picture gets eliminated. Using a velvet-glove approach to retouching will get you one step closer to bringing home a prize. Your nondiving friends might fall in love with a Windex-blue ocean and nuclear-orange clownfish, but most judges vote through a less-is-more filter. Go easy on contrast, clarity and saturation, and keep an eye on the histogram to make sure you’re not exceeding the dynamic range of your photo.
Tip 3: Check Your Work Before Submitting
Whenever you retouch an image, check to make sure you haven’t left any unfinished or sloppy edits. Search your finished product at a magnification of at least 1:1 for artifacts and/or repeated elements left behind by cloning, healing or patching. Look for hard edges from compositing, obvious brush strokes or edited areas that don’t match the texture of the rest of the image. Err on the side of minimalism. That inky black background that looks great on your monitor might reveal every spot of backscatter removal when viewed by the judges on a projector or a monitor different from yours.
How to Check Your Work in Photoshop
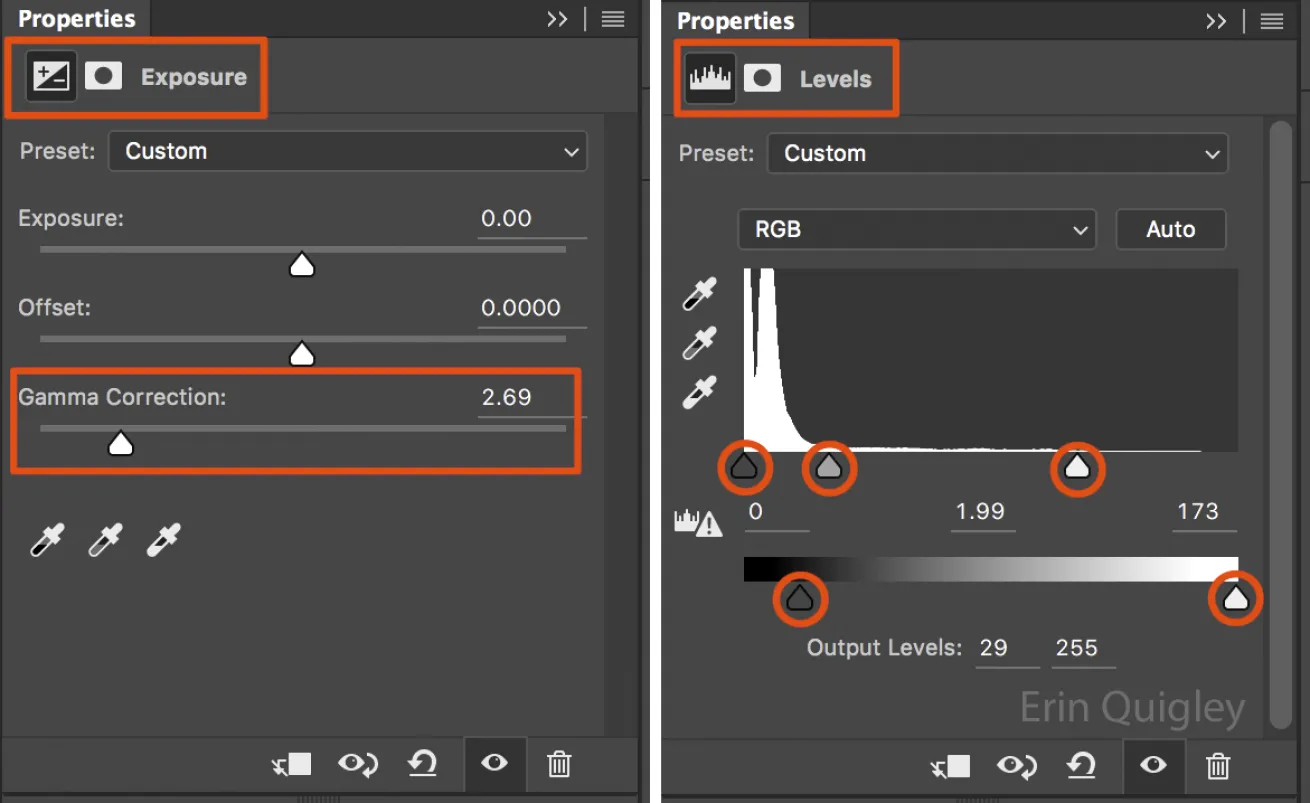
Erin QuigleyBe sure to do an exposure test in Photoshop to look for signs of bad editing.
In Photoshop, add an “Exposure” adjustment layer on top of the layer stack, and decrease the gamma slider. You can often see the edges of messy edits, especially on a dark background. After repairing the problem, throw away the “Exposure” adjustment layer. You can also use a “Levels” layer the same way, temporarily adjusting the input and output levels to double-check your work. There’s no “right” set of numerical values to use on every image — just push the sliders around to the extremes and carefully watch the results.
How to Check Your Work in Lightroom
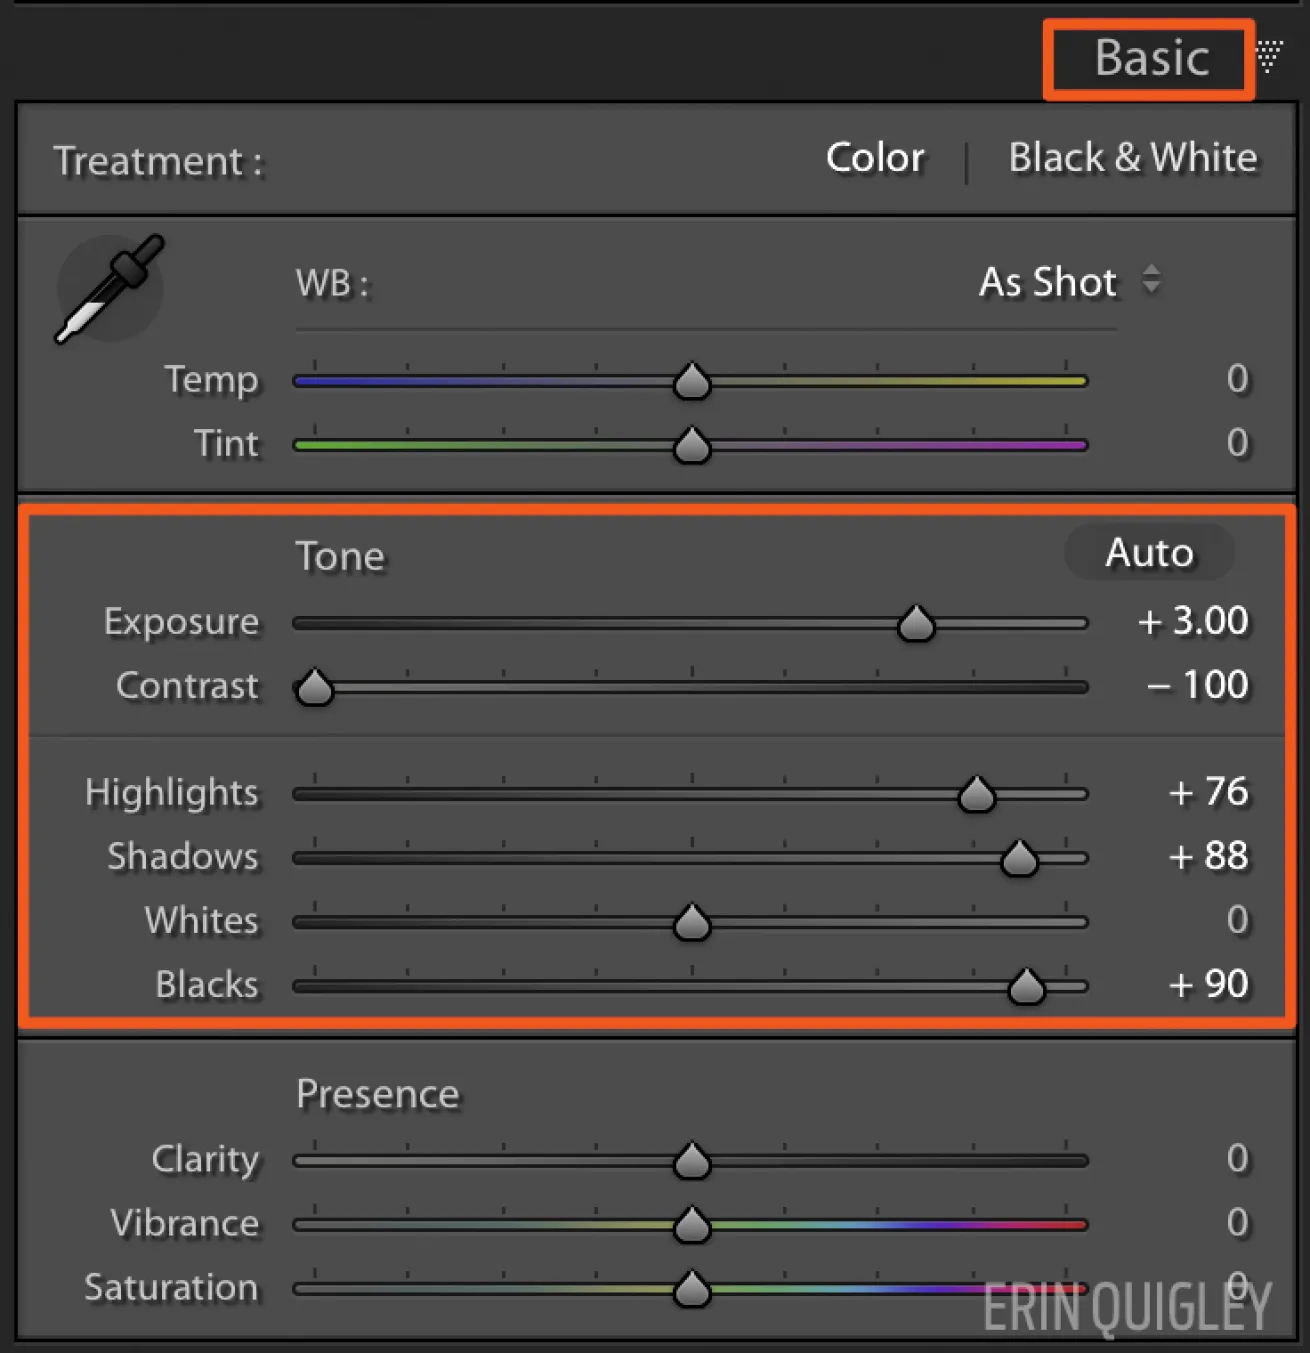
Erin QuigleyCheck the basic panel in Adobe Lightroom to see if extreme adjustments are causing uneven editing.
In Lightroom, create a virtual copy of the image and make extreme adjustments to the sliders in the Basic panel to expose uneven editing. Go back to the original and correct the boo-boos.
Best of luck, and don’t forget to always check your work!
See all of Erin Quigley’s Editing Tutorials Here
Erin Quigley is an Adobe ACE certified digital-imaging consultant and an award-winning shooter. GoAskErin.com provides custom tutorials and one-on-one instruction for the underwater photographic community.


